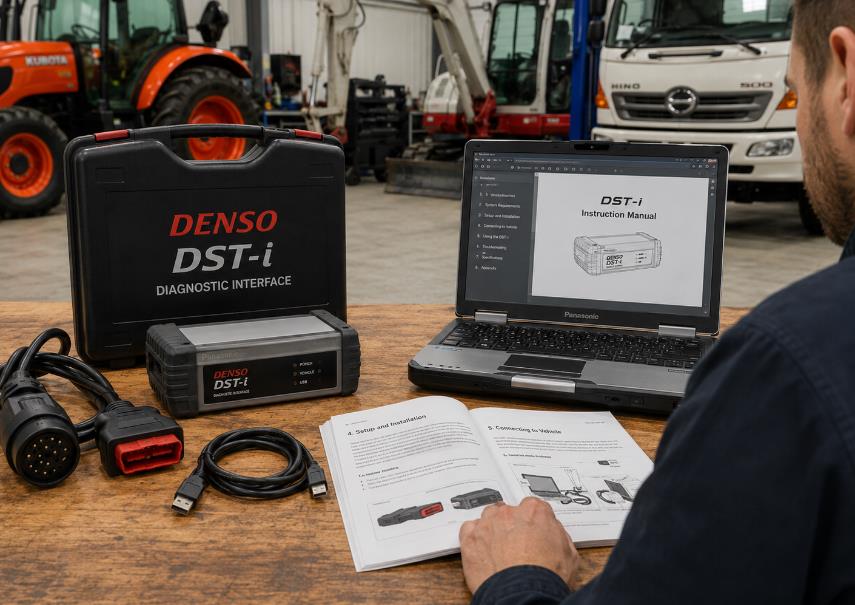
Before using the Denso DST-i Diagnostic Kit with your diagnostic software, you need to install the required USB driver, setup software, and communication interface software on your PC. This ensures that the DST-i interface can communicate correctly with the computer and the supported diagnostic application.
For stable communication and accurate diagnostic performance, always use the latest available DST-i software version.
Step 1: Download and Install the DST-i Setup Software
The first step is to install the dedicated DST-i USB driver and setup software. These components are required for USB communication between the Denso DST-i interface and the PC.
- Click the download button on the DST-i software page to download the DST-i Setup Software.

- When the File Download dialog box appears, click Run or Open.
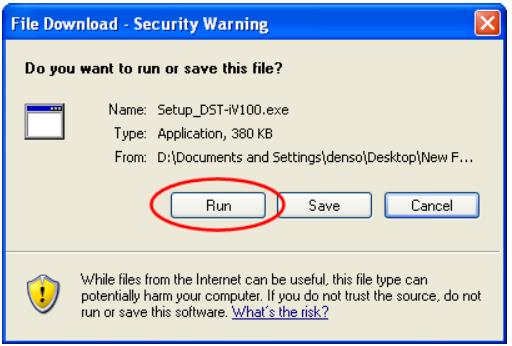
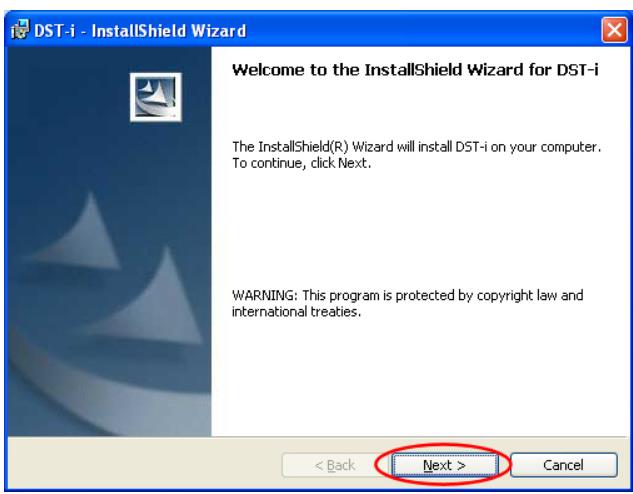
- The installation wizard will start automatically. When the Setup Confirmation screen appears, review the information and click Next.
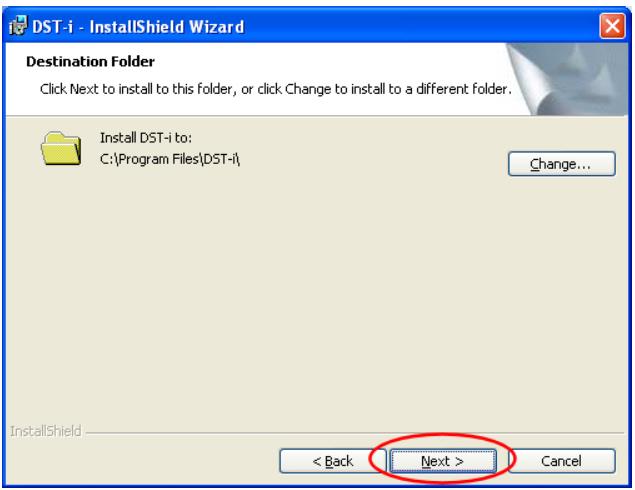
- When the Install Folder Setting screen appears, keep the default folder or select your preferred installation location, then click Next.
- When the Installation Confirmation screen appears, click Install.
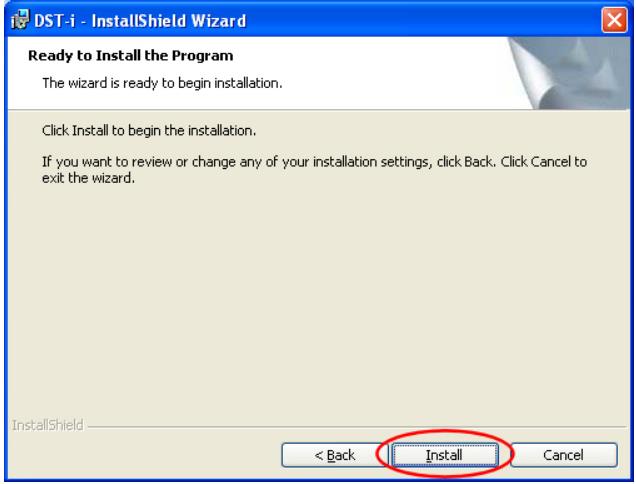
- Wait until the installation process is completed. Do not disconnect the PC or interrupt the installation.
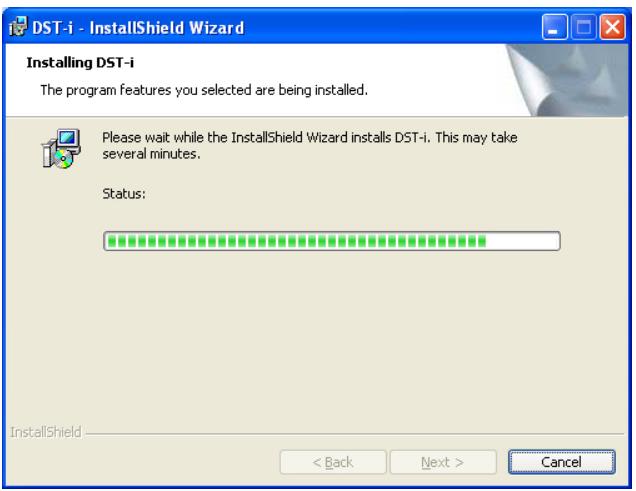
- When the Installation Completed screen appears, the setup is finished. Click Finish to close the installation wizard.
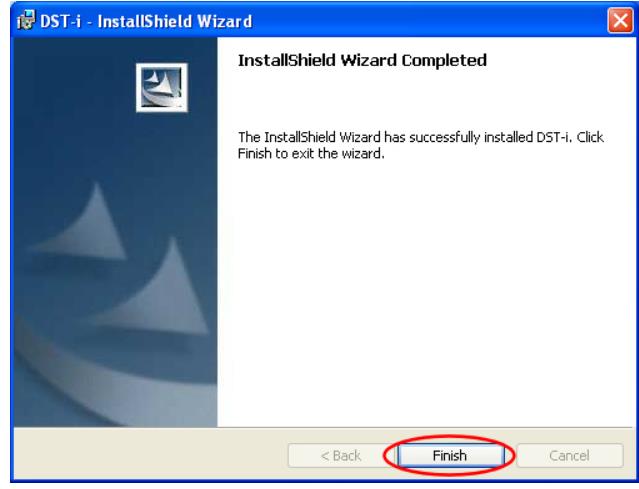
After this step, the PC should have the basic software components required to recognize and communicate with the DST-i diagnostic interface.
Step 2: Check the DST-i Communication Interface Software Version
After installing the DST-i setup software, check the version of the DST-i Communication Interface Software. If the installed version is not the latest version, update it before using the diagnostic tool.
Using an outdated DST-i software version may cause unstable communication, failed connection, or abnormal diagnostic software performance.
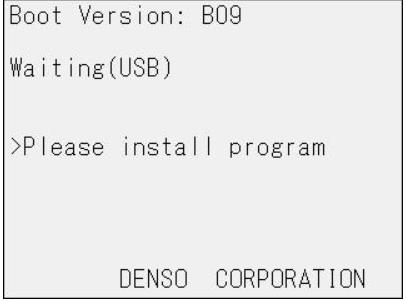
How to Check the DST-i Software Version
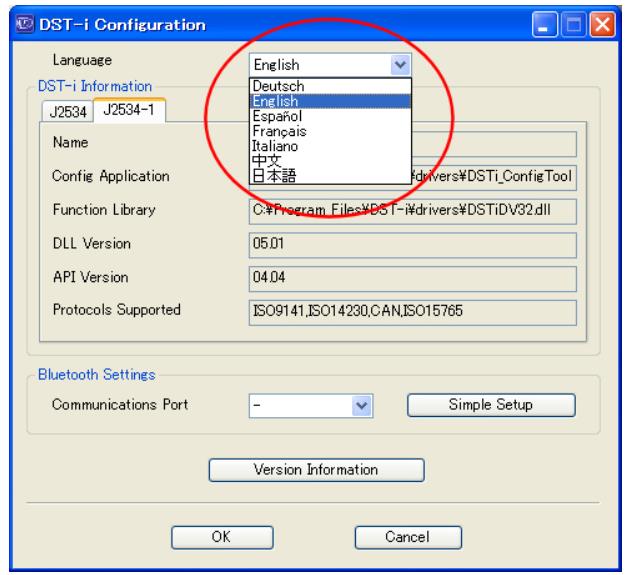
- From the Windows Start menu, select: DST-i Application > DST-i Configuration Tool

- Select the required language if the language selection option appears.
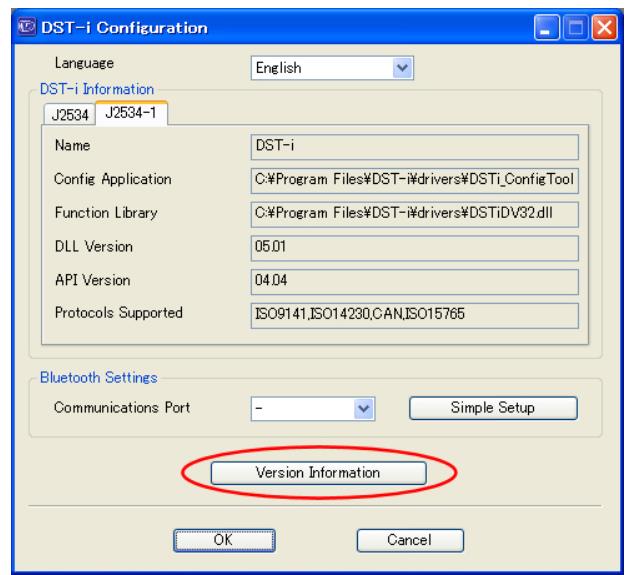
- Click Version Information.
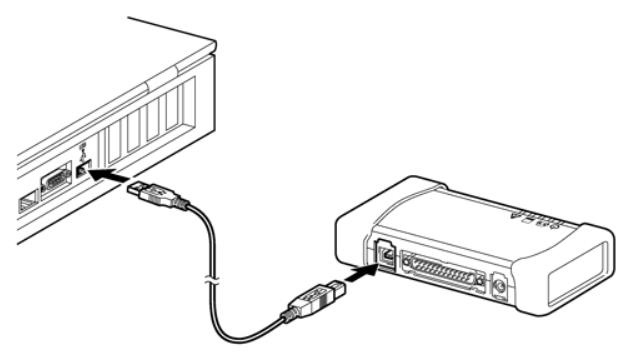
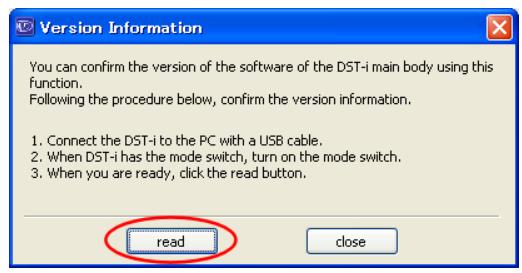
- When the Version Information Read Preparation window appears, connect the DST-i interface to the PC using the USB cable.
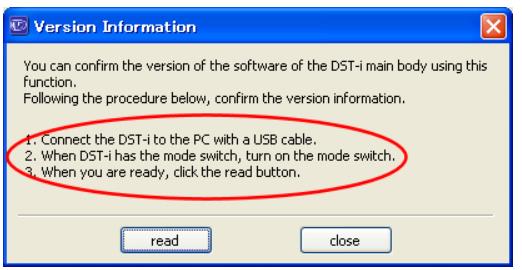
- If the DST-i has already been started, disconnect and reconnect the USB cable to restart the interface.
If the “Found New Hardware Wizard” Appears
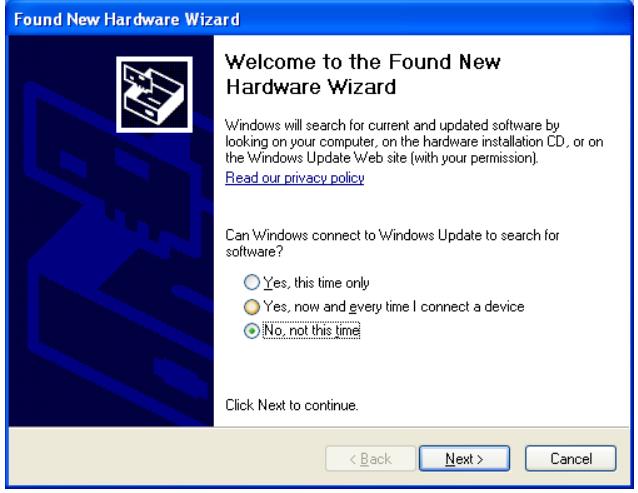
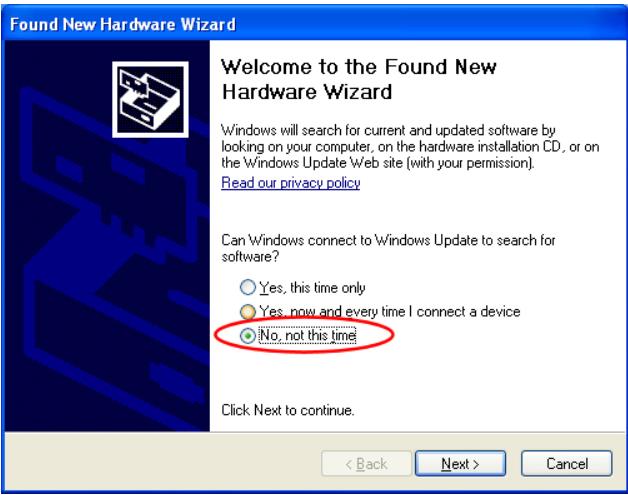
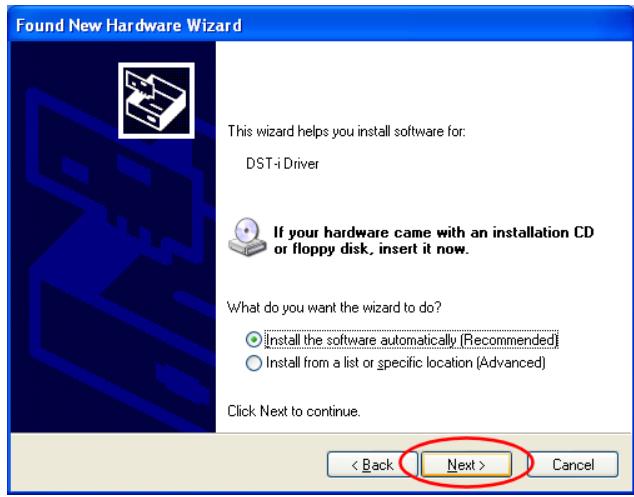
When connecting the DST-i interface to the PC for the first time, Windows may display the Found New Hardware Wizard. If this window appears, follow these steps:
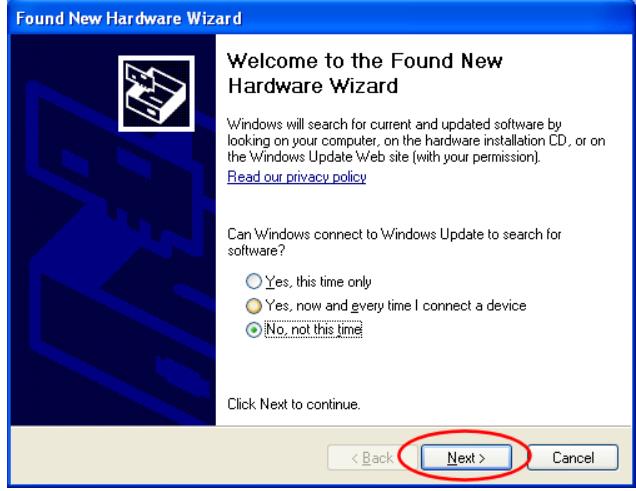
- In the wizard start window, select No, not this time, then click Next.
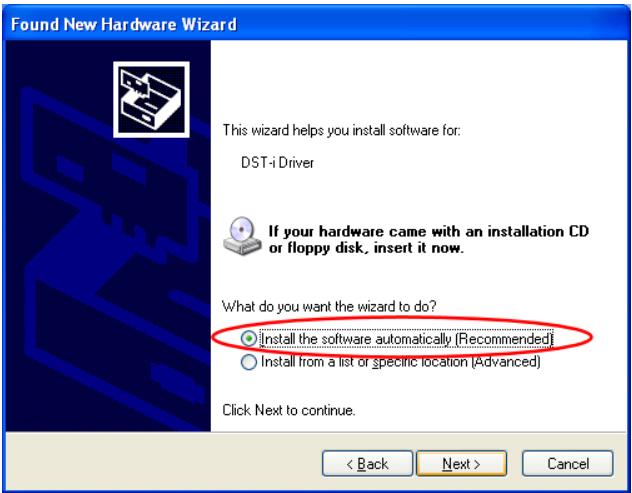
- When the installation method window appears, select Install the software automatically, then click Next.
- Wait until the driver installation is completed.
- When the Completing the Found New Hardware Wizard screen appears, click Finish.
After the driver installation is complete, return to the Version Information Read Preparation window.
Read and Confirm the DST-i Version Information
- In the Version Information Read Preparation window, click Read.
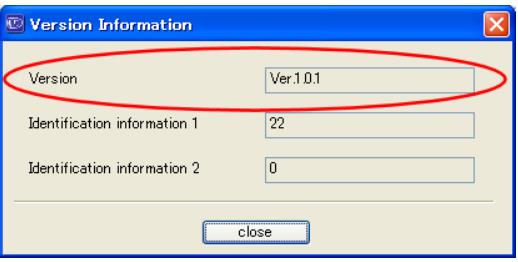
- When the Version Information window appears, check the installed DST-i software version.
- Compare the displayed version with the latest version listed in the update information section.
- If the installed version is not the latest one, download and install the latest update before using the diagnostic software.
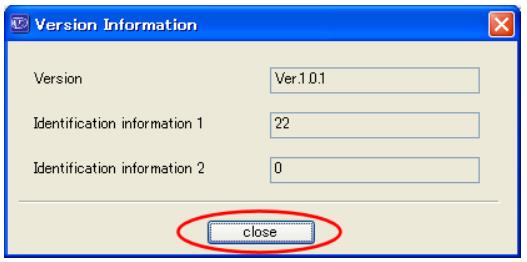
https://www.obd2tool.com/blog/how-to-upgrade-dst-i-communication-interface-software/ - If the version is already up to date, click Close in the version information window.
- Restart the DST-i interface by disconnecting and reconnecting the USB cable.
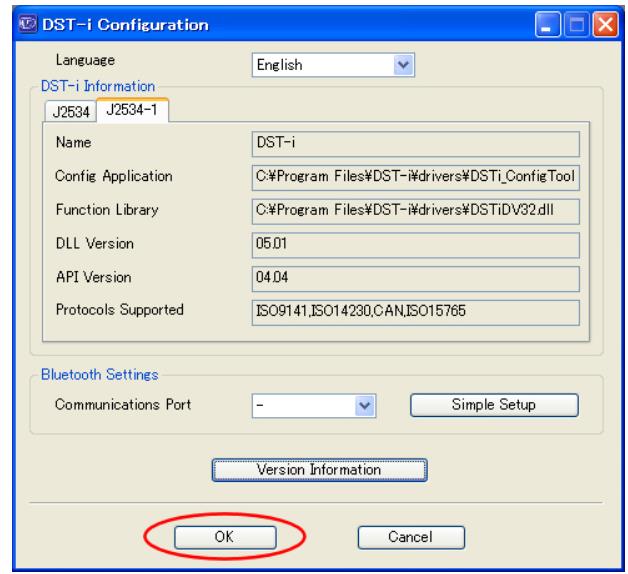
- Click Close, then click OK to finish the version confirmation process.

Whenever a new DST-i software version is released, update the software promptly. Keeping the DST-i Communication Interface Software up to date helps ensure better compatibility, stable USB communication, and reliable diagnostic operation.
Step 3: Set DST-i as the Communication Interface in the Diagnostic Software
After the DST-i setup software and communication interface software are installed and updated, configure your diagnostic software to use DST-i as the communication interface.
- Open the diagnostic software on the PC.
- Go to the communication or interface settings menu.
- Select DST-i as the communication interface.
- Save the settings according to the diagnostic software instruction manual.
- Connect the DST-i interface to the vehicle or machine and confirm that the diagnostic software can communicate normally.
This step is important because the diagnostic software must recognize DST-i as the active vehicle communication interface before it can read fault codes, live data, ECU information, or perform supported diagnostic functions.
Step 4: Download the DST-i Instruction Manual
If you need more detailed setup guidance, download the official DST-i instruction manual from the DST-i support or software download page.
How-to-Install-and-Update-Denso-DST-i-Software-on-a-Windows-PC-25
The instruction manual can help with:
- USB driver installation
- DST-i configuration
- Version confirmation
- Communication setup
- Basic troubleshooting
- Diagnostic software connection settings
Keeping the manual available is recommended for repair shops, diesel equipment technicians, and users who frequently work with Denso DST-i diagnostic systems.
Final Recommendation
Before using the Denso DST-i Diagnostic Kit for vehicle or equipment diagnosis, always complete these four steps:
- Install the DST-i Setup Software
- Check and update the DST-i Communication Interface Software.
- Set DST-i as the communication interface in the diagnostic software.
- Download and keep the DST-i instruction manual for reference.
A properly installed and updated DST-i system helps improve diagnostic stability and reduce connection problems during diagnostics for Kubota, HINO, Takeuchi, and other supported equipment.