Upgrade the DST-i Software
If the DST-i Communication Interface Software is not the latest version, upgrade it before using the diagnostic software. Using the latest version helps ensure stable USB communication, better compatibility, and reliable diagnostic performance.
- Click the download button to start downloading the latest DST-i Software / DST-i Communication Interface Software.

- Read the End User License Agreement (EULA) carefully.
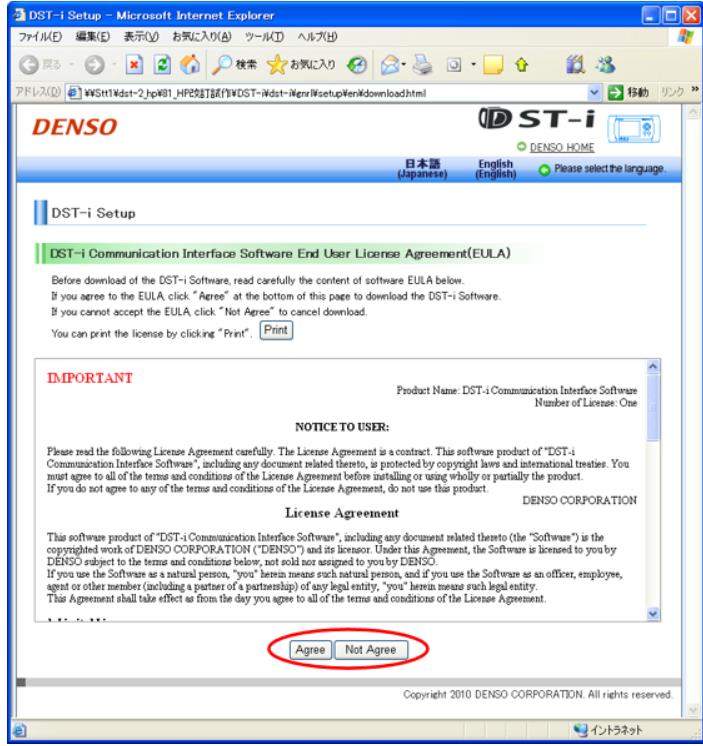
- Click Agree to accept the agreement and continue the download.
- If you do not accept the EULA, click Not Agree to cancel the download.
- When the File Download dialog box appears, click Run or Open.
- The installation wizard will start automatically.
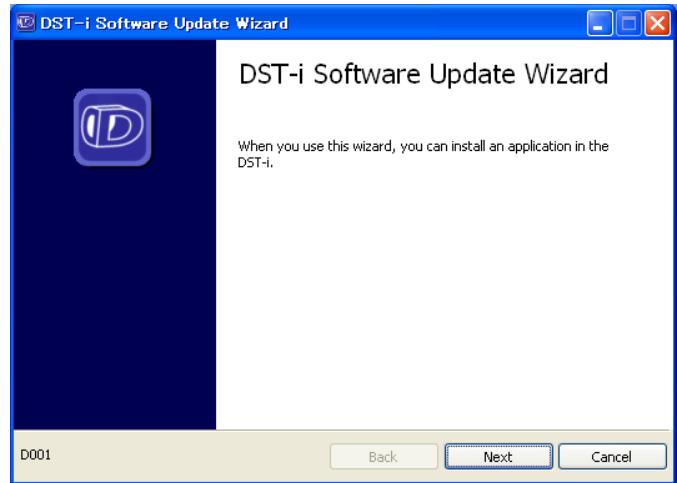
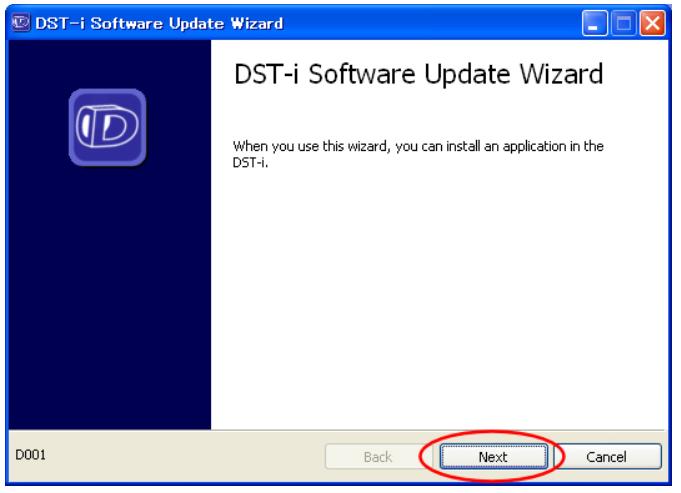
- Confirm the displayed information. If everything is correct, click Next.
- When the Ready to Install window appears, connect the DST-i interface to the PC with the USB cable.
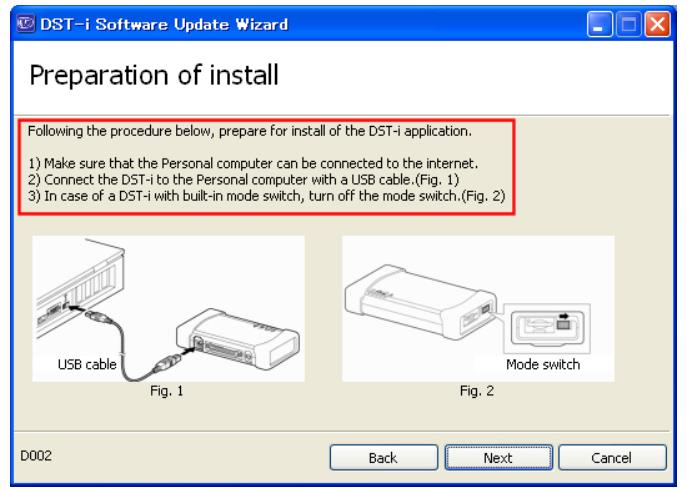
- If the DST-i has already been started, disconnect and reconnect the USB cable to restart the interface.
- If the Found New Hardware Wizard window appears, follow the steps below. If it does not appear, continue to the next installation step.
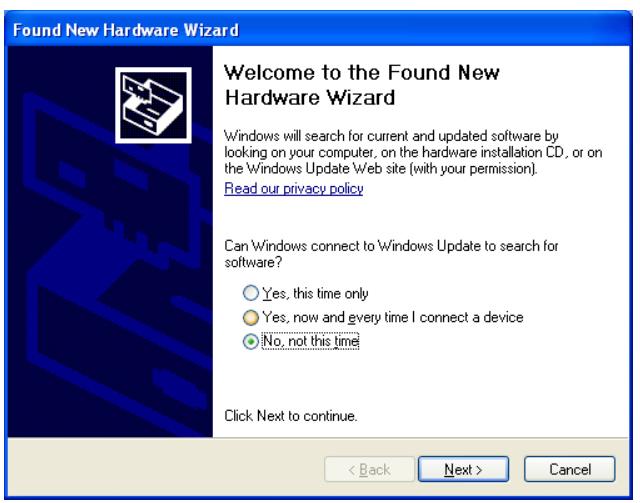
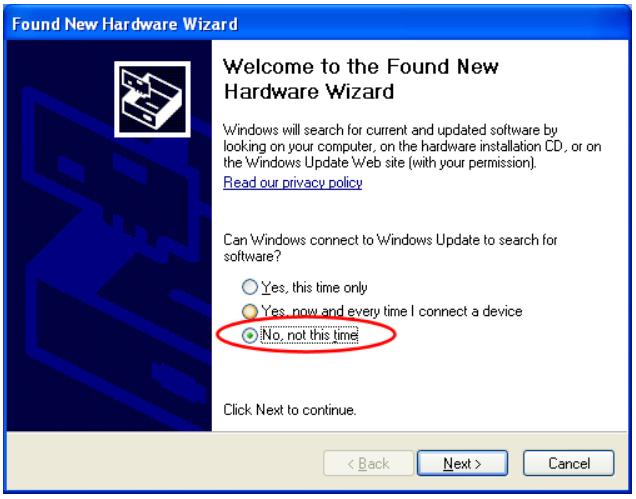
- In the Found New Hardware Wizard start window, select No, not this time, then click Next.
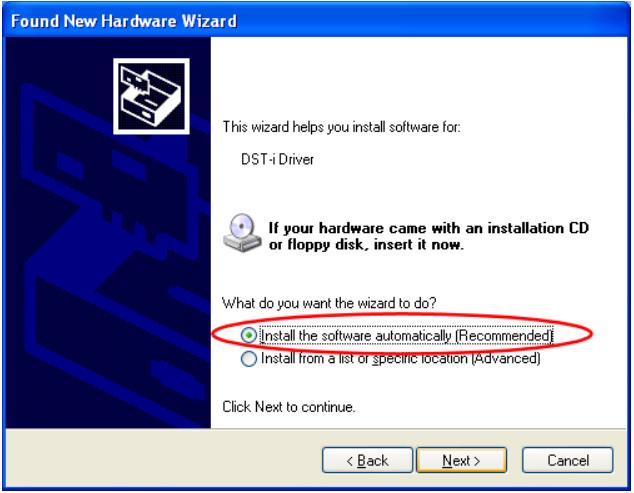
- When the installation method selection window appears, select Install the software automatically, then click Next.
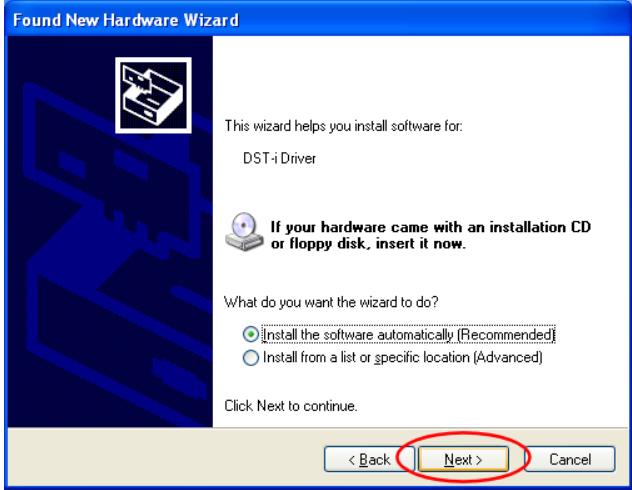
- Wait until the software installation is completed.
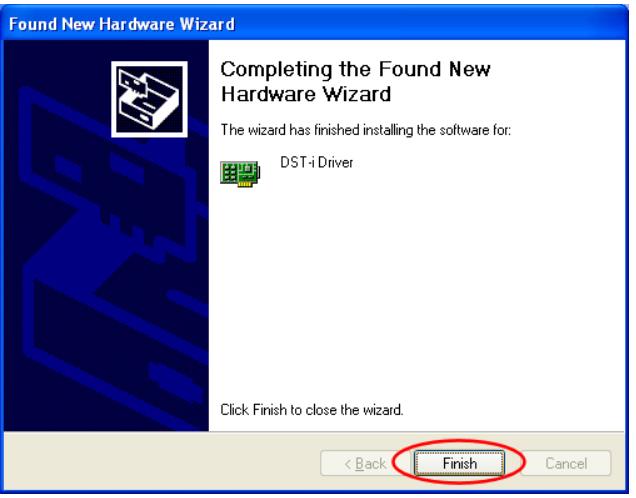
- When the Completing the Found New Hardware Wizard window appears, click Finish.
- Continue the installation preparation. Make sure the DST-i interface is still connected to the PC with the USB cable.
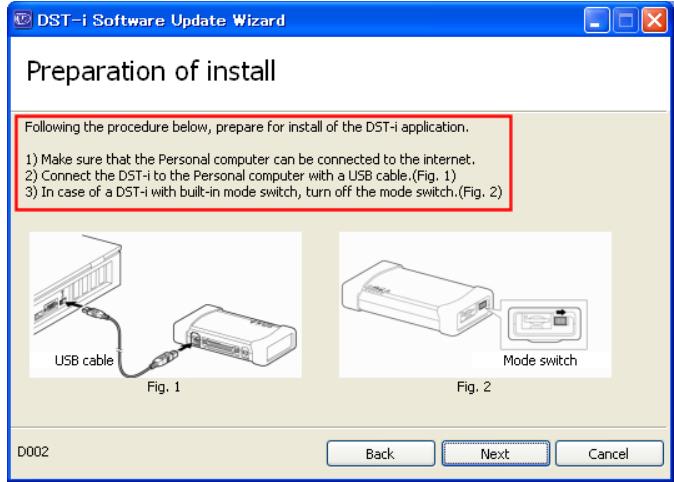
- If the DST-i has already been initiated, disconnect and reconnect the USB cable to restart it.
- When the preparation is completed, click Next to continue.
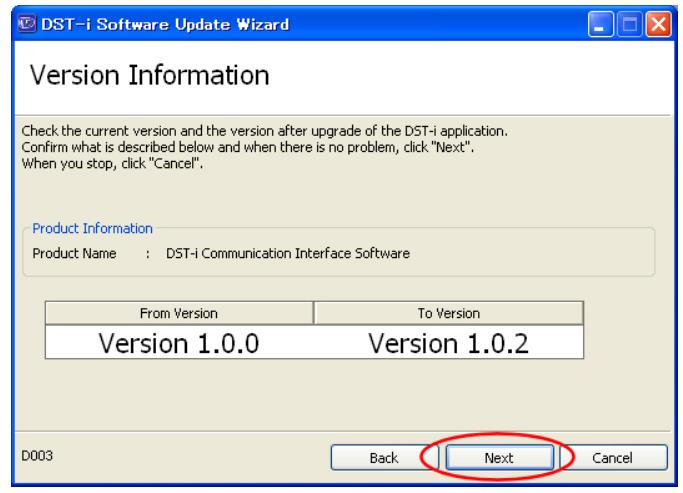
- When the Version Information Confirmation window appears, confirm the displayed information. If there is no problem, click Next.
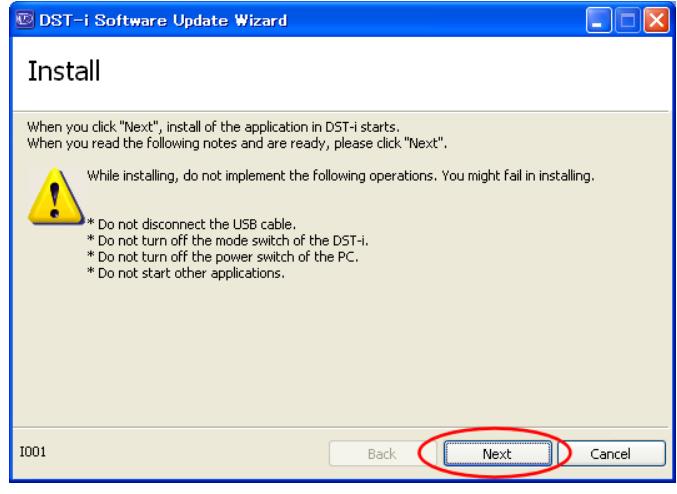
- When the Installation Confirmation window appears, prepare to start the installation.
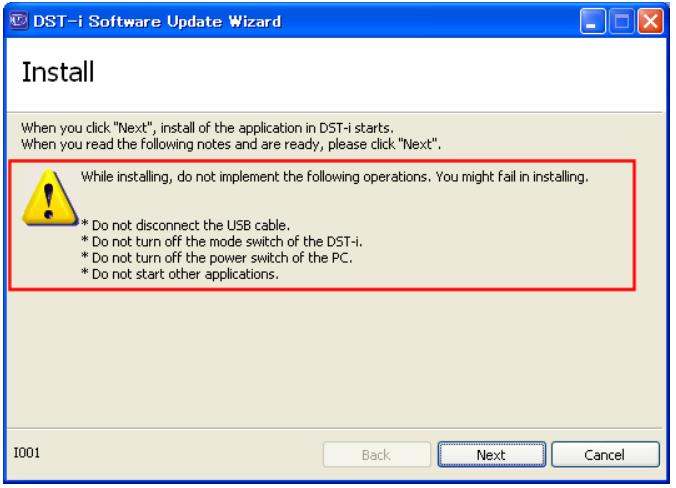
- After the installation starts, do not perform the following operations until the installation is completed:
- Do not disconnect the USB cable.
- Do not turn off the DST-i mode switch.
- Do not turn off the PC power.
- Do not shut down or restart the PC.
- Do not run other applications during the installation.
- Click Next to start the installation.
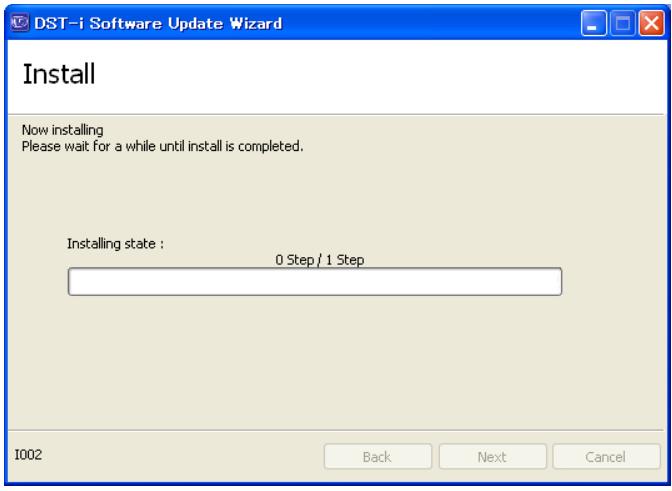
- Wait until the installation is completed.
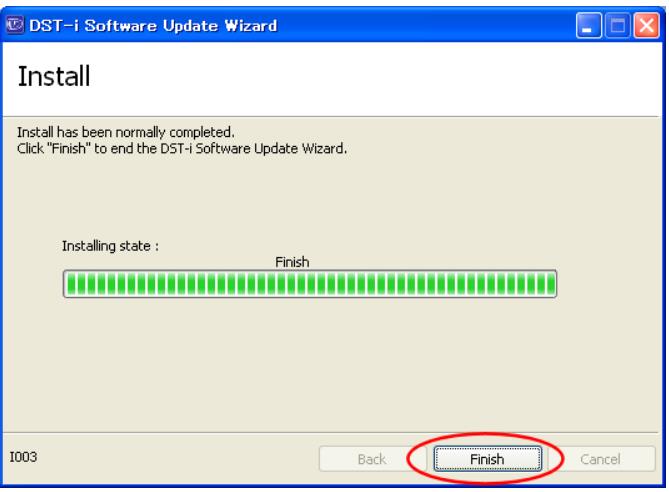
- When the Installation Completed window appears, the upgrade is complete.
- Click Finish to exit the installation wizard.
- Return to Step 2 and check the DST-i software version again to confirm that the latest version has been installed successfully.