IMPORTANT: The AV control unit for the applied vehicle is new, different from the previous model year, and requires a new procedure when replacing. If the following procedures are not followed completely, all features will not work as intended.
1. Replace the AV control unit.
* Refer to the ESM, section DRIVER INFORMATION & MULTIMEDIA > AUDIO, VISUAL & NAVIGATION SYSTEM > NissanConnect > REMOVAL AND INSTALLATION > AV CONTROL UNIT.
REPROGRAM THE AV CONTROL UNIT
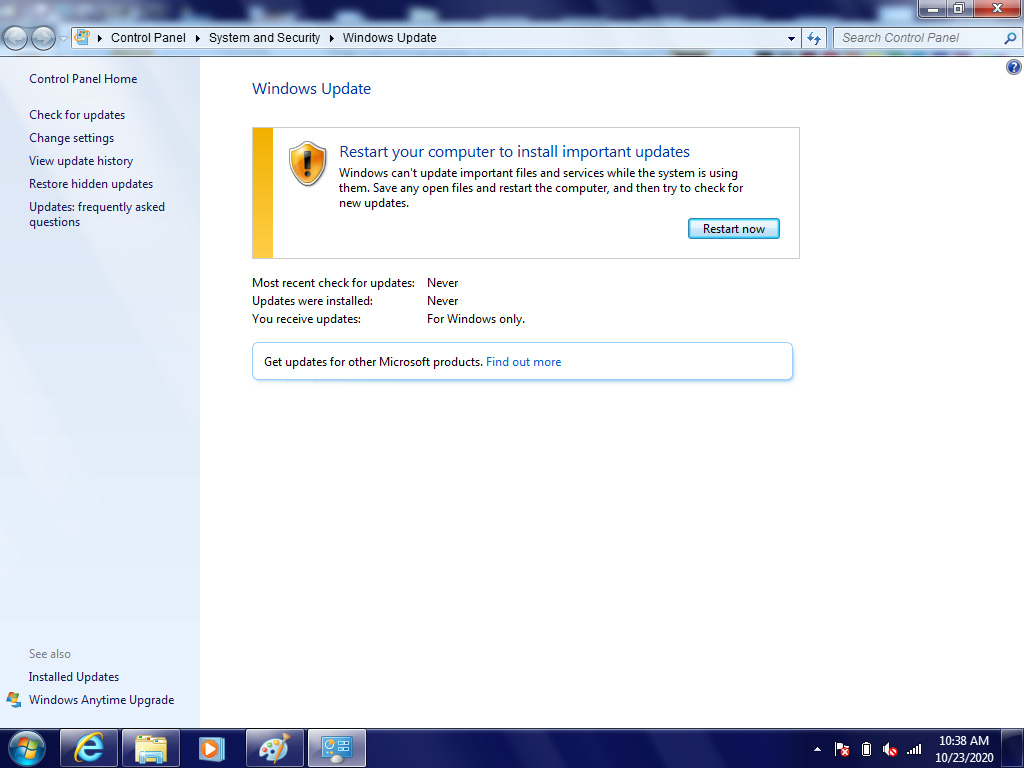
IMPORTANT: If you are using a Windows 7 PC, please ensure you have applied all of the latest updates using the ‘Windows Update’ tool application. See page 21 for the instructions.
Perform the following before starting the reprogramming procedure to prevent damage to the control unit.
* Connect the AC Adapter to the CONSULT PC.
* Connect the CONSULT PC to the internet (Wi-Fi or cable).
* Ensure ASIST on the CONSULT PC has been synchronized (updated) to the current date and all C-III plus software updates (if any) have been installed.
* Turn OFF all external Bluetooth® devices (e.g., cell phones, printers, etc.) within range of the CONSULT PC and the VI. If Bluetooth® signal waves are within range of the CONSULT PC during reprogramming, the reprogramming may be interrupted.
* Turn OFF all vehicle electrical loads.
* Connect a battery maintainer or smart charger, set to reflash mode or a similar setting, to ensure the battery voltage stays between 12.0 V and 15.5 V.
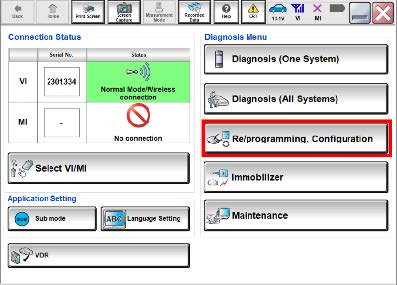
2. Select Re/programming, Configuration.
NOTE:
C-III plus screens for steps 3-7 are not shown.
3. Select Confirmed instructions.
4. Select Next.
5. Select Confirm.
6. Confirm the correct VIN is populated.
7. Select Confirm.
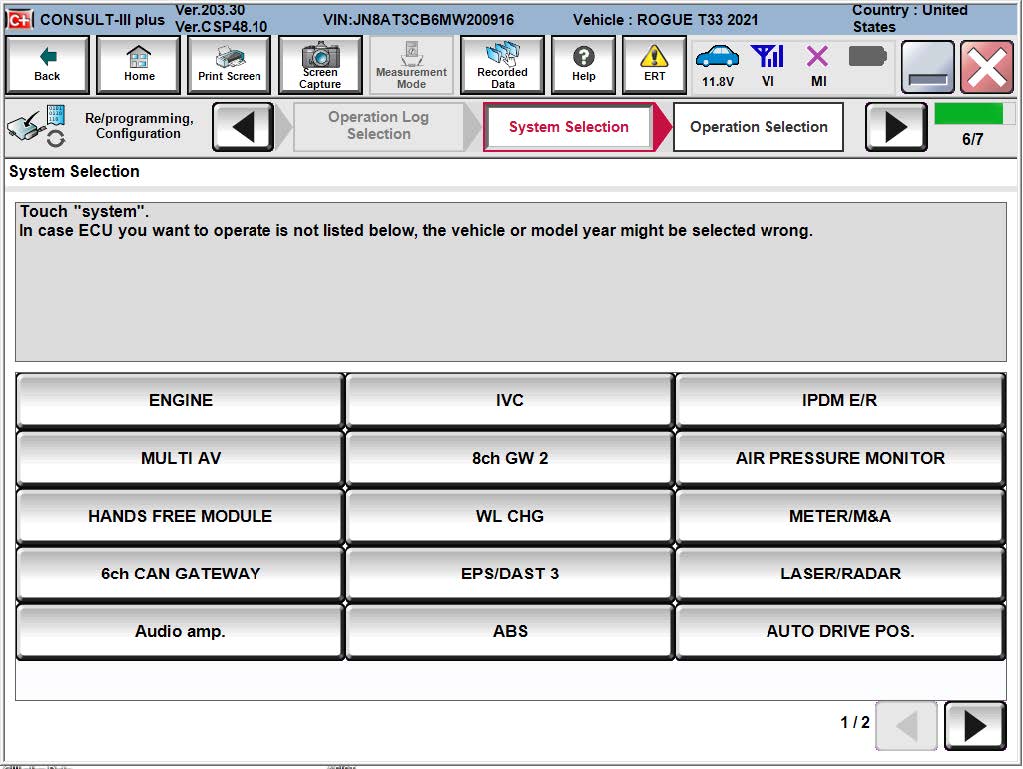
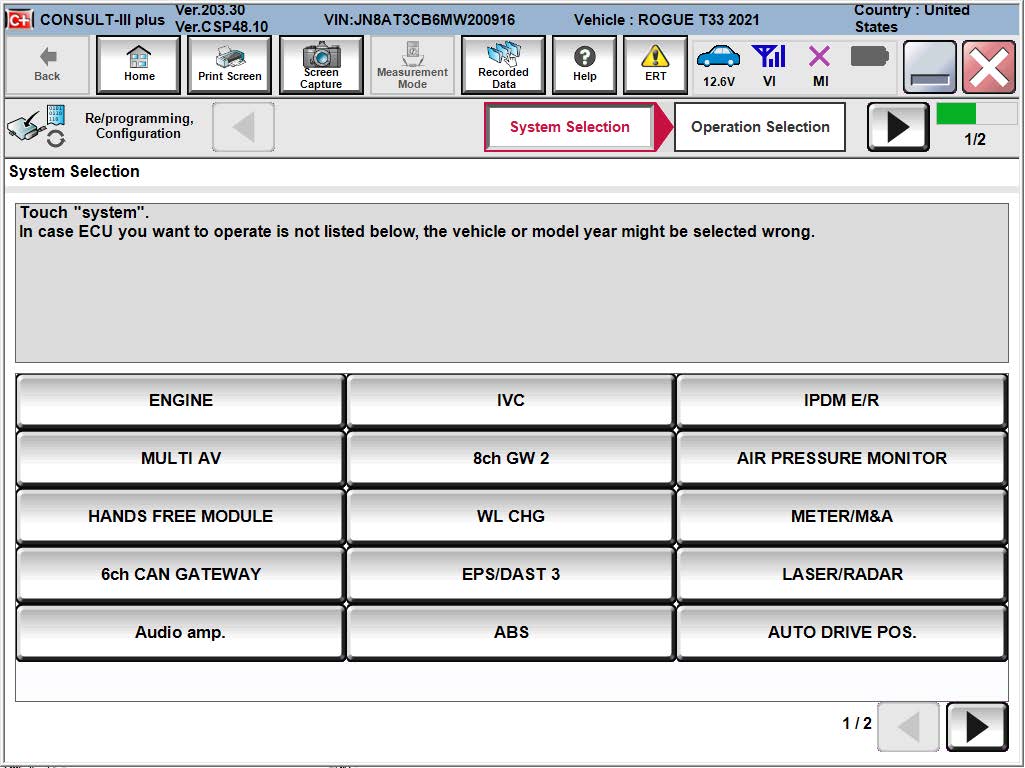
8. Select MULTI AV.
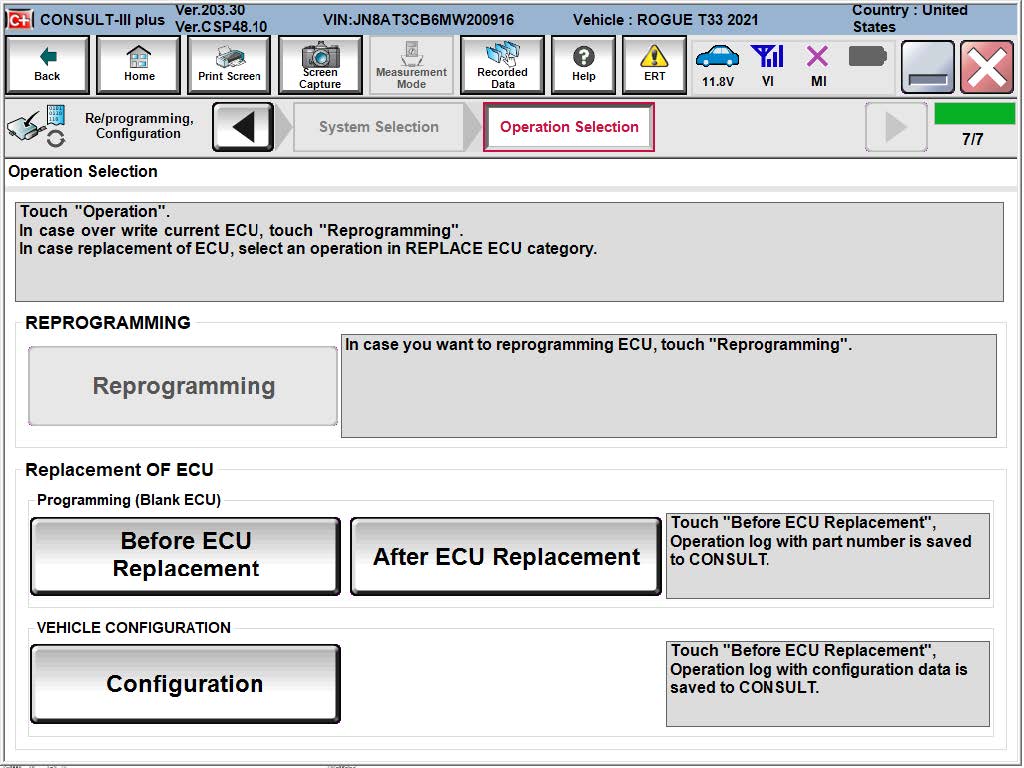
9. Select After ECU Replacement from the Programming (Blank ECU) menu.
10. Select Next after reading the Precaution.
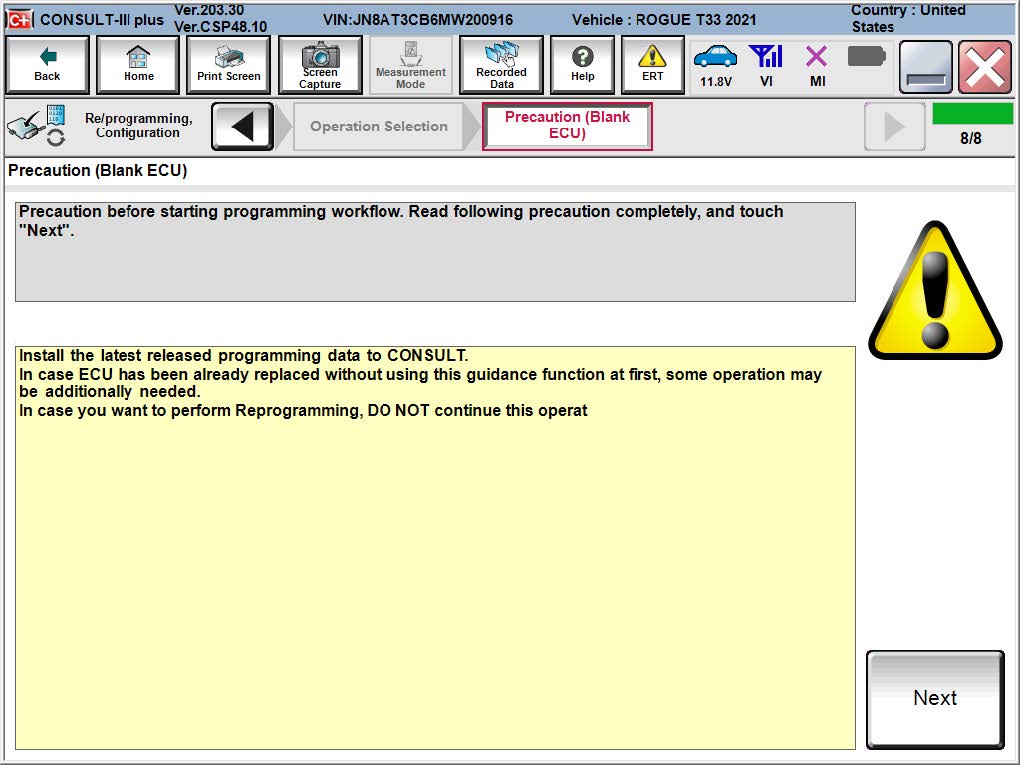
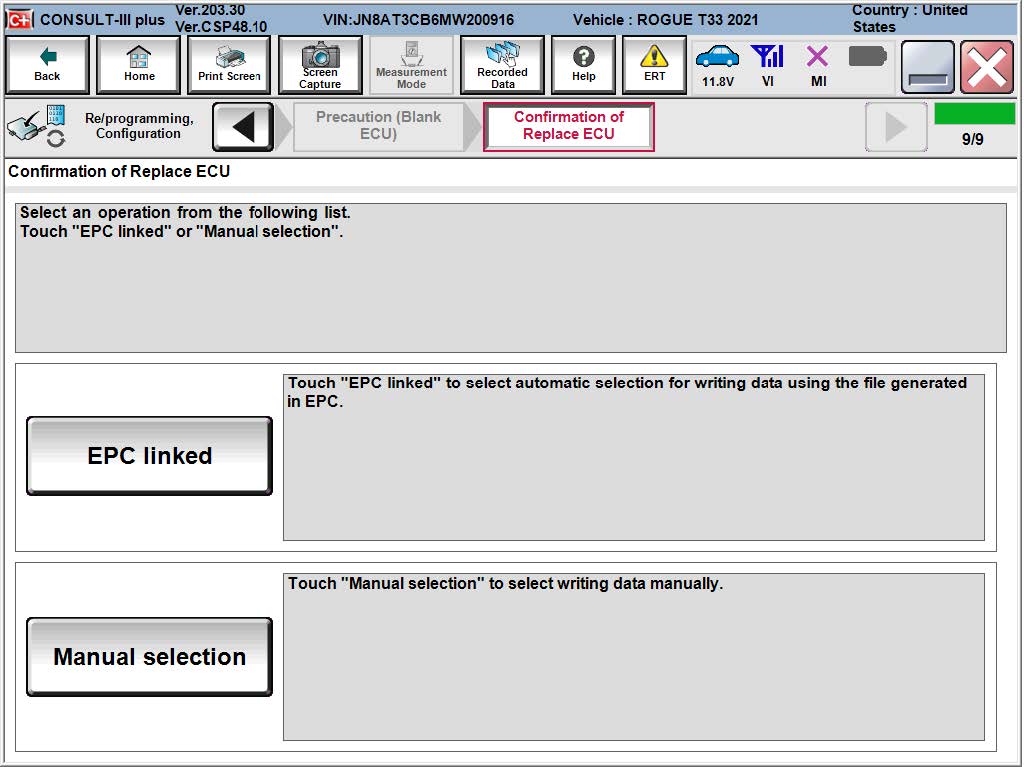
11. Select Manual selection.
NOTE:
C-III plus screens for steps 12-13 are not shown.
12. Read the Precautions.
* Click on the arrows to read all of the precautions.
13. After reading all of the precautions, select Confirmed instructions, then select Next.
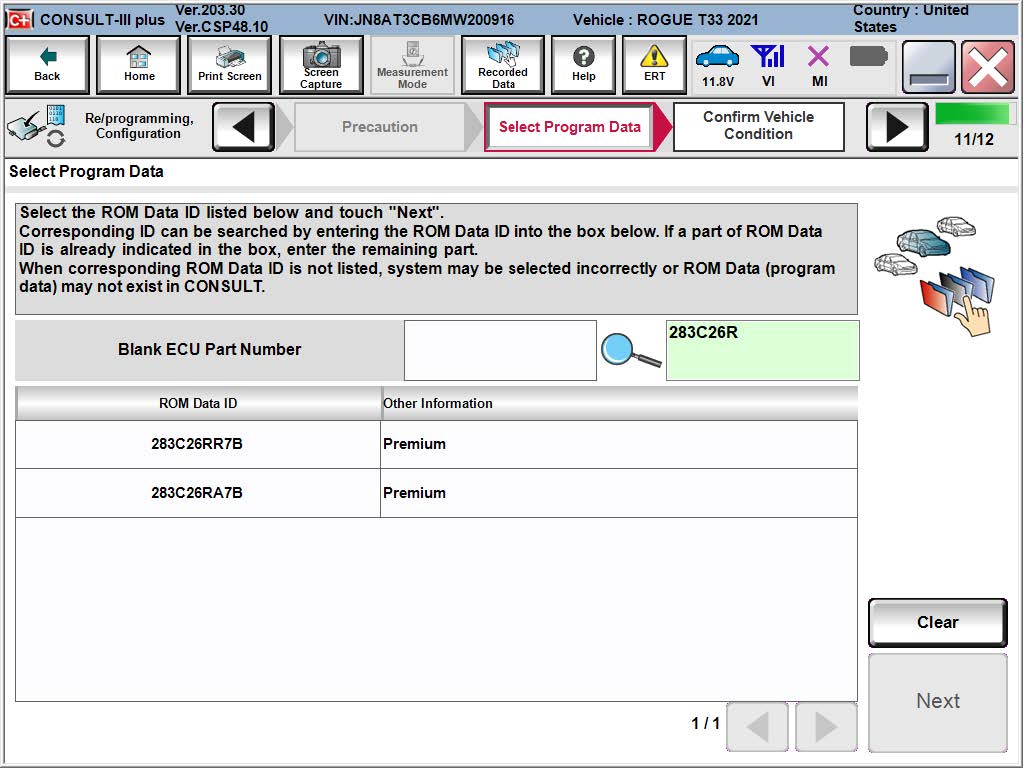
14. Review Table A, below, and find the applicable ROM Data ID for the vehicle you are working on.

(1) Excluding tweeters.
(2) The VIN for Kyushu manufactured Rogues will display as JN8AT(*****)W(******).
(3) The VIN for Smyrna manufactured Rogues will display as 5N1AT(*****)C(******).
15. Select the applicable ROM Data ID and then select Next.
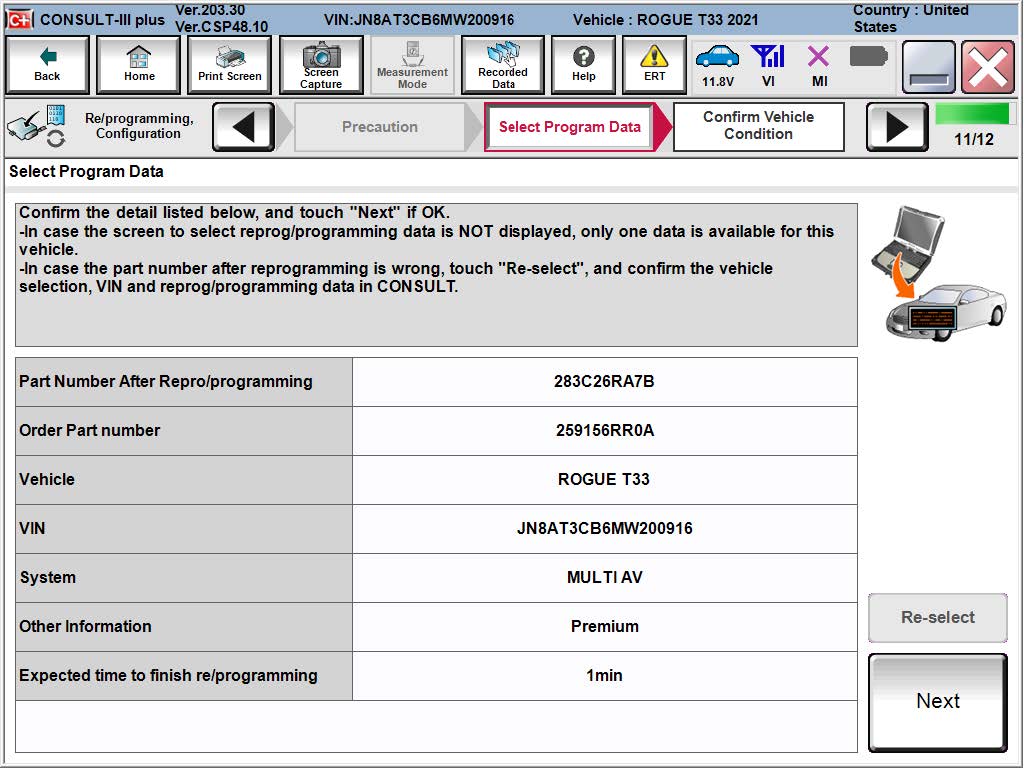
16. Confirm the information matches the vehicle you are working on and select Next.
17. Follow the on-screen instructions, and then select Next.
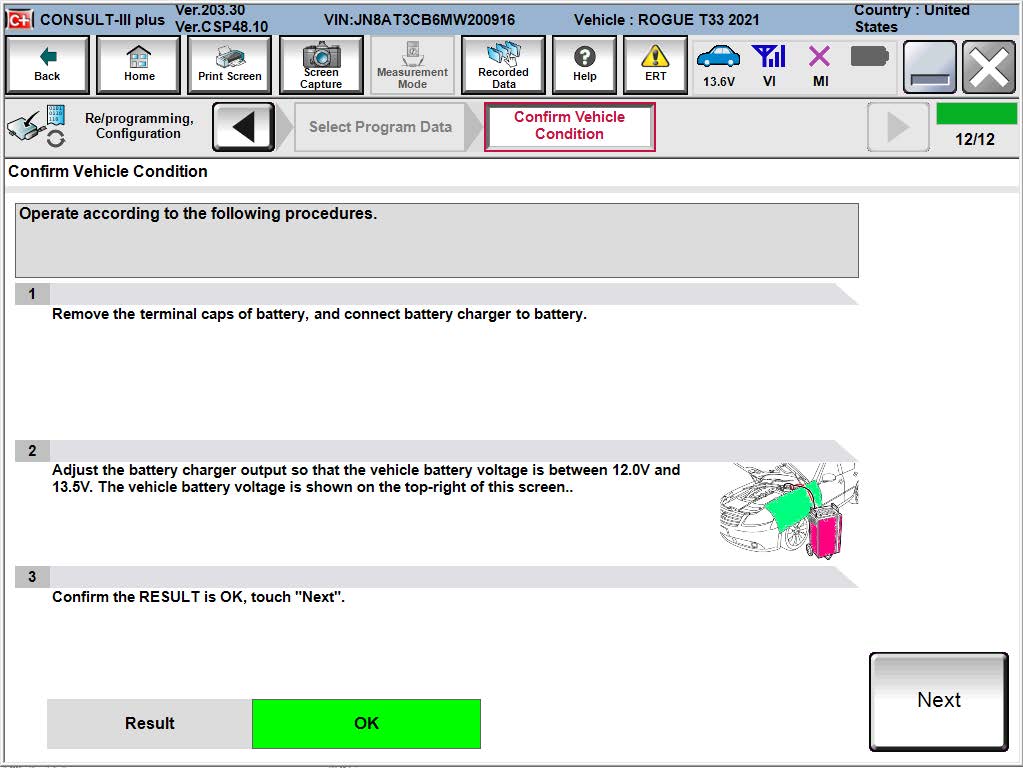
18. Confirm the battery voltage is within acceptable limits, and then select Start.
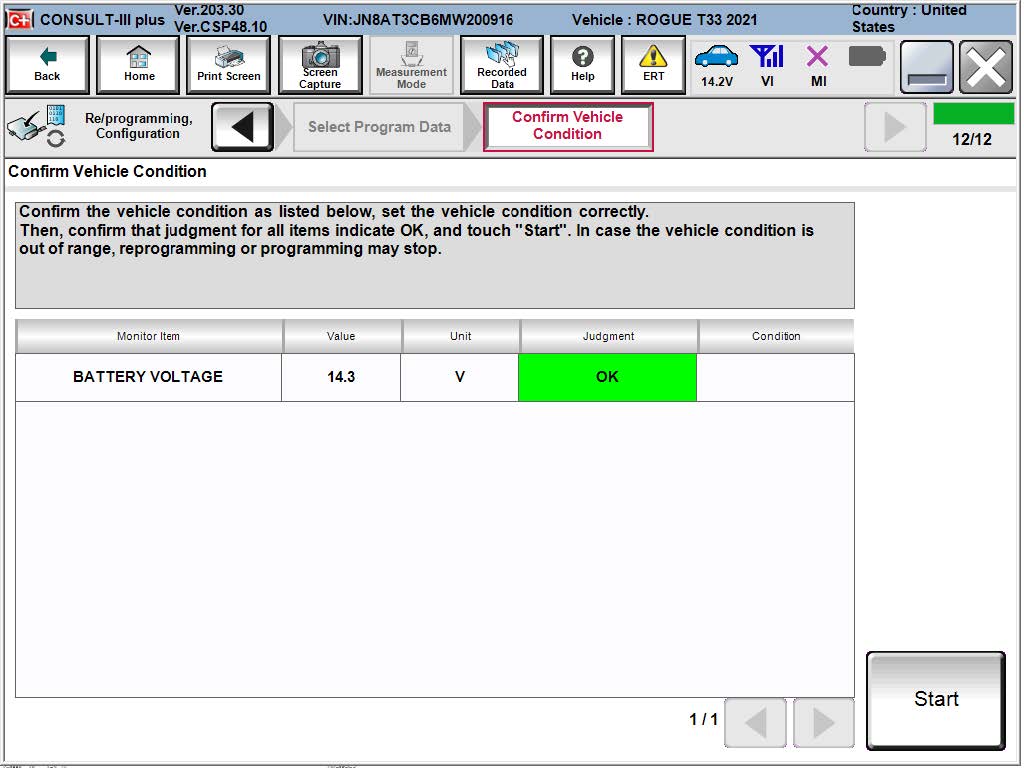
19. Select your user group from the drop down menu, then select OK.
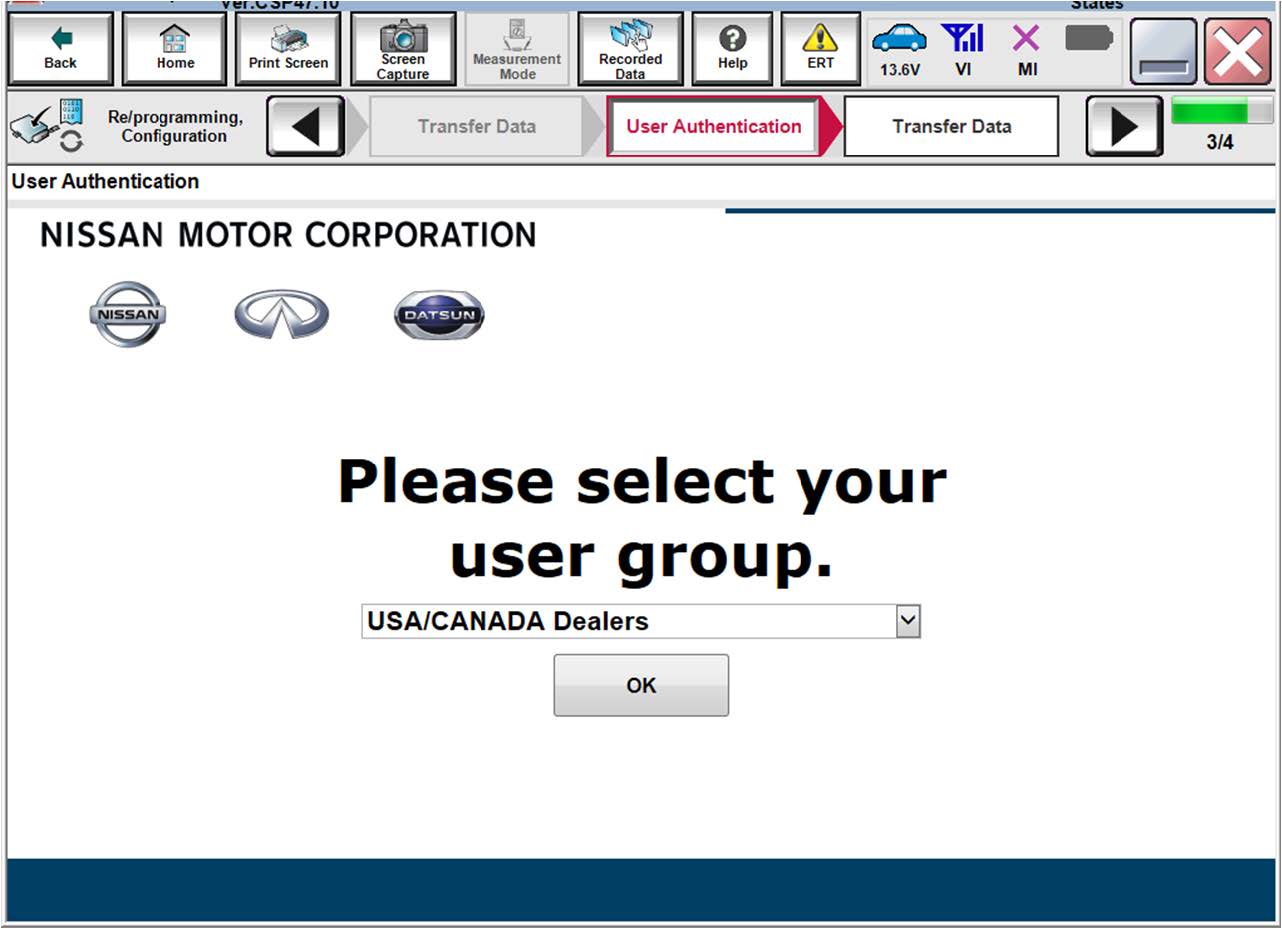
20. Enter your Username and Password, and then select Submit.
21. Wait for the data transfer to complete.
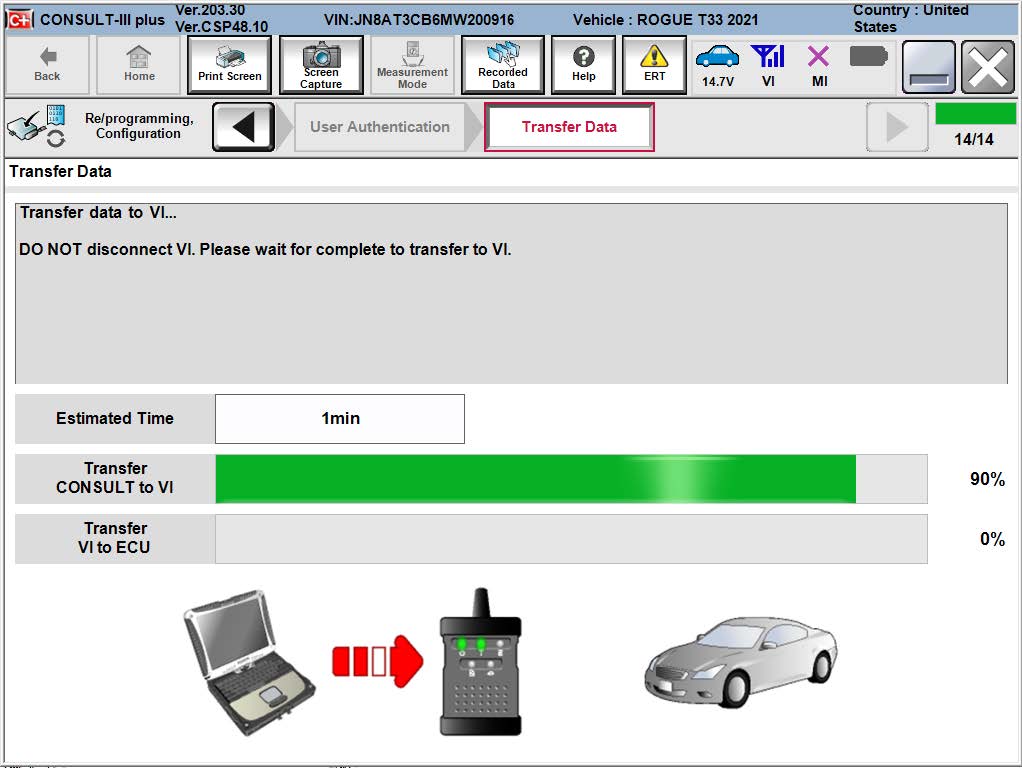
22. Once the data transfer is complete, select Next.
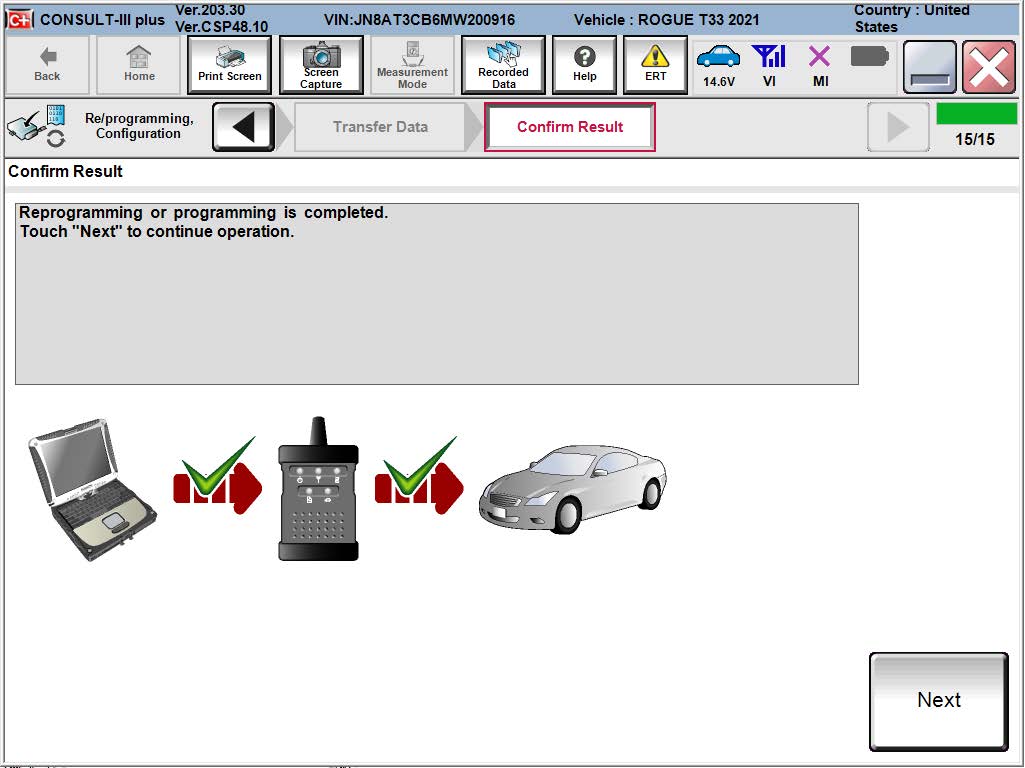
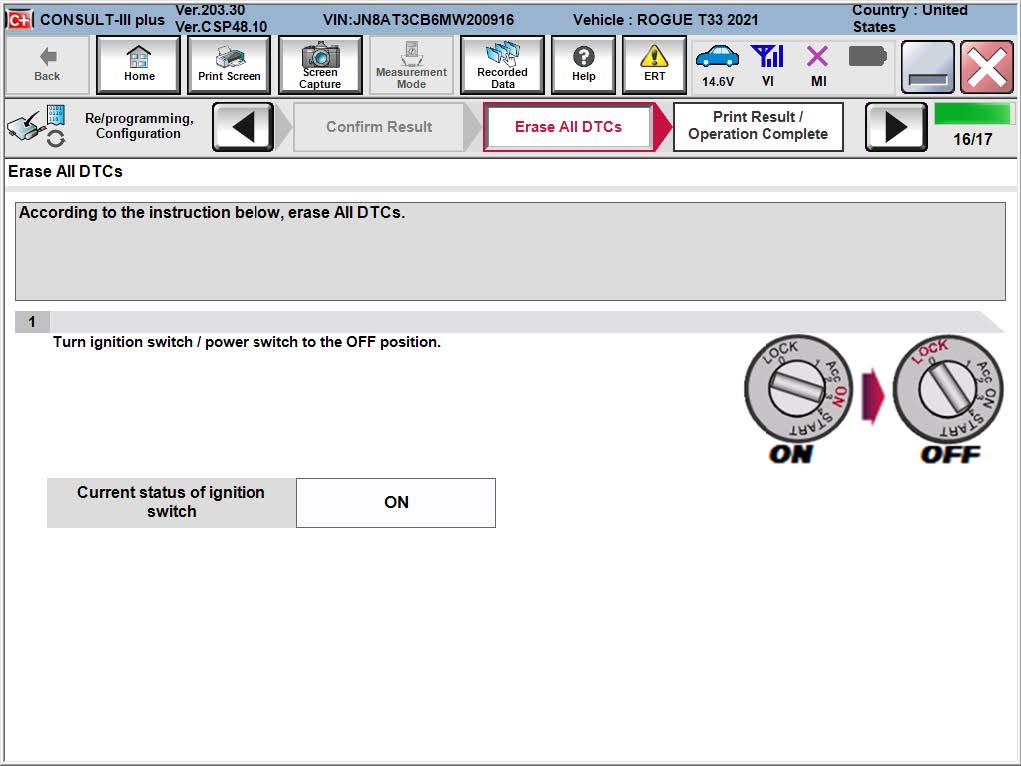
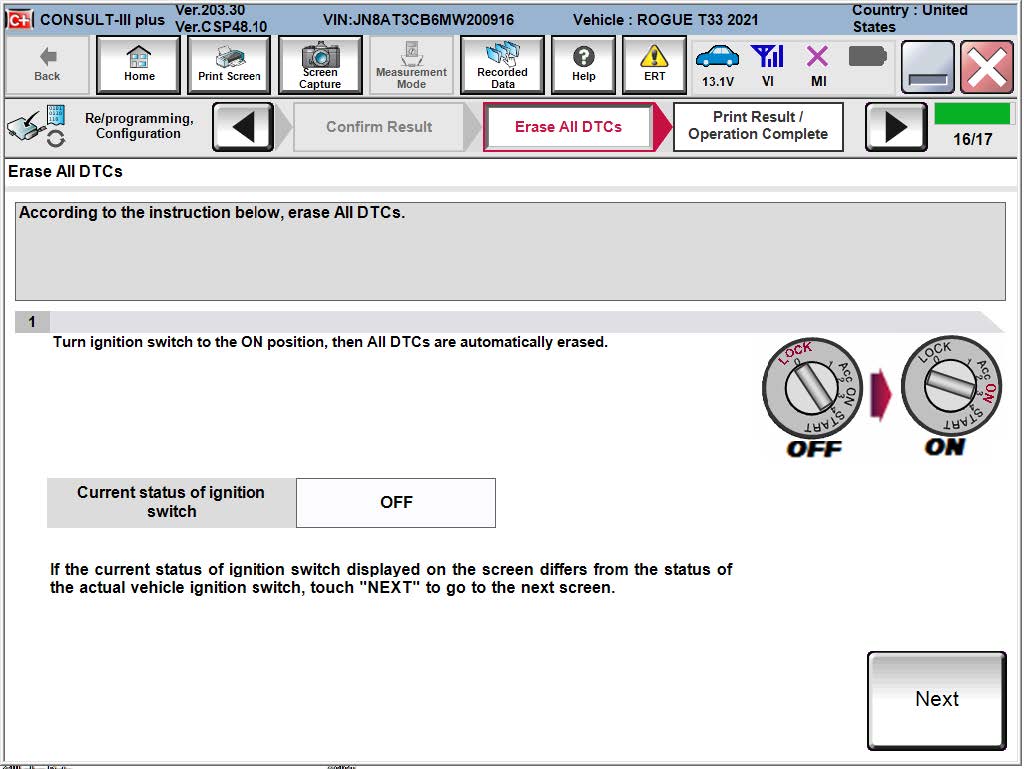
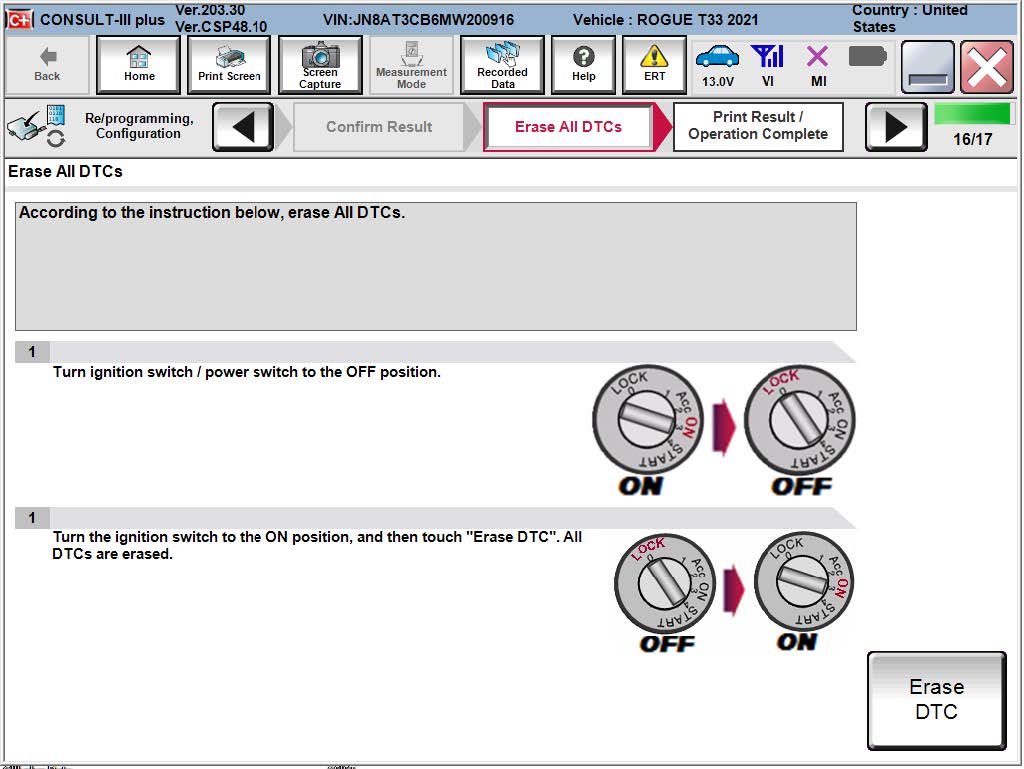
23. Erase All DTCs.
* Follow the on-screen instructions as shown in Figure 16, Figure 17 and Figure 18.
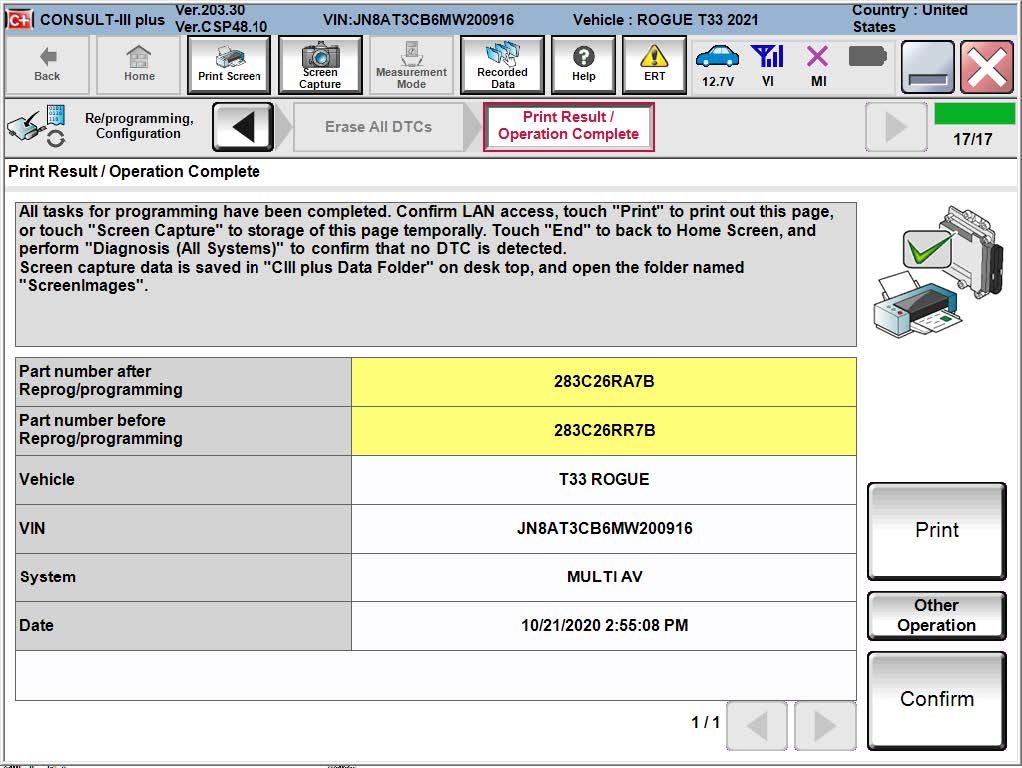
24. Verify the before and after part numbers are different, follow the screen prompts to
print the results, then select Confirm.
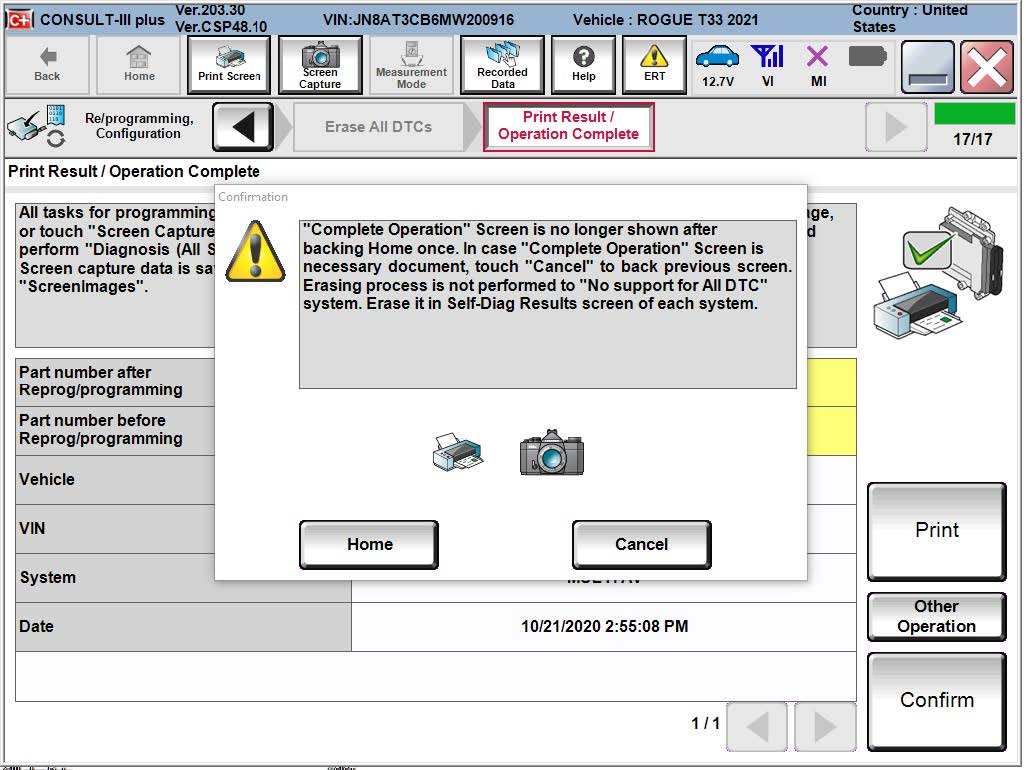
25. Select Home.
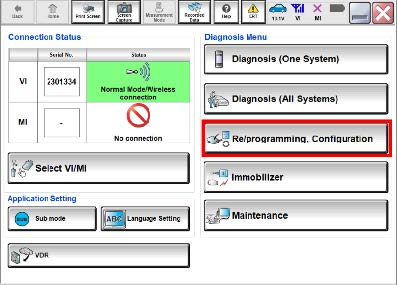
26. Select Re/programming, Configuration.
NOTE:
C-III plus screens for steps 27-31 are not shown.
27. Select Confirmed instructions.
28. Select Next.
29. Select Confirm.
30. Confirm the correct VIN is populated.
31. Select Confirm.
32. Select MULTI AV.
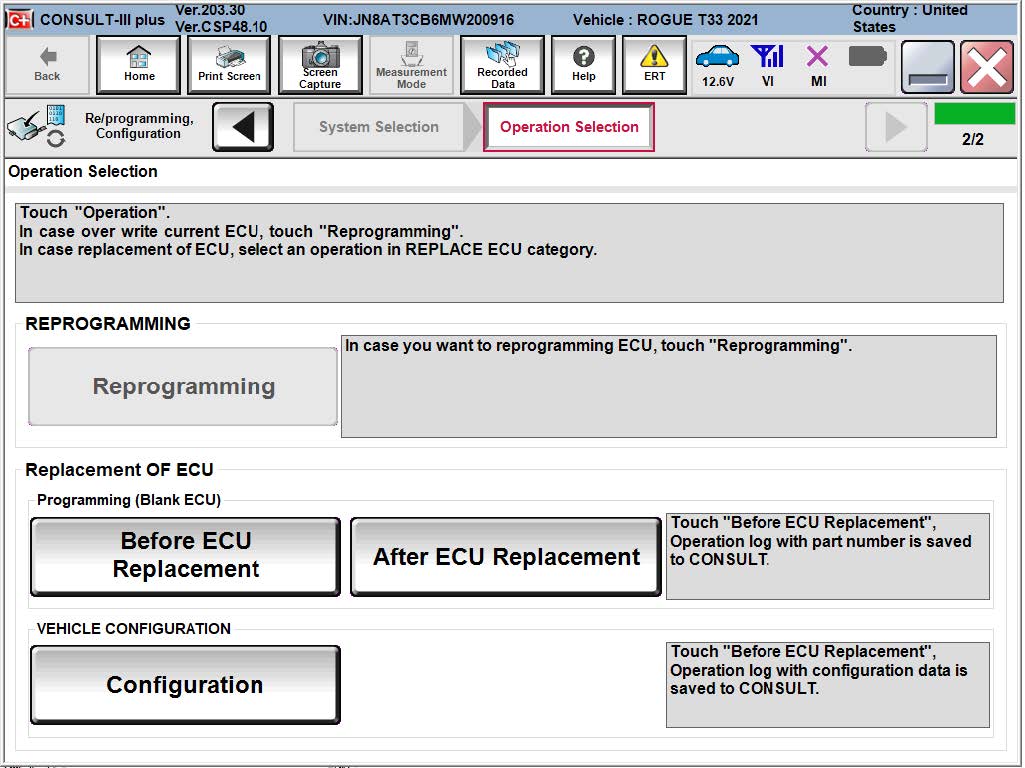
33. Select Configuration under VEHICLE CONFIGURATION.

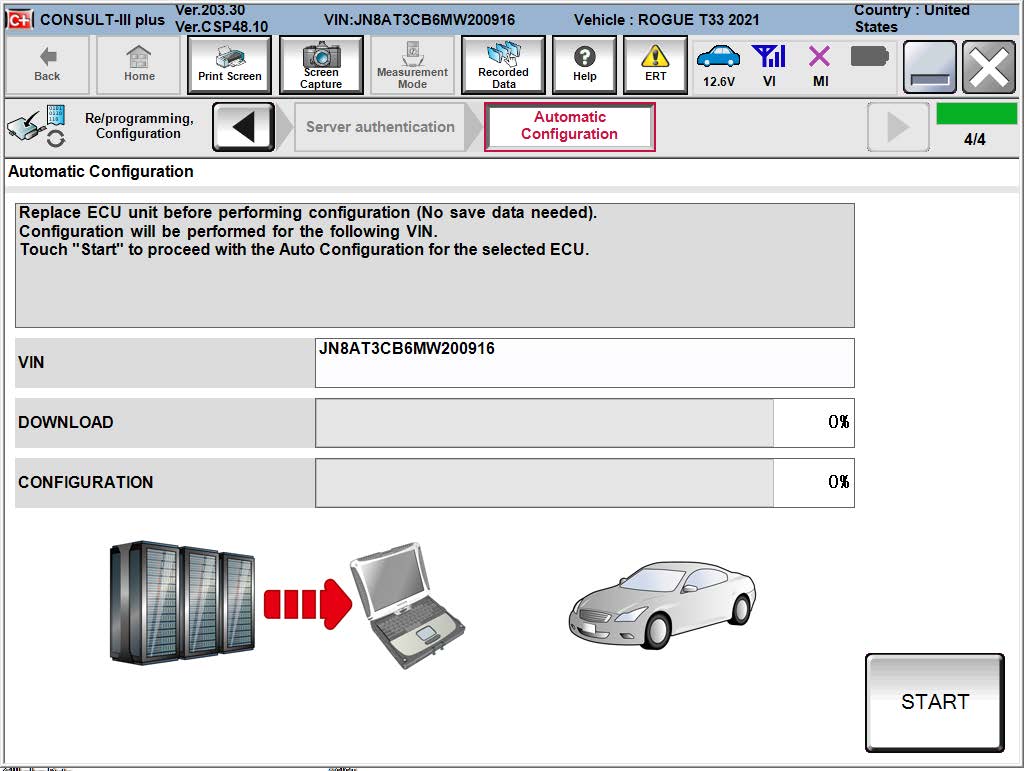
34. On the Automatic Configuration screen, ensure the VIN is correct and select START.
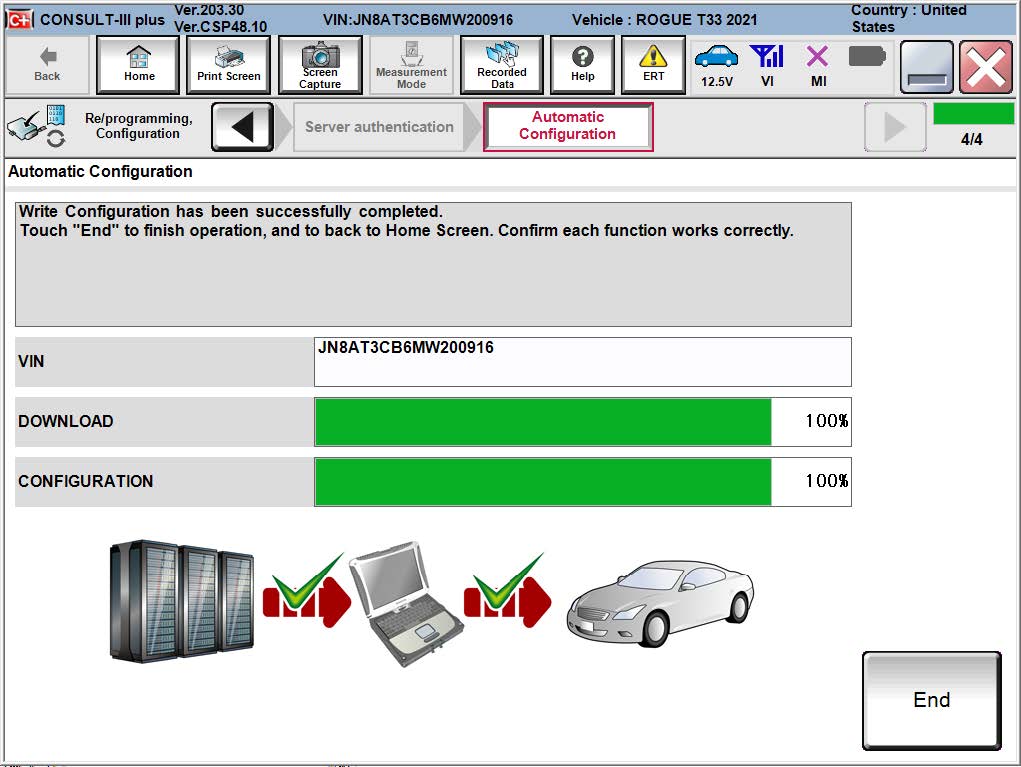
35. Once Write Configuration has completed, select End.
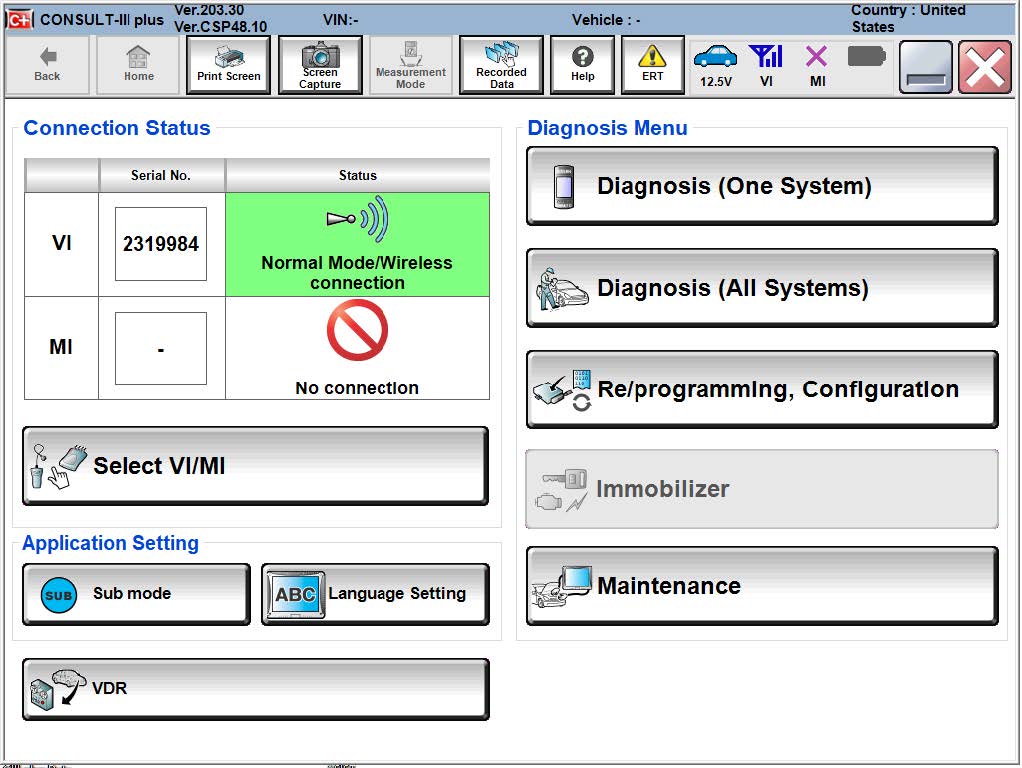
36. Select Diagnosis (One System).
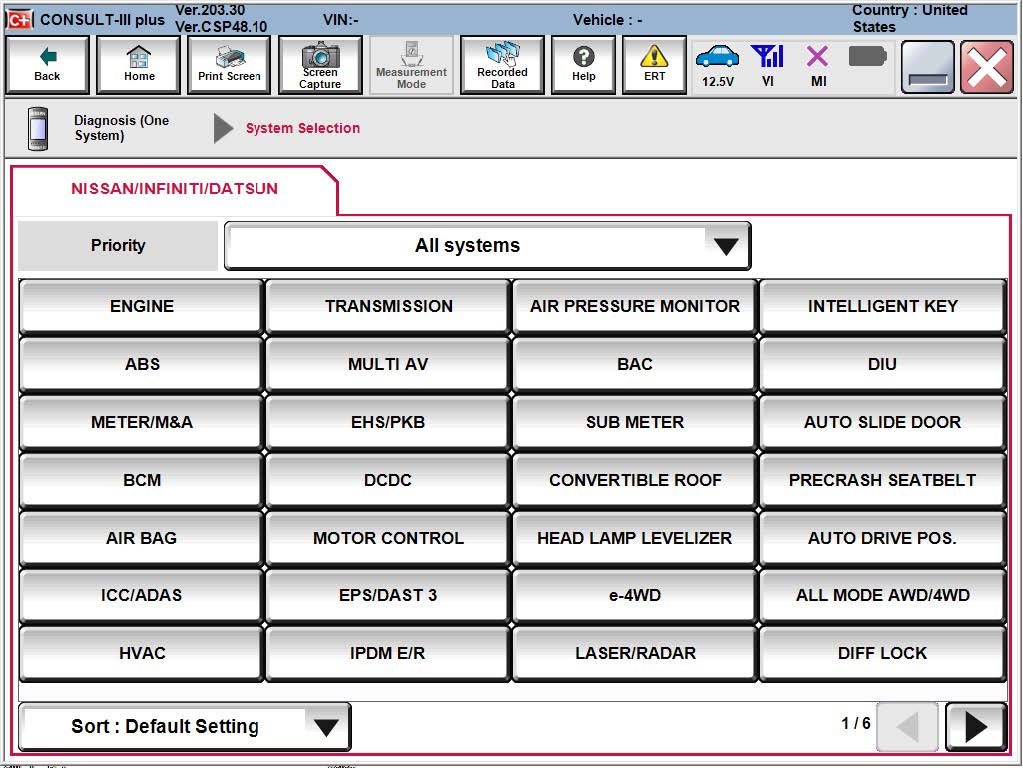
37. Select MULTI AV.
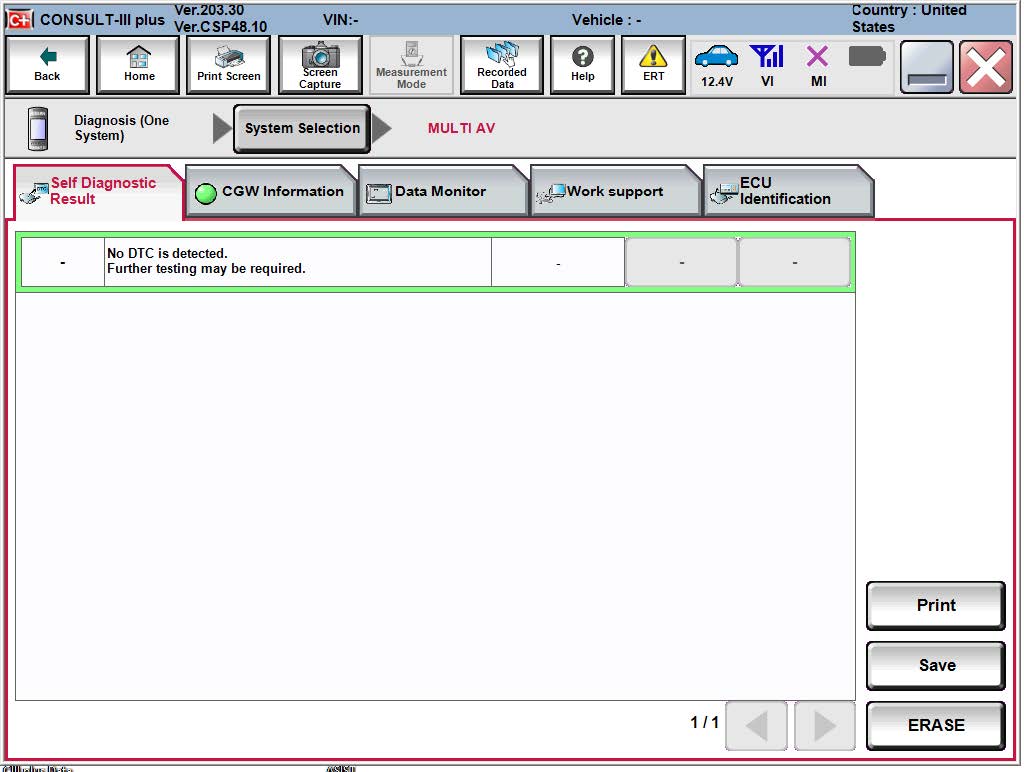
38. Select ERASE if any DTCs exist.
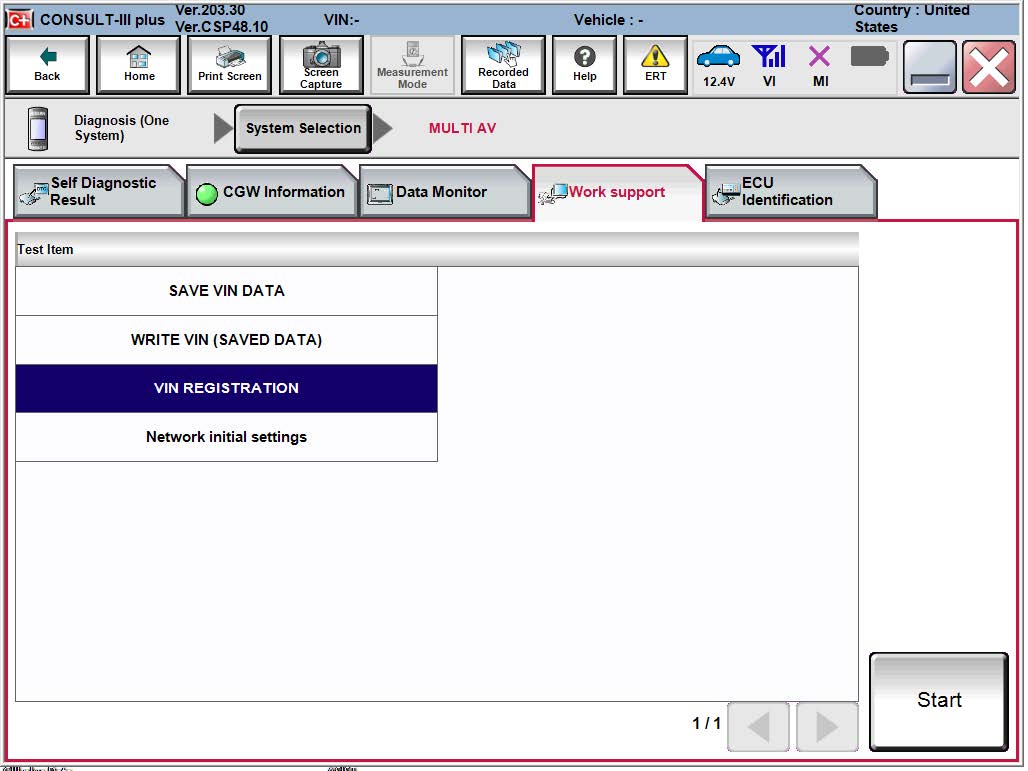
39. Select the Work support tab.
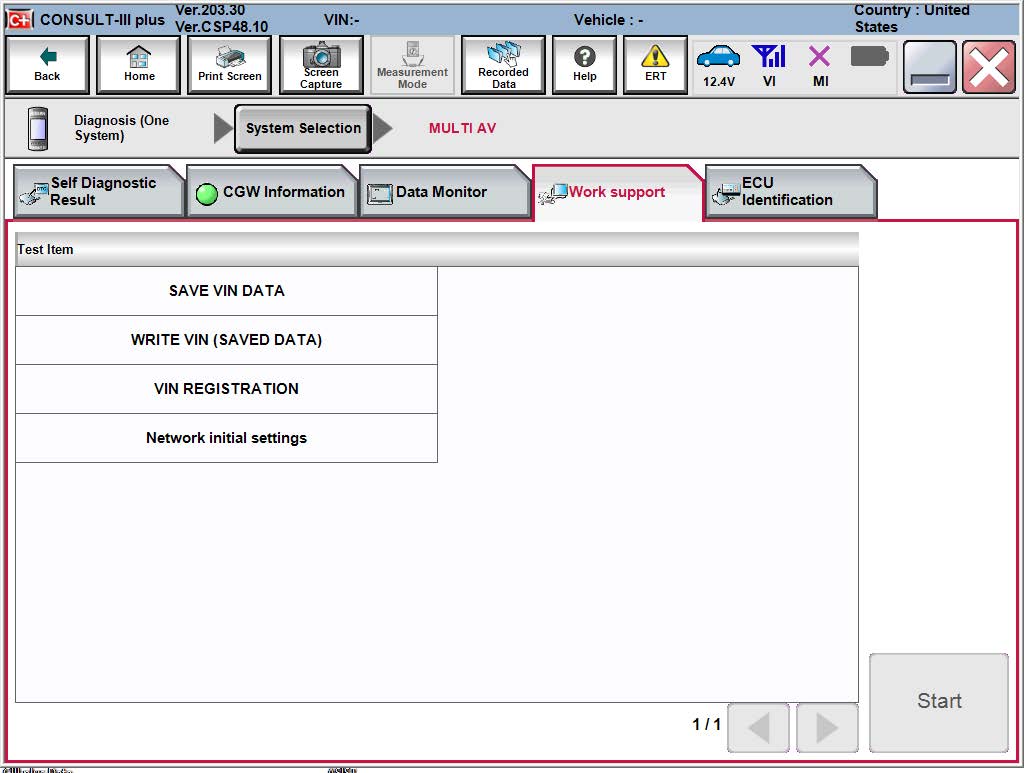
40. Select VIN REGISTRATION.
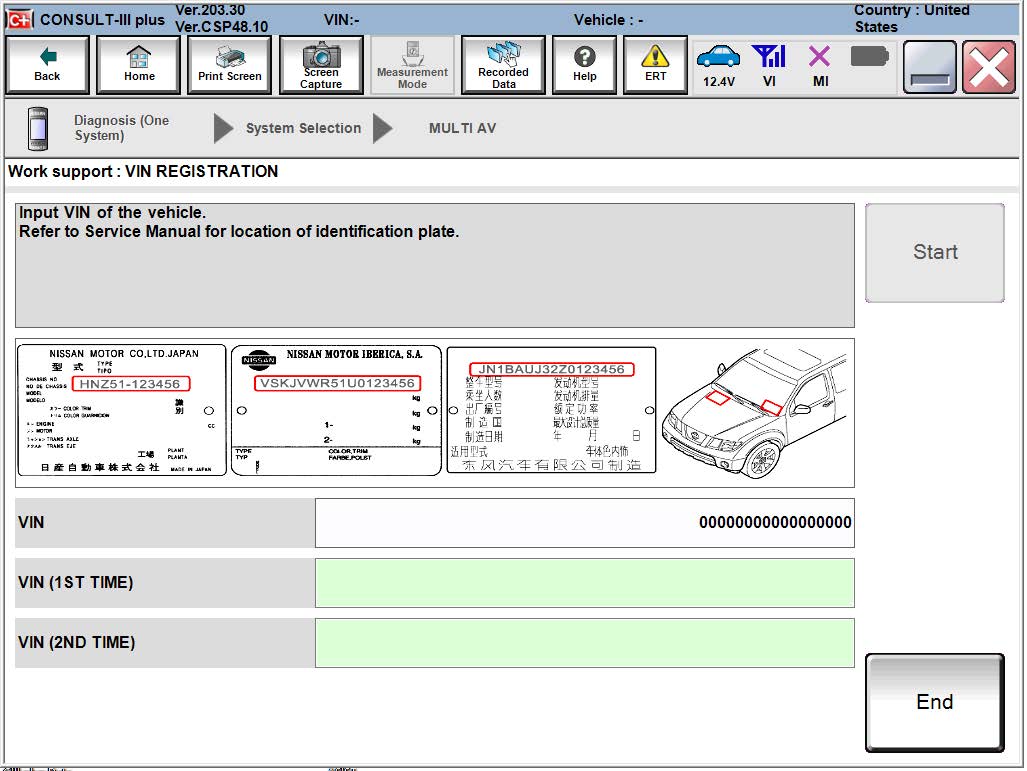
41. Type the VIN into the fields shown below.
* The VIN must be entered two times.
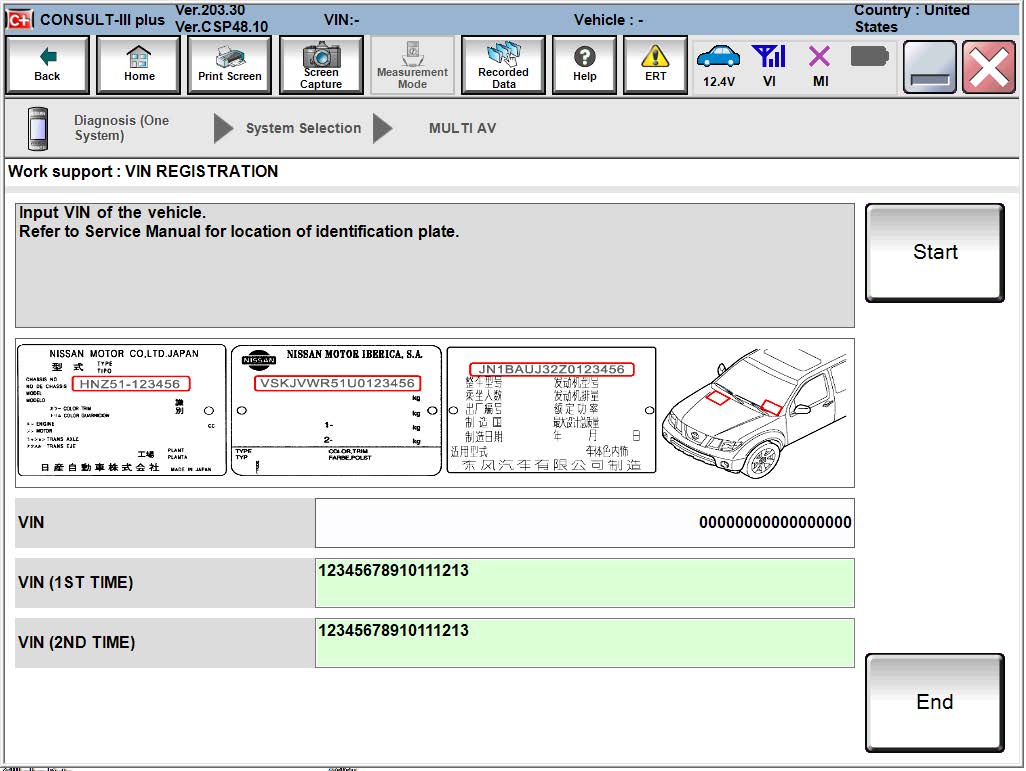
42. Select Start.
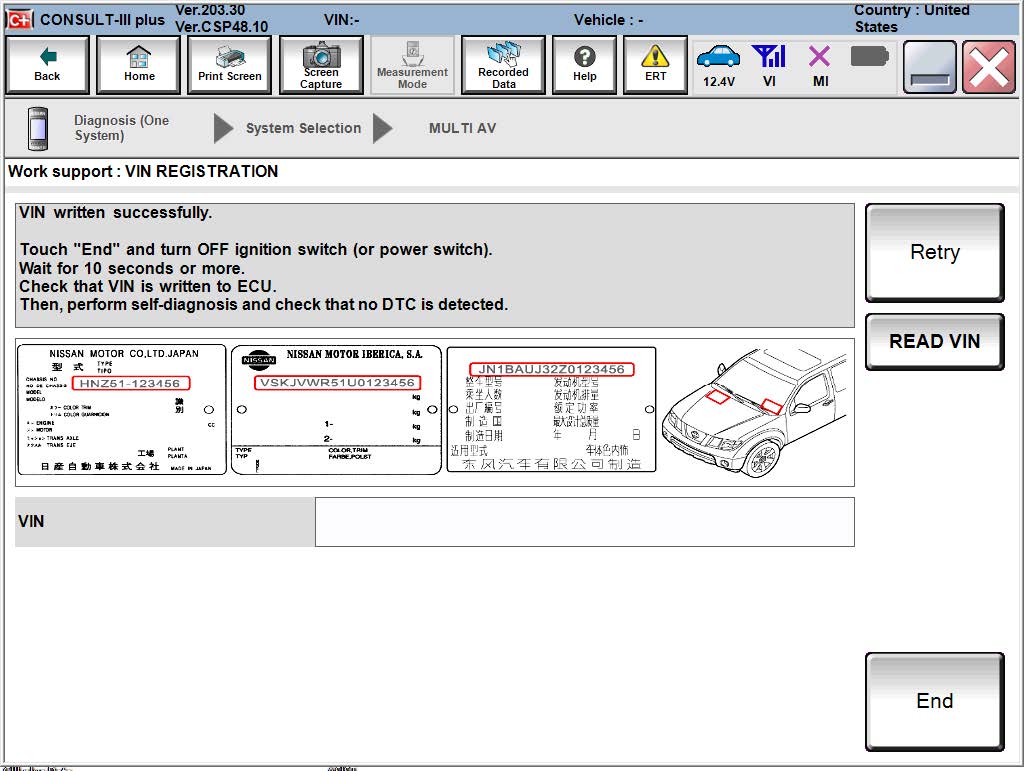
43. Select READ VIN to verify the VIN was written successfully.
* The VIN should now populate in the field shown below.
44. Select End.
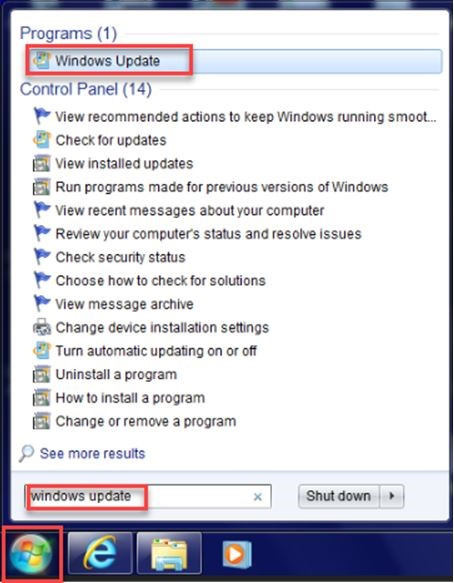
NOTE: If using a Windows 7 PC, follow these steps before reprogramming the AV control unit to ensure all of the latest Windows updates have been applied.
1. From your Windows 7 desktop,click the Start button and type in‘windows update’ to launch the
Windows Update application.
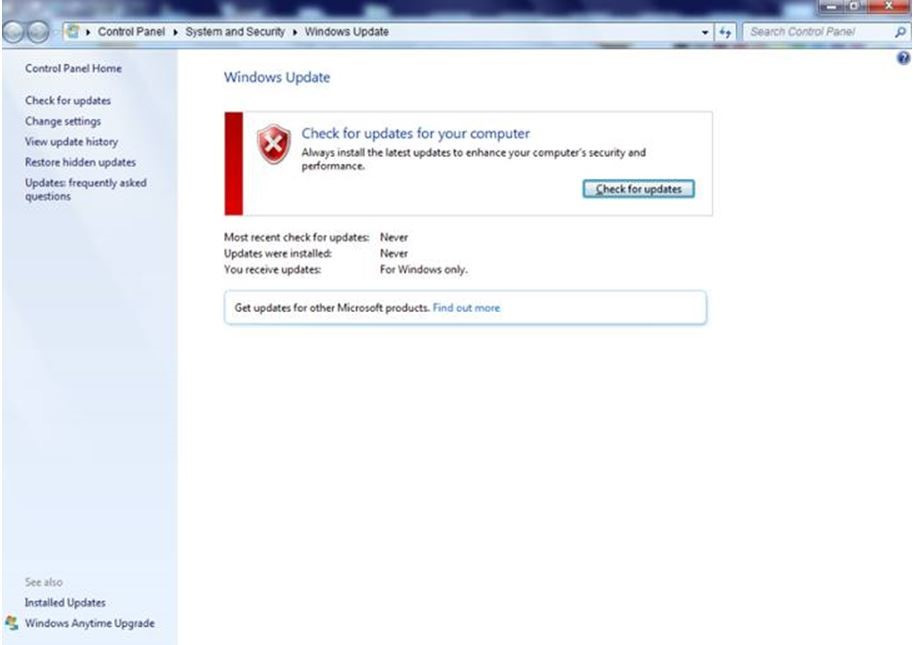
2. Select Check for updates.
3. Follow the on screen instructions to install all of the latest updates.
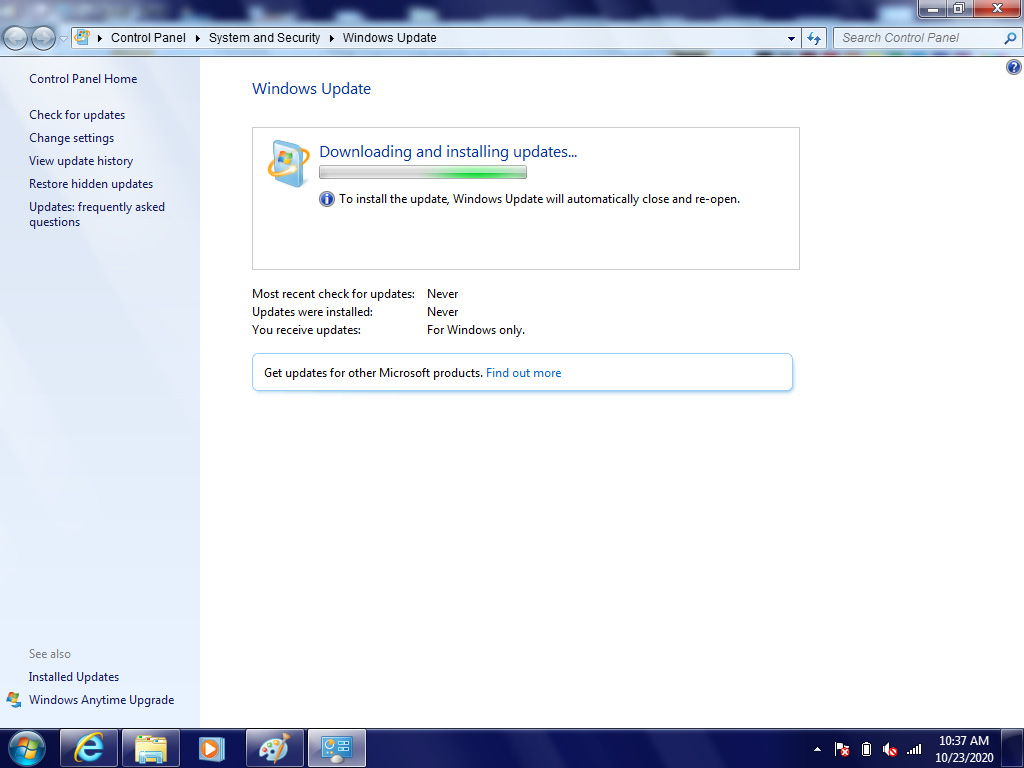
* You may need to select Restart now.
