This article will guide you through using the Star Diagnostic machine for a quick Mercedes diagnosis. These tools come in various models, including the older C3, the more common C4 and C5, and the latest C6. For a detailed comparison of these versions, check out the blog section on our website.
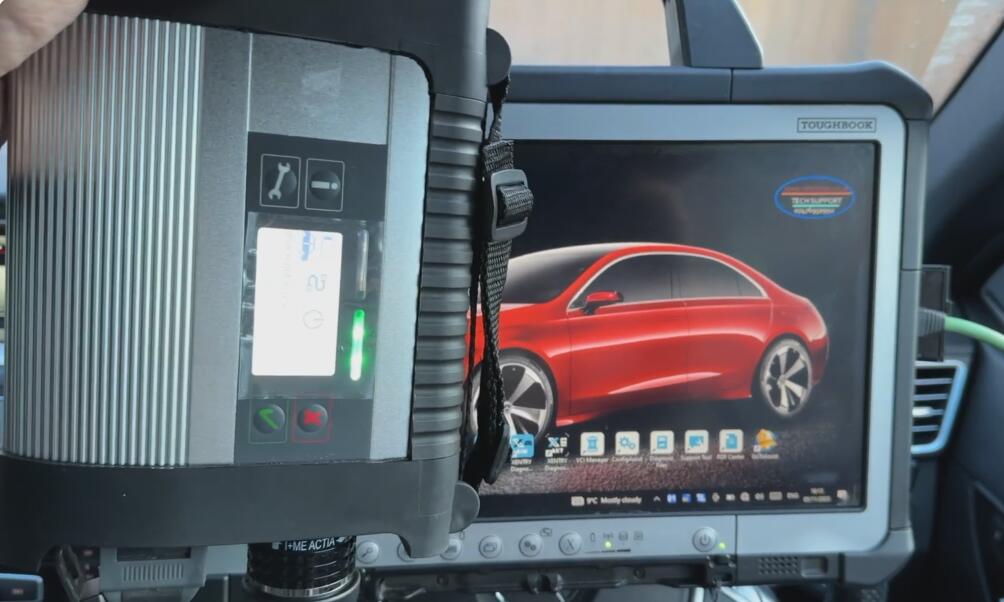
In this demonstration, we’re using the C4 DOIP model. You can find this exact system for purchase on our store, and I’ll include a link in the description below.
Let’s start the diagnosis:
- Connecting the Device: Connect the C4 to your vehicle using the OBD and Ethernet cables. Make sure both are securely attached.
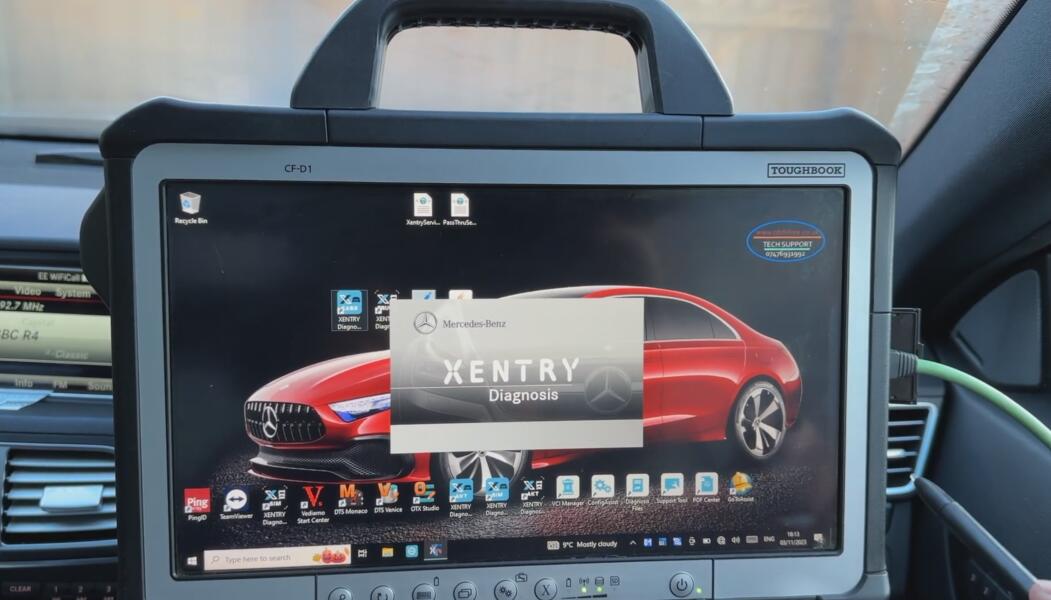
- Launching Xentry Diagnosis: On your laptop, open the Xentry Cars application. If you encounter any Chinese icons or text, it’s likely due to the software being a Chinese version, which is common but less reliable.
- Preparation: Before beginning, turn off any battery-intensive accessories like the radio and air conditioning to prevent battery drain during the diagnosis.
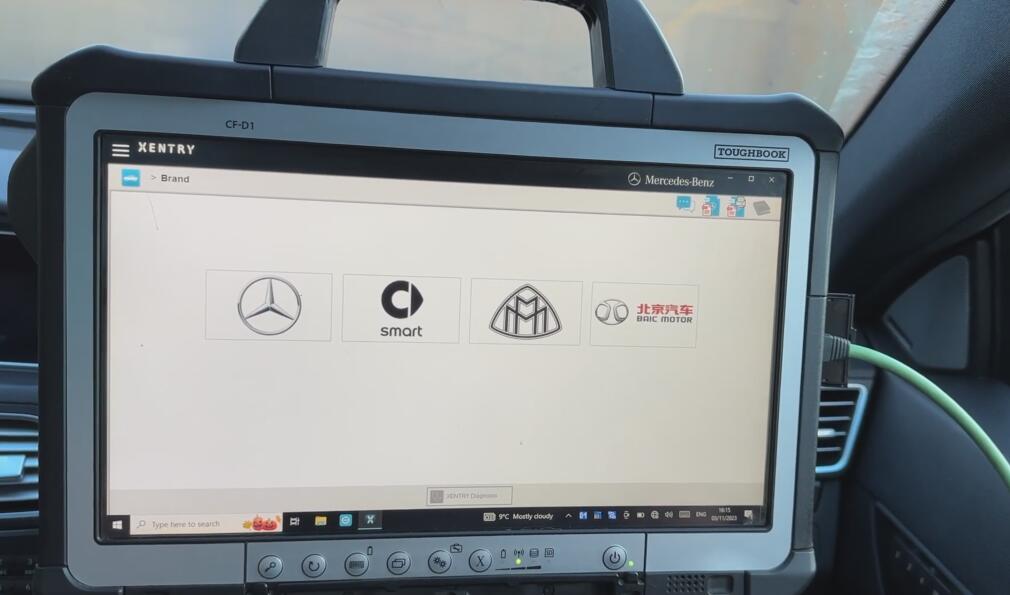
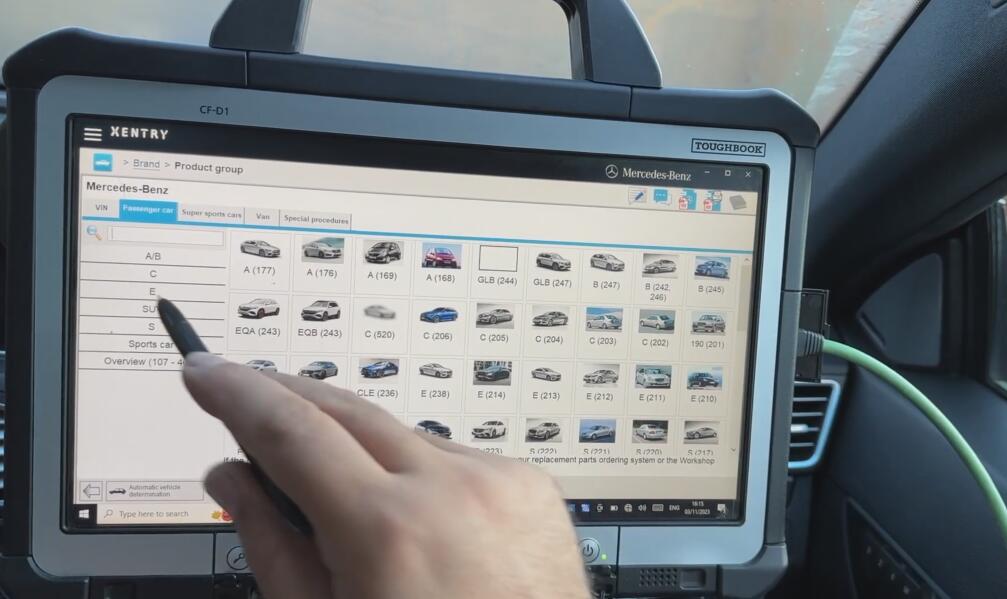
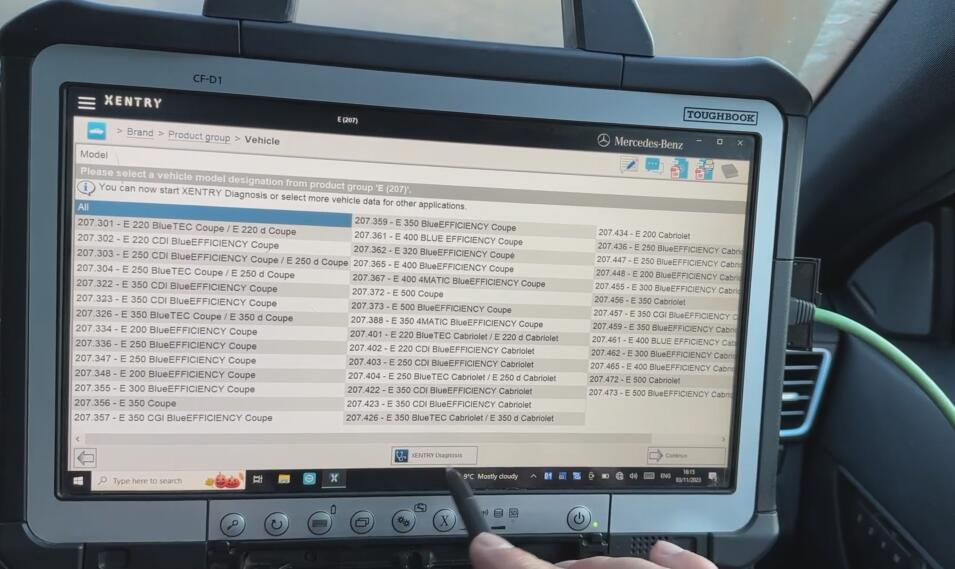
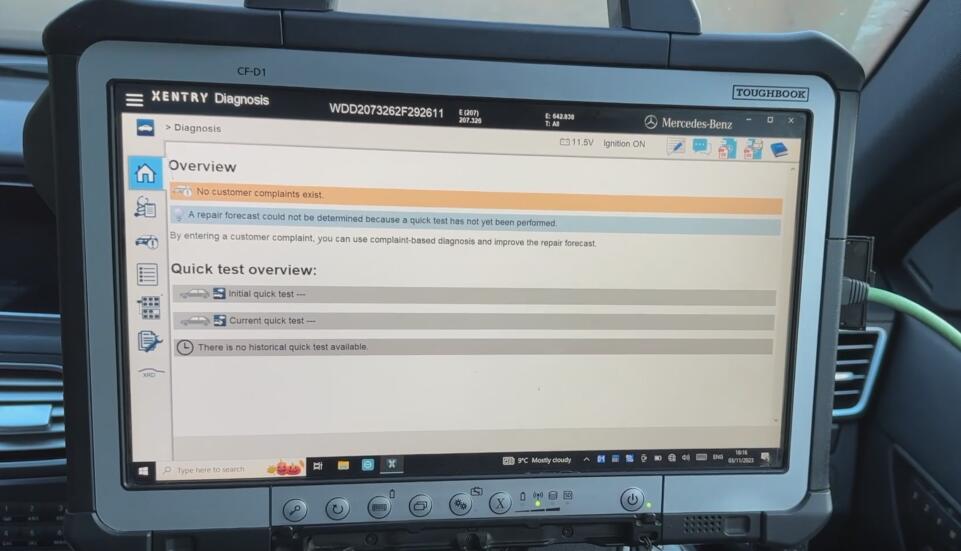
- Selecting the Vehicle: Click on the Mercedes icon in Xentry. You can either enter the vehicle’s VIN or navigate through the menu by selecting ‘Passenger Cars’, then your specific model, such as an E-Class. This will narrow down the list to specific sub-models.
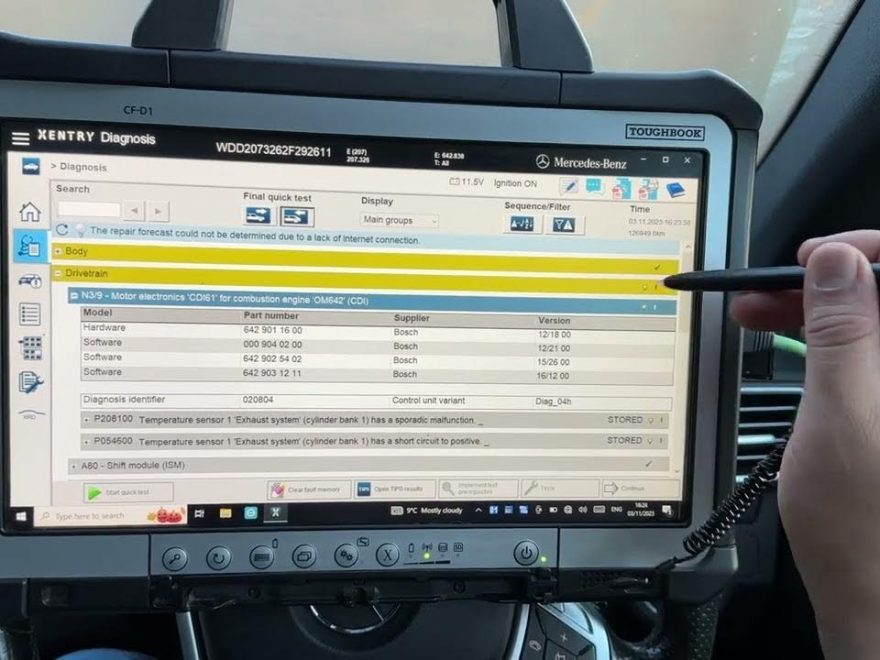
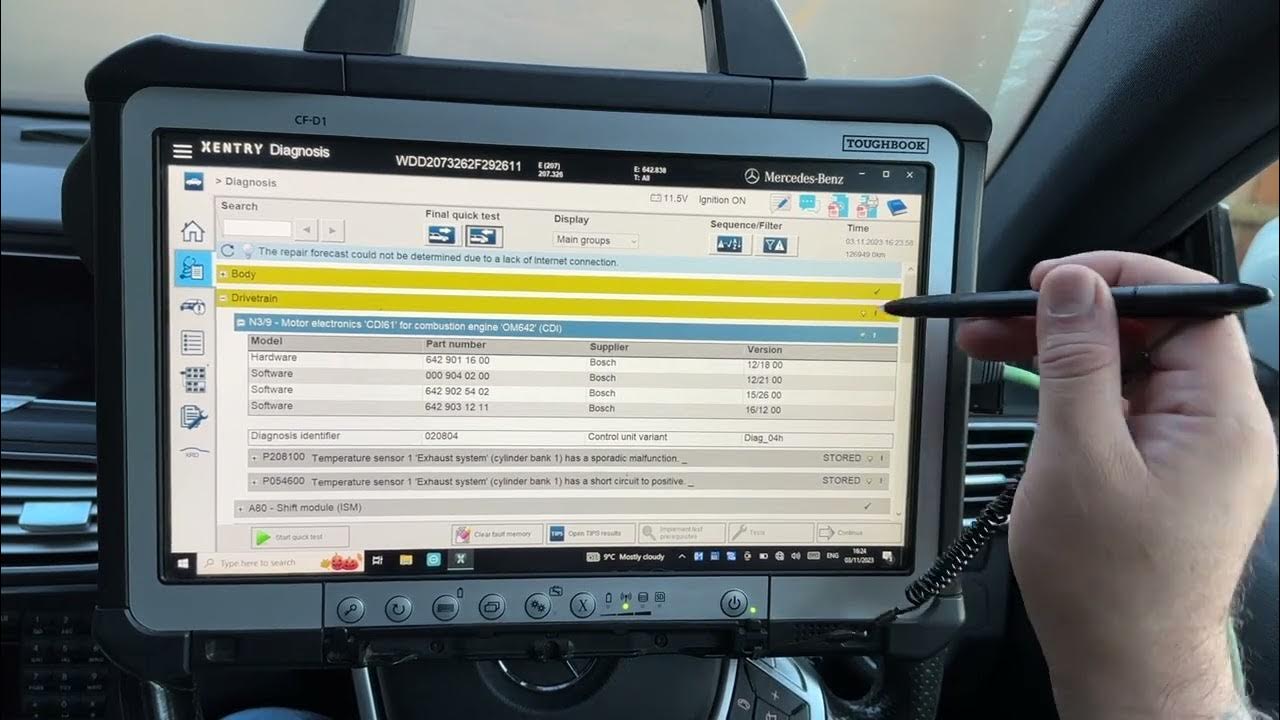
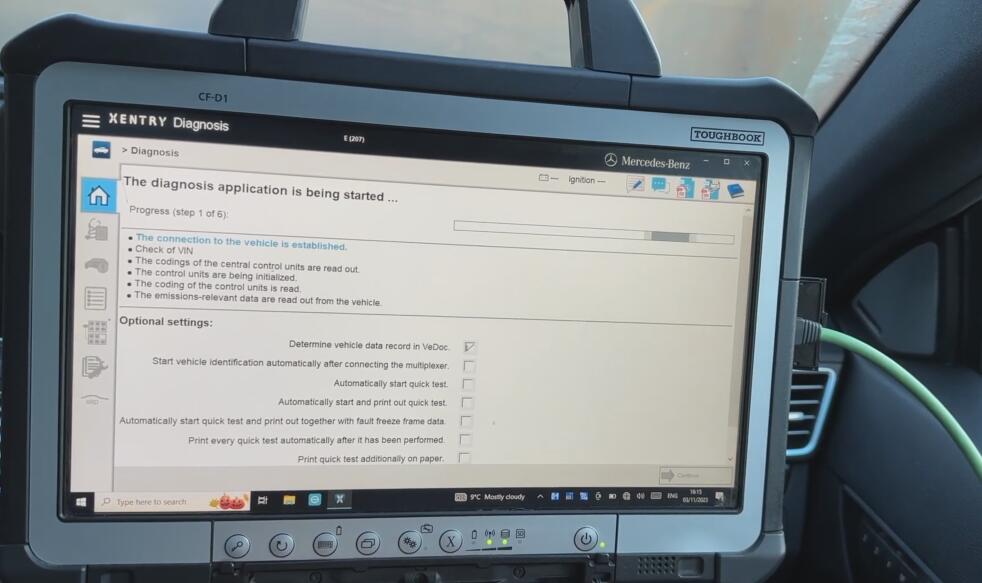
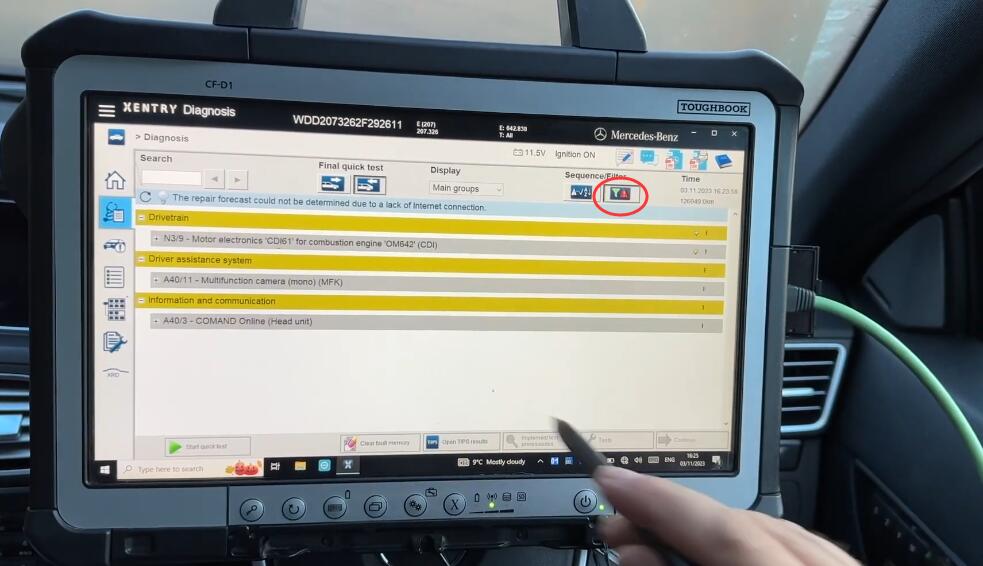
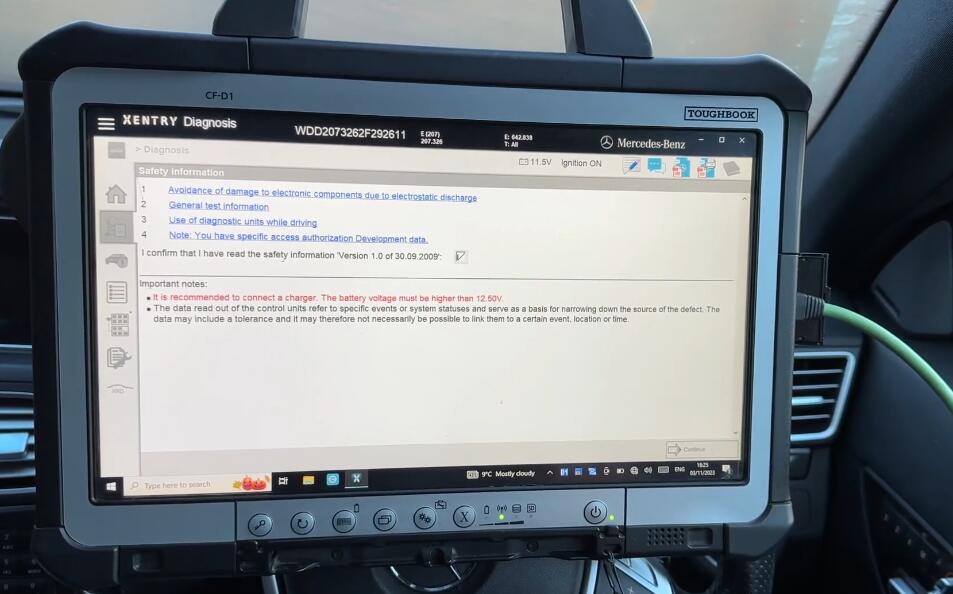
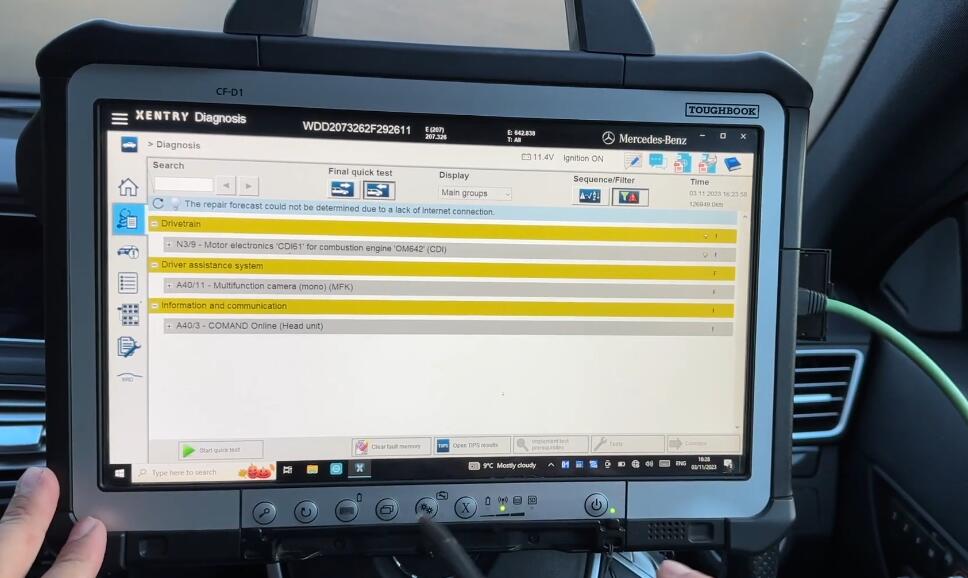
- Starting the Diagnostic Test: Look for the padlock icon to confirm the system is ready, then click on ‘Start Quick Test’. This initializes the system checks and module diagnostics. Be patient as this might take a moment.
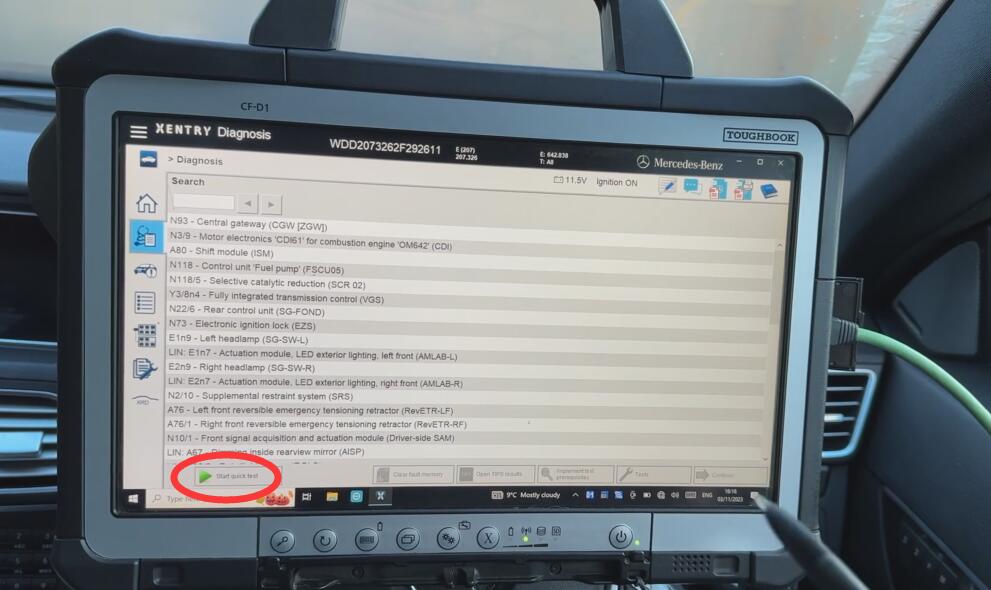
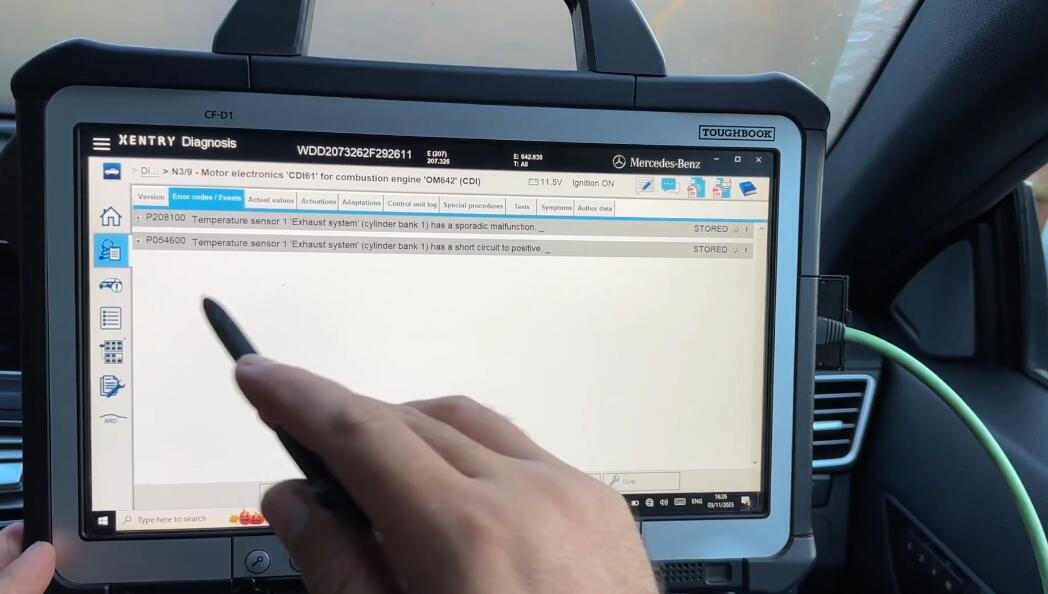
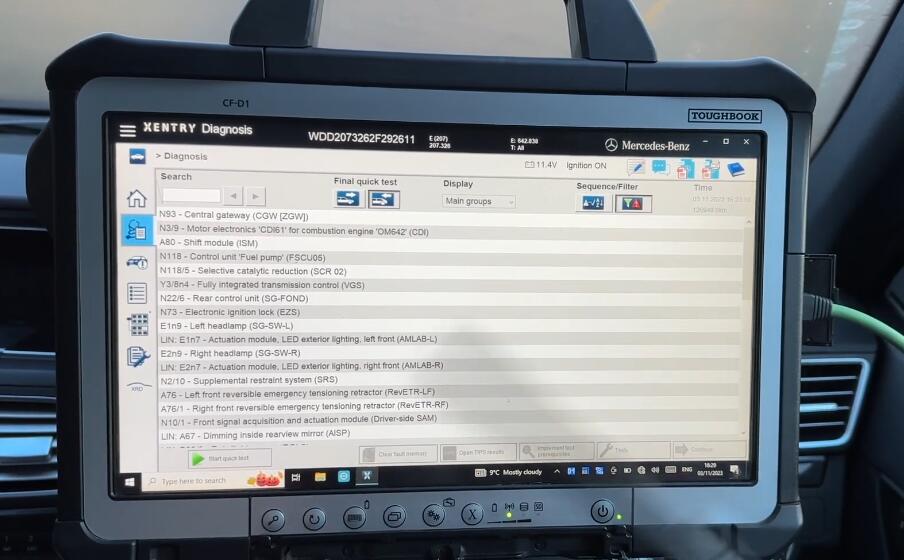
- Analyzing the Results: Once the quick test is complete, you’ll see a list of modules checked. Green ticks indicate no faults, an ‘F’ indicates stored faults, and ‘CF’ denotes current and stored faults. Specific icons will highlight critical issues contributing to engine warning lights.
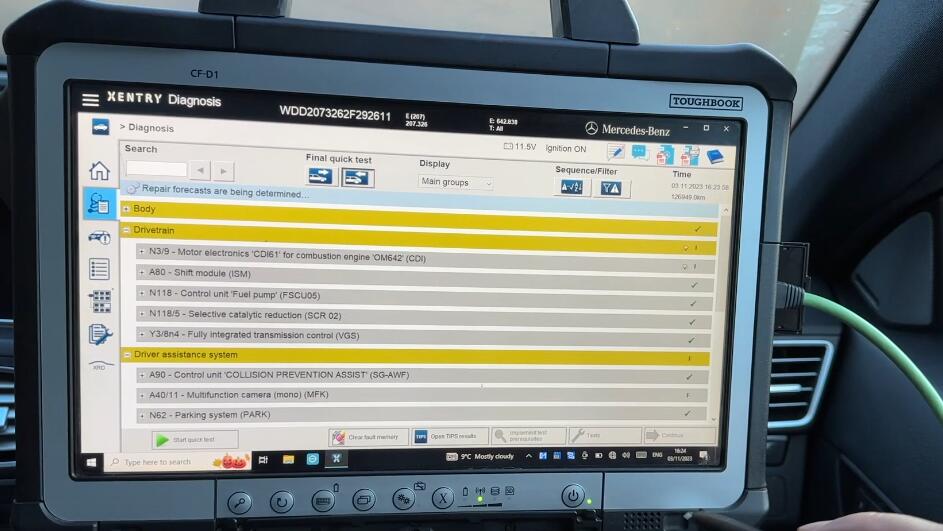
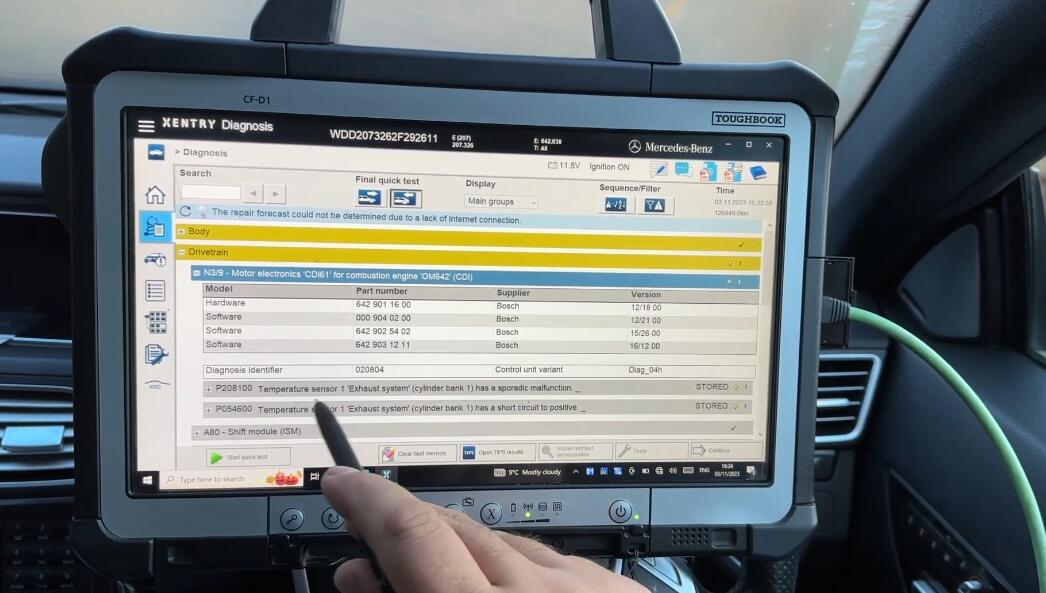
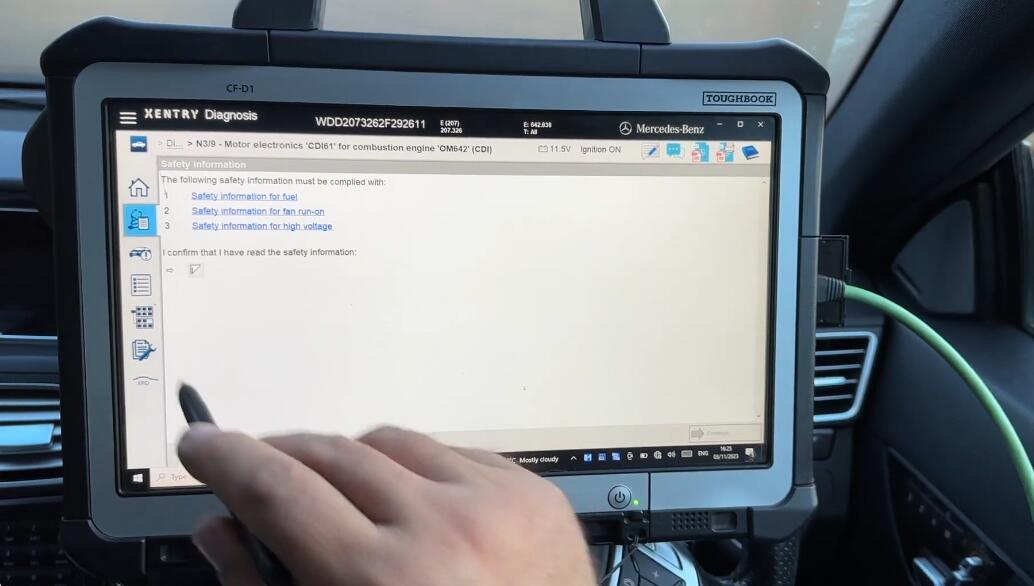
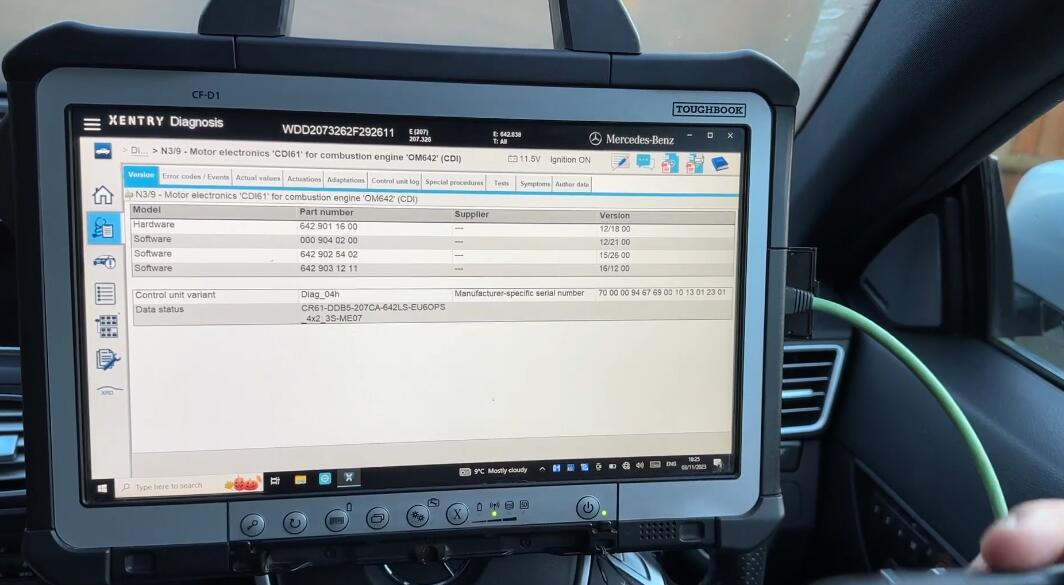
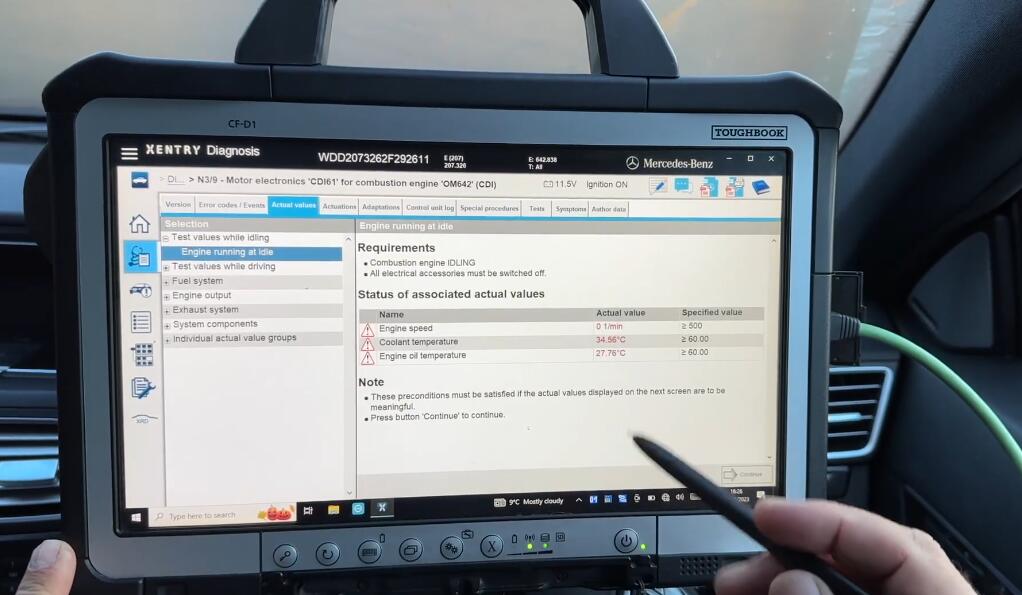
- Exploring Fault Details: Select a module with faults to view detailed error reports and real-time data. This section provides insights into what’s functioning within normal parameters and what isn’t.
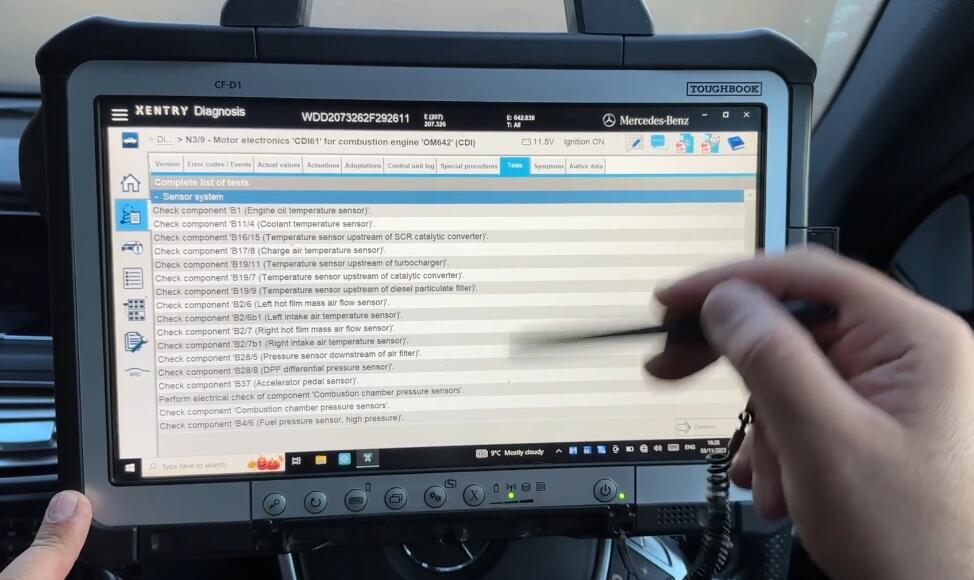
- Performing Functions: Here, you can perform tests, adjust settings, or initiate part replacements without running the engine. This includes tasks like shutting off or starting an injector, which is part of the system’s adaptation and coding capabilities.

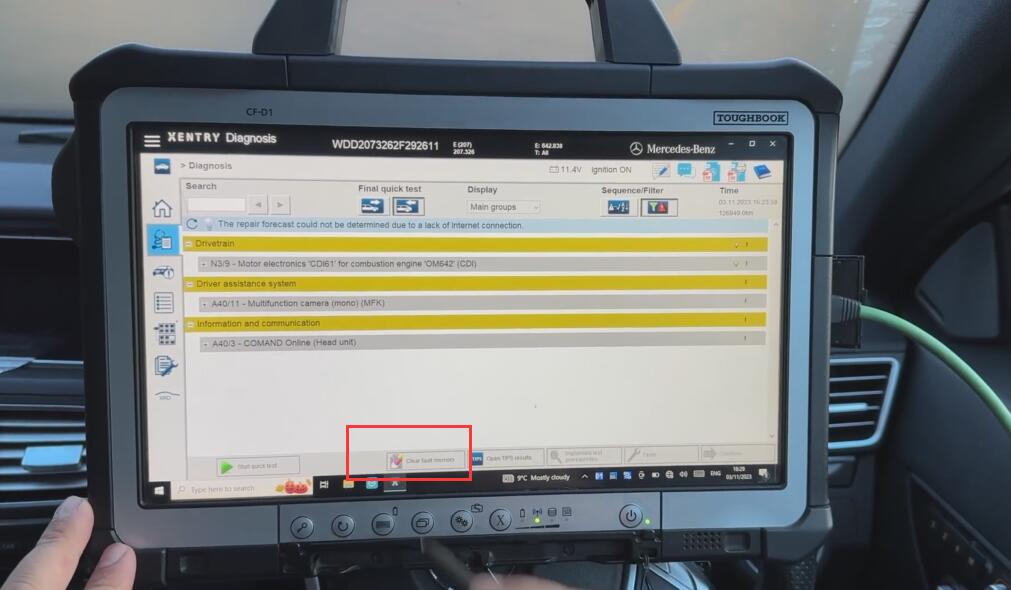
- Clearing Faults: After diagnosing and perhaps rectifying issues, you can clear the fault codes. Remember, clearing a stored fault (‘SF’) doesn’t fix a current issue, which might cause the warning light to return once the engine reaches operating temperature again.
- Further Actions: Following the diagnosis, you can use the Electronic Parts Catalog (EPC) to identify and order necessary parts and the Workshop Information System (WIS) for repair instructions and time estimates.
That’s it for today’s quick demonstration on using the Xentry C4 DOIP for Mercedes diagnosis. For more detailed tutorials on using additional features like the EPC and WIS, stay tuned to our channel. Don’t forget to visit our website https://www.obd2tool.com for purchasing information.