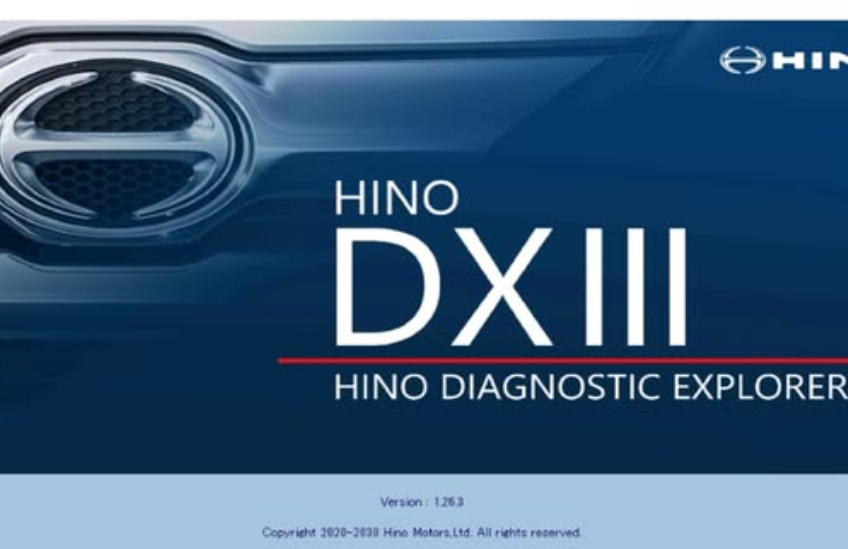
Hino DX3, also known as Hino Diagnostic Explorer 3, is diagnostic software designed for supported Hino commercial trucks. It supports fault-code diagnosis, live-data monitoring, active tests, service procedures, vehicle configuration, and supported ECU programming functions.
This guide walks new users through the complete Hino DX3 installation and initial setup process, including:
- Recommended laptop requirements
- Compatible diagnostic hardware
- DX3 software installation
- User login and password setup
- Software updates
- Vehicle connection
- Diagnostic workflow
- Common communication problems
Important: Available functions depend on the Hino model, engine, ECU, model year, software version, diagnostic interface, and user authorization. Always confirm compatibility before performing programming or configuration work.
Recommended Hardware Requirements
For a smoother Hino DX3 installation and diagnostic experience, we recommend using a dedicated Windows diagnostic laptop.
Recommended Laptop Specifications
- Operating System: Windows 10 or Windows 11, 64-bit
- Processor: Intel Core i5 or equivalent
- Memory: 8 GB RAM or more
- Storage: At least 20 GB of free space
- Ports: Available USB port
- Internet: Stable broadband connection
Internet access may be required for software installation, login, updates, activation, calibration downloads, or other online functions.
Actual requirements may vary depending on the DX3 release and installation package.
Recommended Diagnostic Adapter
A compatible vehicle communication interface is required to connect Hino DX3 to the truck.
One commonly used heavy-duty diagnostic interface is the NEXIQ USB-Link 3, which supports a wide range of commercial vehicle diagnostic applications.
NEXIQ USB-Link 3
View NEXIQ USB-Link 3 Diesel Truck Diagnostic Tool
Before using any interface with Hino DX3, confirm:
- DX3 compatibility
- Correct Windows driver
- Required vehicle-side cable
- Supported Hino model and model year
- Support for the diagnostic or programming function you need
Don’t assume every J2534 or heavy-duty adapter provides the same DX3 functions.
What Can Hino DX3 Do?
Hino DX3 provides diagnostic, monitoring, testing, service, and configuration functions for supported Hino electronic systems.
Diagnostics
Typical diagnostic functions include:
- Read diagnostic trouble codes
- Clear supported DTCs
- View freeze-frame information
- Monitor live ECU data
- View sensor values
- Check system status
- Review fault information
- Scan supported vehicle control modules
Service and Active Test Functions
Depending on the vehicle and ECU, available functions may include:
- DPF/DPR service procedures
- Aftertreatment-related resets
- Engine oil or maintenance resets
- Injector-related procedures
- Fuel-system service functions
- EGR system tests
- SCR/DEF system checks
- Actuator tests
- Sensor learning or calibration procedures
Programming and Configuration
Supported vehicles may allow functions such as:
- Idle shutdown settings
- PTO parameter adjustment
- Vehicle speed-related parameters
- ECU replacement setup
- Sensor calibration
- Vehicle configuration changes
- Supported ECU programming or reprogramming
Programming availability depends on the vehicle, ECU, calibration files, DX3 installation, and required authorization.
Utility Functions
DX3 may also provide useful workshop functions such as:
- Saving diagnostic information
- Recording ECU data
- Reviewing stored diagnostic data
- Diagnostic report generation
- Data logging
- Screenshot capture
Need Hino DX3 Diagnostic Software?
OBD2TOOL offers Hino Diagnostic Explorer 3 DX3 diagnostic software for Hino truck diagnostic applications.
View Hino Diagnostic Explorer 3 DX3 Software
Before ordering, confirm your:
- Hino model and model year
- Engine type
- Diagnostic interface
- Windows operating system
- Required diagnostic or programming functions
How to Install and Set Up Hino DX3
Before you start, install the correct driver for your diagnostic interface and make sure Windows recognises the adapter.
Also verify that your laptop has a stable internet connection.
Step 1: Run the Hino DX3 Application
Locate the Hino DX3 shortcut on the Windows desktop and launch the application.
Insert original image here:

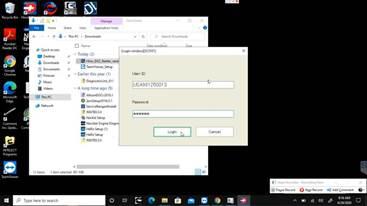
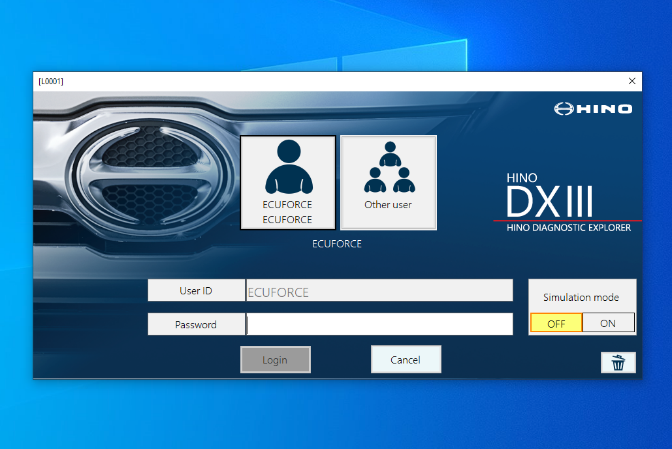
Step 2: Enter Your Hino DX3 Login Information
Enter the User ID and password supplied with your authorized DX3 account or software package.
Enter the credentials exactly as provided.
Insert original image here:
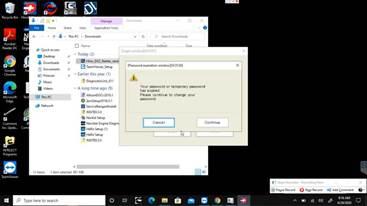
Step 3: Continue to the Password Change Screen
During the first login, a Password Expiration message may appear.
Click Continue to change the initial password.
Not every DX3 installation or account will display this screen.
Insert original image here:
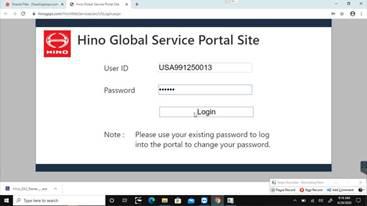
Step 4: Log In to the Hino Service Portal
The password-change process may open the applicable Hino service portal.
Sign in using the account information provided for your DX3 installation.
Insert original image here:
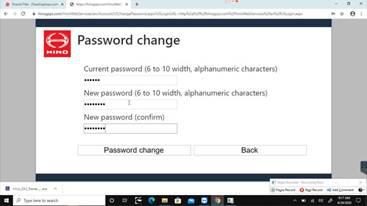
Step 5: Change the Password
On the Password Change page, enter a new password that meets the security requirements shown.
Use a strong password that you don’t reuse for unrelated accounts.
Insert original image here:
Step 6: Confirm the Password Change
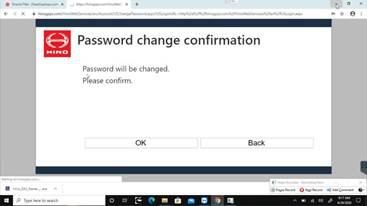
If the new password is accepted, a Password Change Confirmation message should appear.
Click OK, then close the password-change window.
Insert original image here:
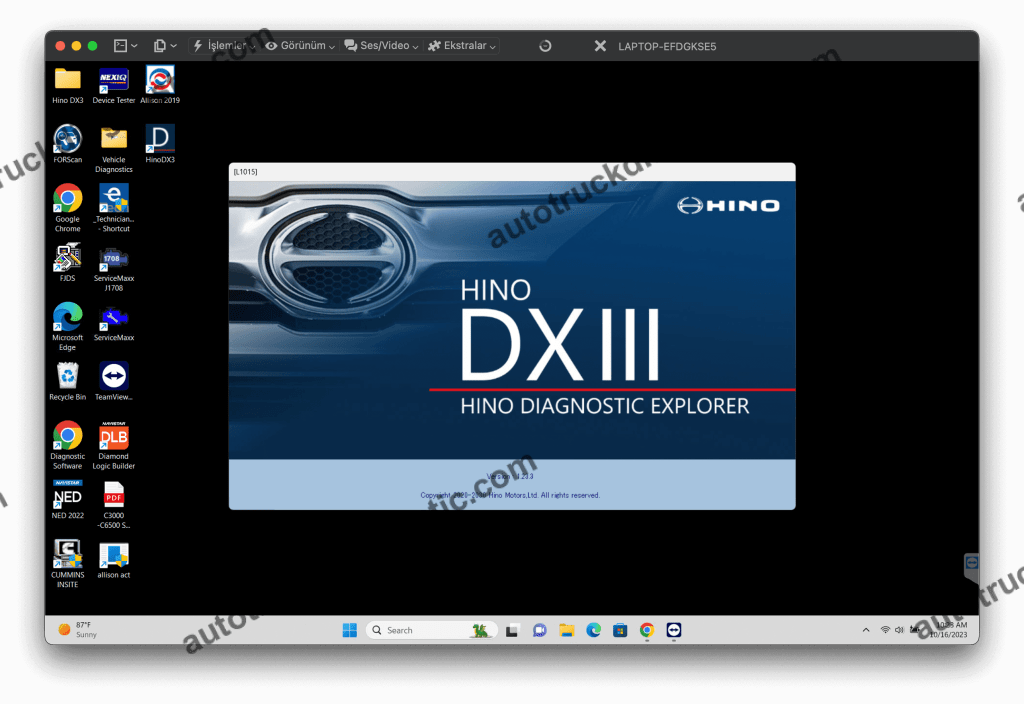
Step 7: Launch DX3 Again
Return to the Windows desktop and reopen the Hino DX3 application.
Insert original image here:
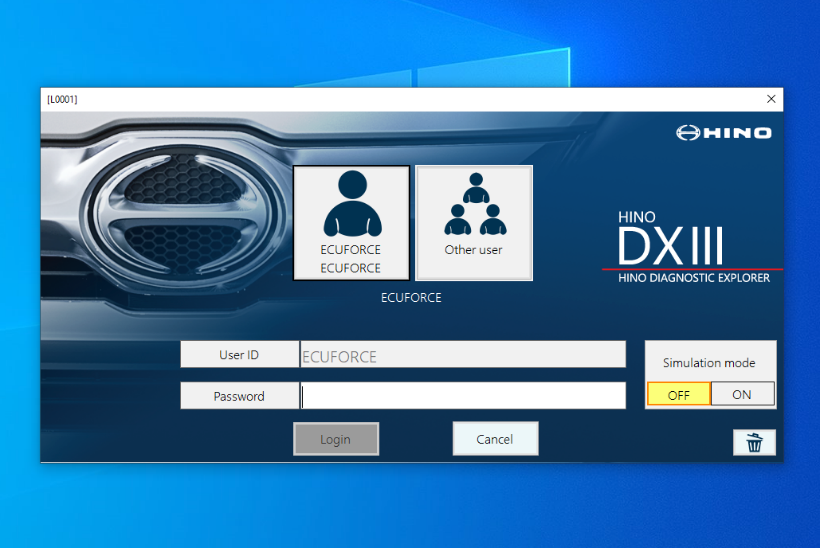
Step 8: Log In With the New Password
Enter your Hino DX3 User ID and the new password.
If login fails, check:
- Username spelling
- Password capitalization
- Keyboard layout
- Internet connection
- Account status
Avoid repeatedly entering an incorrect password because some account systems may temporarily restrict access after multiple failed attempts.
Insert original image here:
Updating Hino DX3
After logging in, DX3 may automatically check for available software updates.
Step 9: Allow DX3 to Check for Updates
Launch DX3 and allow the application to complete its update check.
If a software update is available, an update notification should appear.
Keep the original Step 9 image here.
Step 10: Download the Available Update
If an update window appears, select Yes to begin the download.
If no update window appears, continue to Step 18.
Keep the original Step 10 image here.
Step 11: Approve the Windows UAC Prompt
After the update has downloaded, Windows may display a User Account Control prompt.
Click Yes to allow the installer to continue.
Keep the original Step 11 image here.
Step 12: Open the InstallShield Wizard
When the InstallShield Wizard appears, click OK.
Insert original image here:
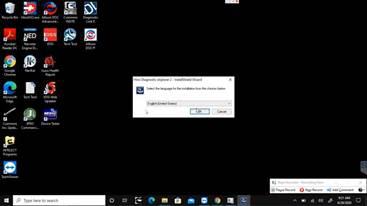
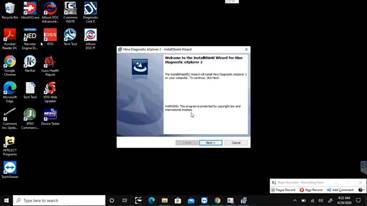
Step 13: Continue the Installation
Click:
Next >
to continue.
Insert original image here:
Step 14: Accept the License Agreement
Read the software license agreement.
If you agree to the terms, select the appropriate option and click:
Next >
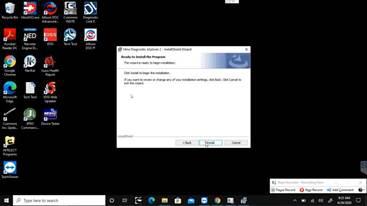
Step 15: Install the DX3 Update
Click Install to begin the update installation.
Do not restart or shut down the laptop during the installation.
Insert original image here:
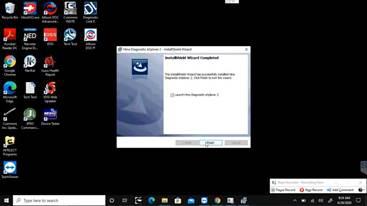
Step 16: Finish the Installation
When the installation completes, click:
Finish
Insert original image here:
Step 17: Return to the DX3 Login Window
The DX3 login window may open automatically.
If it does not, launch Hino DX3 manually from the Windows desktop.
Insert original image here:
Step 18: Complete the Update Check
DX3 may perform another update check.
When the check has completed, click Next at the bottom of the window.
Step 19: Accept the Security Conditions
A Security Conditions window may appear.
Read the displayed information and select Yes if you agree and want to continue.
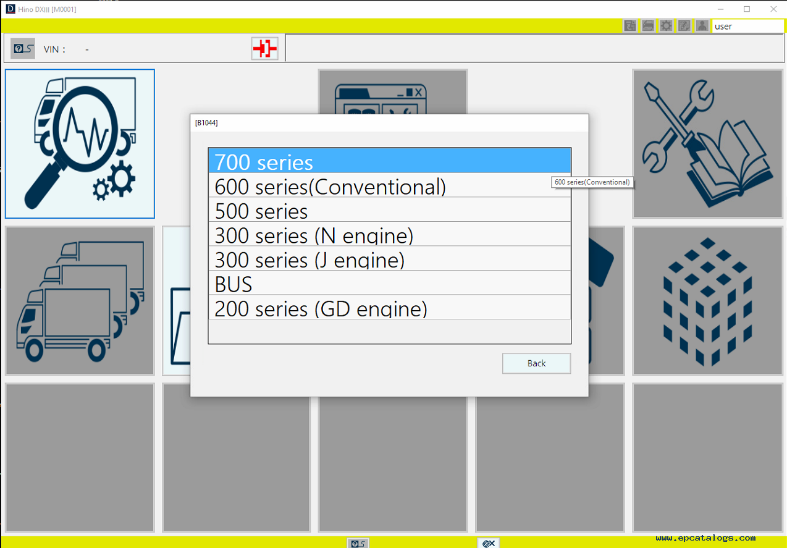
Step 20: Open the DX3 Diagnosis Page
After the setup process has completed successfully, Hino DX3 should open to the Diagnosis page.
The basic software installation and login setup are now complete.
Insert original image here:
Step 21: Store Your Login Information Securely
Keep your Hino DX3 username and other required account information in a secure location.
Avoid storing the username and password together in an unprotected text file on the Windows desktop.
A secure password manager or protected credential-storage method is preferable.
How to Connect Hino DX3 to the Truck
Once DX3 is installed and working, connect the diagnostic hardware to the truck.
A typical connection path is:
Laptop → Hino DX3 → Diagnostic Interface → Vehicle Cable → Truck Diagnostic Port → Vehicle ECUs
Connection Procedure
- Close unnecessary diagnostic programs.
- Connect the diagnostic interface to the laptop.
- Connect the correct vehicle cable to the interface.
- Connect the cable to the truck diagnostic connector.
- Turn the ignition ON as required.
- Launch Hino DX3.
- Select or confirm the correct communication interface.
- Identify the vehicle.
- Allow DX3 to communicate with the available ECUs.
- Verify that vehicle communication is established.
If you are using a NEXIQ interface, make sure the correct driver is already installed before starting DX3.
Basic Hino DX3 Diagnostic Workflow
Once communication has been established, use a structured diagnostic process:
Connect Vehicle → Identify Vehicle → Scan ECUs → Read DTCs → Check Live Data → Perform Tests → Repair → Clear Codes → Retest
1. Scan the Vehicle
Begin with a complete system scan whenever possible.
Save or record the original fault information before clearing any codes.
2. Read DTC Information
Check:
- Active DTCs
- Stored DTCs
- Fault frequency
- Related operating conditions
- Freeze-frame information when available
Do not automatically replace a component simply because its name appears in a DTC.
A diagnostic trouble code usually identifies the system or condition the ECU detected, not necessarily the failed part.
3. Review Live Data
Compare related parameters such as:
- Engine speed
- Temperatures
- Pressures
- Sensor voltages
- Switch status
- Aftertreatment values
- Commanded versus actual values
Relationships between several parameters are often more useful than a single data value.
4. Perform Active Tests
Where supported, DX3 can command certain actuators or systems for testing.
Only perform active tests when the truck and surrounding work area are safe.
5. Repair and Retest
After completing the repair:
- Clear applicable DTCs.
- Restart the vehicle if required.
- Scan the ECUs again.
- Confirm that the fault does not return.
- Recheck live data.
- Perform an operational or road test when appropriate.
Hino DX3 ECU Programming Safety
Programming requires more care than normal fault-code diagnosis.
Before beginning an ECU programming or reprogramming procedure:
- Connect a suitable battery support unit.
- Confirm the correct vehicle identification.
- Verify the correct ECU and calibration.
- Use a reliable wired diagnostic connection where possible.
- Disable Windows sleep and hibernation.
- Do not disconnect the USB cable.
- Do not unplug the diagnostic interface.
- Do not switch the ignition off unless instructed.
- Do not interrupt the programming process.
Power loss or communication loss during ECU programming can result in an incomplete programming session and may prevent the control module from operating normally.
Common Hino DX3 Problems and Solutions
DX3 Does Not Recognize the Diagnostic Adapter
Check:
- Interface driver installation
- USB connection
- Windows Device Manager
- Adapter configuration
- Vehicle-side power
- Diagnostic cable
- DX3 interface selection
Try connecting the adapter directly to the laptop, not through a USB hub.
DX3 Cannot Communicate With the Truck
Determine whether:
- One ECU is offline, or
- All vehicle modules are offline
If every control module is unavailable, first check:
- Diagnostic interface
- DLC power
- Ground
- Vehicle ignition status
- Diagnostic cable
- Communication-network wiring
- Interface configuration
Don’t assume a vehicle ECU has failed immediately.
DX3 Login Fails After Changing the Password
Make sure you are entering the new password, not the previous or temporary password.
Also check:
- Caps Lock
- Keyboard layout
- Internet connection
- Username
- Account status
Hino DX3 Update Will Not Install
Check that:
- The laptop has sufficient free storage.
- Windows is not waiting for a restart.
- You have permission to install software.
- The update downloaded completely.
- Security software has not blocked the installer.
Avoid downloading replacement DX3 installation packages from unknown sources.
NEXIQ USB-Link 3 Is Not Detected
If DX3 cannot communicate through the NEXIQ USB-Link 3:
- Verify that the NEXIQ driver is installed.
- Check Windows Device Manager.
- Disconnect and reconnect the USB cable.
- Confirm vehicle-side power.
- Verify the correct diagnostic cable.
- Confirm that the correct interface is selected in the diagnostic software.
- Restart DX3 after changing interface settings.
Hino DX3 Installation Checklist
Before connecting to a customer’s truck, confirm:
- Hino DX3 installed successfully
- DX3 login works
- Required updates completed
- Diagnostic-interface driver installed
- Windows recognizes the diagnostic adapter
- Correct vehicle cable available
- Hino model compatibility confirmed
- Internet connection available when required
- Vehicle battery voltage is stable
- Battery support is available before ECU programming
Completing these checks in advance can prevent many communication and programming problems.
Frequently Asked Questions
What is Hino DX3?
Hino DX3, or Hino Diagnostic Explorer 3, is diagnostic software used with supported Hino truck electronic systems for fault-code diagnosis, ECU data monitoring, active tests, service procedures, configuration, and supported programming functions.
Can I Use NEXIQ USB-Link 3 With Hino DX3?
NEXIQ USB-Link 3 is a commonly used heavy-duty diagnostic interface, but compatibility can depend on the DX3 installation, vehicle, driver, and required function.
Always confirm compatibility for your specific setup.
View NEXIQ USB-Link 3 on OBD2TOOL
Does Hino DX3 Work With Every Hino Truck?
No.
Coverage varies according to model year, engine, market, ECU, and software version. Confirm compatibility before purchasing or attempting diagnosis.
Can Hino DX3 Reprogram an ECU?
Supported DX3 installations can provide ECU programming or reprogramming functions, but availability depends on the vehicle, ECU, calibration data, software environment, and required authorization.
Does DX3 Require Internet Access?
Internet access may be required for:
- Login
- Software updates
- Activation
- Calibration downloads
- Other online services
Requirements can vary depending on the DX3 installation.
Why Does DX3 Not Detect My Adapter?
Common causes include:
- Missing interface driver
- Incorrect driver version
- USB connection problem
- Incorrect interface selection
- No power at the truck diagnostic connector
- Incorrect cable
- Unsupported adapter configuration
Get Hino DX3 Software and Diagnostic Hardware
For a complete Hino diagnostic setup, you will normally need both the DX3 diagnostic software and a compatible vehicle communication interface.
Hino Diagnostic Explorer 3 DX3 Software
Use DX3 for supported Hino diagnostics, live-data monitoring, testing, service procedures, and available configuration functions.
View Hino Diagnostic Explorer 3 DX3 Software
NEXIQ USB-Link 3 Diagnostic Interface
For technicians working on multiple commercial truck platforms, the NEXIQ USB-Link 3 is a useful heavy-duty vehicle communication interface option.
View NEXIQ USB-Link 3 Diesel Truck Diagnostic Tool
Before ordering either product, confirm your vehicle, engine, operating system, interface, cable requirements, and required diagnostic functions.
Conclusion
Installing Hino DX3 is only the first part of building a reliable Hino diagnostic setup.
For successful vehicle communication, the DX3 software, Windows laptop, diagnostic-interface driver, communication adapter, vehicle cable, and truck electronic system must all work together correctly.
For normal diagnostics, always save the original fault information before clearing DTCs.
For ECU programming or configuration changes, verify compatibility first and maintain stable vehicle voltage and diagnostic communication throughout the entire procedure.