The Nexiq USB-Link 3 is a versatile diagnostic tool designed to facilitate vehicle diagnostics and communication with various software applications across a wide range of vehicle types. Here’s a general guide on how to use the Nexiq USB-Link 3. This guide assumes you have the correct drivers installed, especially if you’re using Windows 10 64-bit, as mentioned in your previous message.
Setting Up the Nexiq USB-Link 3
- Driver Installation: Before connecting the Nexiq USB-Link 3 to your computer, ensure you have the latest drivers installed. As you’ve discovered, the drivers are compatible with Windows 10 64-bit. Drivers can usually be downloaded here https://www.obd2tool.com/goods-10653-NEXIQ-3-USB-Link-Software-Diesel-Truck-Diagnostic-Tool.html
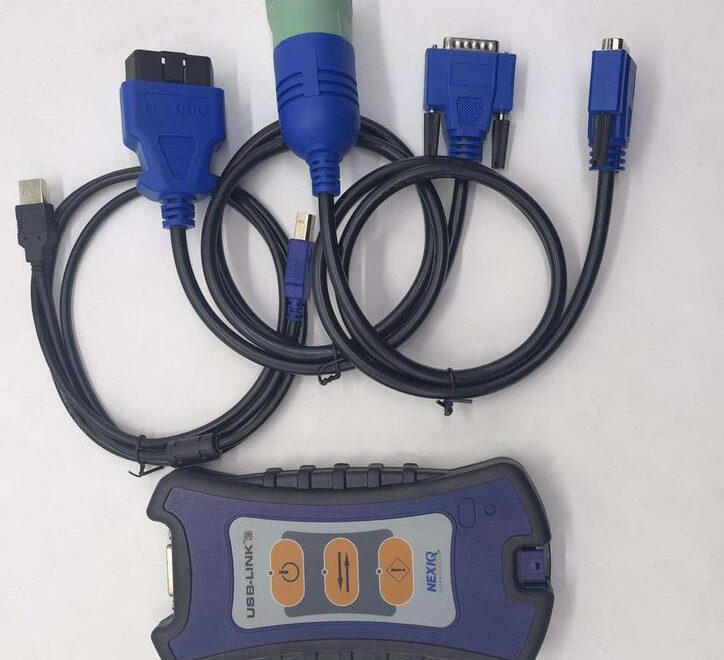
- Connecting to Your Computer: Connect the Nexiq USB-Link 3 to your computer using the provided USB cable. Your computer should recognize the device and complete any additional driver installations if necessary.
- Vehicle Connection: Connect the Nexiq USB-Link 3 to the vehicle’s diagnostic port using the appropriate cable. The type of cable can vary depending on the vehicle’s make and model, as the Nexiq USB-Link 3 supports multiple protocols and connectors.
- Software Configuration: Open the diagnostic software you plan to use (e.g., JPRO, Allison DOC, Detroit Diagnostic Link, etc.). You might need to configure the software settings to recognize the Nexiq USB-Link 3 as the communication interface. This typically involves selecting it from a list of hardware interfaces in the software’s settings or preferences menu.
Using the Nexiq USB-Link 3 for Diagnostics
- Performing Diagnostics: With the software configured, you can now perform various diagnostic tasks. These can range from reading and clearing fault codes, monitoring live data from different sensors and systems, performing automated tests, and configuring vehicle parameters.
- ECU Programming and Service Tests: Although you haven’t programmed any ECUs yet, the Nexiq USB-Link 3 is capable of facilitating this, along with other service tests, provided the software application supports these features. Always ensure you follow the software’s guidance and the vehicle manufacturer’s procedures when performing these advanced tasks.
- Using With J1939 and Other Protocols: Your setup includes testing communications with an engine J1939 single channel simulator, demonstrating the device’s capability to interact with various vehicle communication protocols. Ensure your diagnostic software is set up to communicate over the correct protocol for the vehicle or system you are diagnosing.
Tips for Effective Use
- Software Updates and Compatibility: Keep your diagnostic software updated to ensure compatibility with the latest vehicles and systems. As you noted, Windows updates may sometimes disrupt software or driver functionality, so it’s wise to have a stable setup and backup plans before performing critical updates.
- Consult Documentation: Always refer to the Nexiq USB-Link 3 manual and the documentation for your specific diagnostic software for detailed instructions on performing specific tasks or troubleshooting any issues that arise.
- Vehicle Compatibility: Ensure the vehicle you are working on is supported by both the Nexiq USB-Link 3 and the diagnostic software you intend to use. Compatibility information is typically available from the tool and software manufacturers.
Using the Nexiq USB-Link 3 effectively requires a combination of proper setup, understanding of the vehicle and diagnostic software, and adherence to safety and procedural guidelines.