Status Tool on Caterpillar ET Software
Status Tool
Accessing Status
The Status function monitors ECM data as it occurs.
To run the Status function:
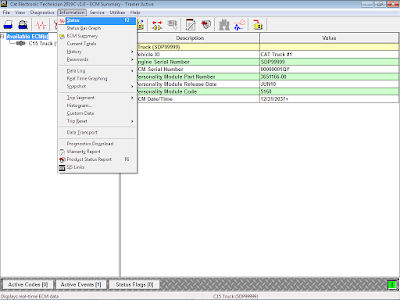
* Select “Status” from the “Information” menu, or
* Push the F2 key (if the default function keys are set), or
* Click the Status Tool icon on the toolbar (if default is set), as Figure 1.1 above.
The Status screen is displayed.
The Status screen has the following areas:
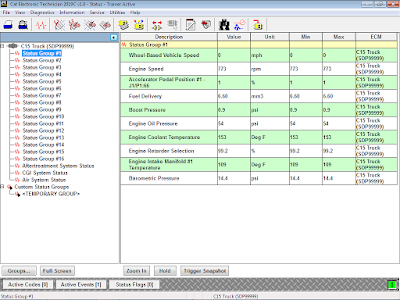
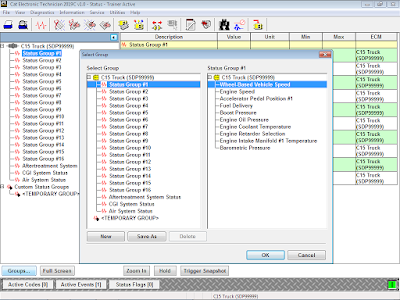
A). Tree Area
The tree area is located on the left side of the screen. This area lists each available ECM. Under each ECM is a list of status groups, as Figure 1.2 above.
To view an individual group of parameters, click on one of the Status Groups. The selected Status Groups parameters will appear in the display area. Or, use the up and down arrows on the keyboard to consecutively view each group and its parameters in the Display Area.
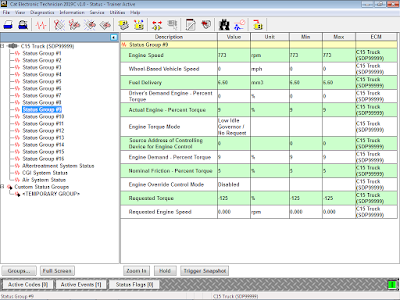
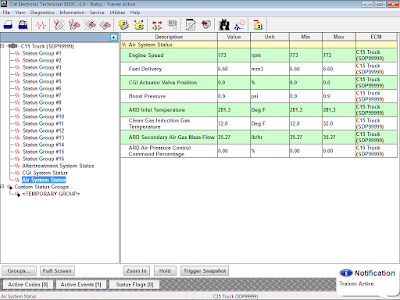
B). Display Area
The display area is located on the right side of the screen. To view a group of status parameters, double click on the Status Group. The corresponding status parameters will appear in the display area.
The Status display area has six columns displaying the following information:
* Description – name of the parameter.
* Value – status of the selected parameter.
* Unit – type of unit with which the value is measured.
* Min – lowest (minimum) values a status parameter has reached while being displayed.
* Max – highest (maximum) value a status parameter has reached while being displayed.
* ECM – ECM reading the parameter value.
If the service tool is unable to read a parameter value, “Unavailable,” “Not Installed,” or “Not Available” will appear in the Values column for that parameter.
Selecting a Group of Parameters
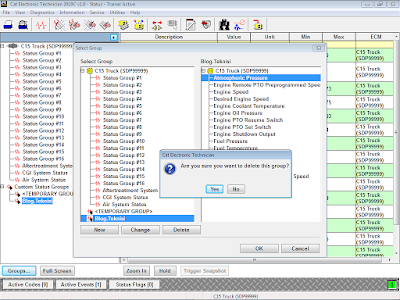
The Groups… button prompts the Select Group dialog box to be displayed. This dialog box displays available default groups of parameters to monitor and provides access for creating, changing, and deleting groups. This dialog box allows a group in the service tool to be reassigned.
* To select a group:Click the Groups… button. The Select Group dialog box is displayed.
* Highlight a group from the Select a group list box, and click OK. The service tool screen displays showing the selected group and its parameters.
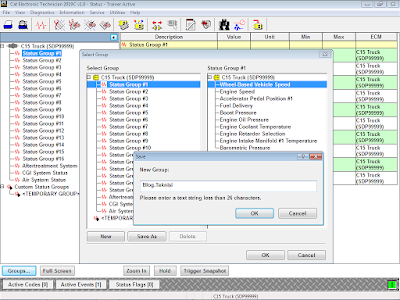
Creating a New Group
* To create a new group:Click the Groups… button. The Select Group dialog box is displayed.
* Click the New button to create a new group. The Save dialog box is displayed.
* Enter a name that will be used to identify the new group. To return to the Select Group dialog box without entering a name for the new group, click Cancel.
* When the name of the new group has been entered, click OK. The Maintain Groups dialog box is displayed.
* Highlight a parameter in the Available Parameters list box and click the right arrow button. This moves parameters, one at a time, from the Available Parameters list box to the Group list box. To move a parameter from the Group list box back to the Available Parameters list box, click the left arrow button.
* Click OK, or click the Save As button. The Select Group dialog box is displayed.
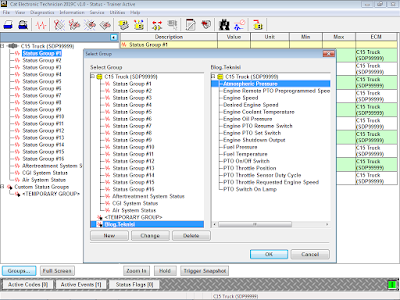

* Click Change, to change a group. Note: Default groups in the Select Group dialog box cannot be changed.
* Click Delete, to delete a group. The “Are you sure…” message box is displayed. Note: The Temporary group and default groups in the Select Group dialog box cannot be deleted. Click Yes to delete the group, or click No to return to the Select Group dialog box without deleting the group.