The Bendix EC-60 and EC-80 braking systems are known for their advanced features that enhance the safety and performance of commercial vehicles. One crucial aspect of these systems is the steering angle sensor, which plays a significant role in ensuring accurate braking response. In this article, we will guide you through the process of conducting a steering angle test and calibration using the JPRO diagnostic tool.
Why is Steering Angle Test and Calibration Important?
The steering angle sensor is responsible for measuring the position of the steering wheel and providing this information to the braking system. It enables the system to make precise calculations and adjustments based on the vehicle’s steering angle, ensuring optimal braking performance. Regular testing and calibration of the steering angle sensor are essential to maintain accurate and reliable braking system operation.
Related Contents:
JPRO Noregon Commercial Fleet Diagnostics 2024 Free Download
Noregon JPRO DLA+ 2.0 Adapter
This test allows for verification of steering angle sensor functionality and provides recalibration ability if necessary.
1 Select the Battery Voltage Test and press Enter or the Start button.
2 The test dialog will be displayed.
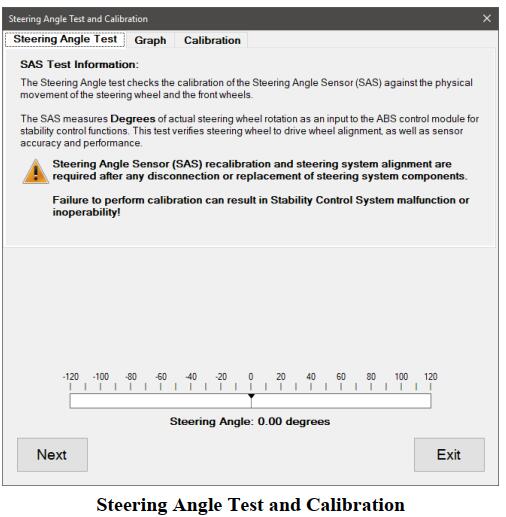
3 The Steering Angle Test tab guides the user through the diagnostic steps for ensuring proper steering angle alignment.
Select the Graph tab to view a graph of the monitored steering angle.
Select Calibration to run the recalibration procedure which relearns the current steering angle position as 0 degrees.
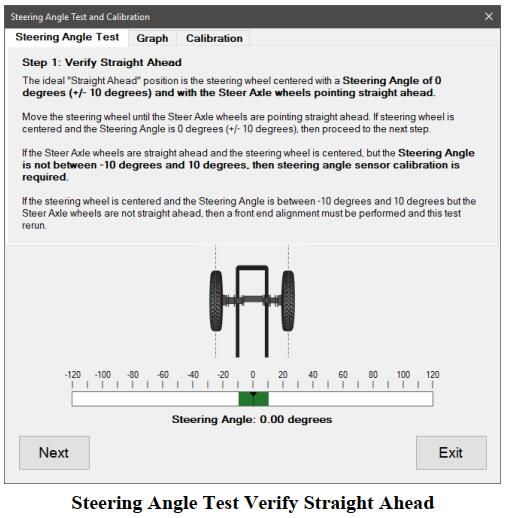
4 To begin the Steering Angle Test, select the Next button. Step 1 of the procedure provides instructions to verify straight ahead position of the steer axle wheels compared to the steering wheel. The green area on the steering angle number line shows the acceptable target range.
5 Select the Next button to continue.
6 Step 2 requires turning the steering wheel ¼ turn clockwise to the position indicated by the graphic. Compare the steering angle to the acceptable range which is also noted by the green target area on the number line.
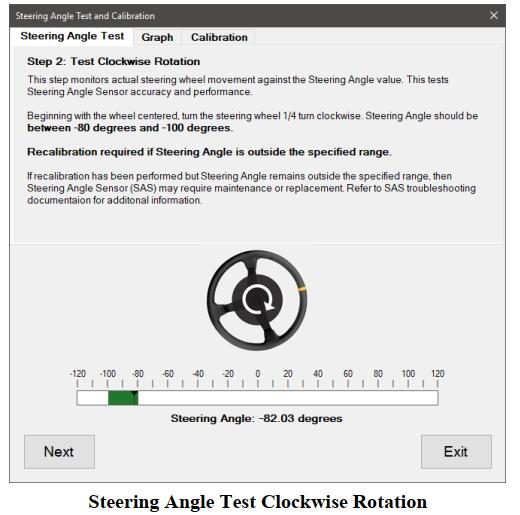
7 Click the Next button to continue. Noregon JPRO DLA+ 2.0 Adapter Kit
8 Step 3 requires turning the steering wheel ½ turn counterclockwise to the position indicated by the graphic.Compare the steering angle to the acceptable range which is also noted by the green target area on the number line.
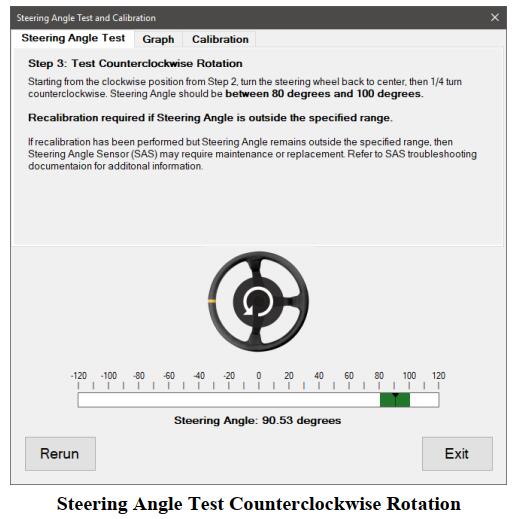
9 Selecting Rerun will return to step 1 of the Steering Angle Test.
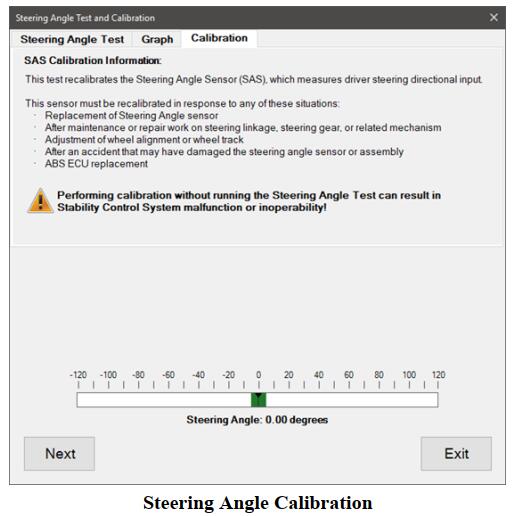
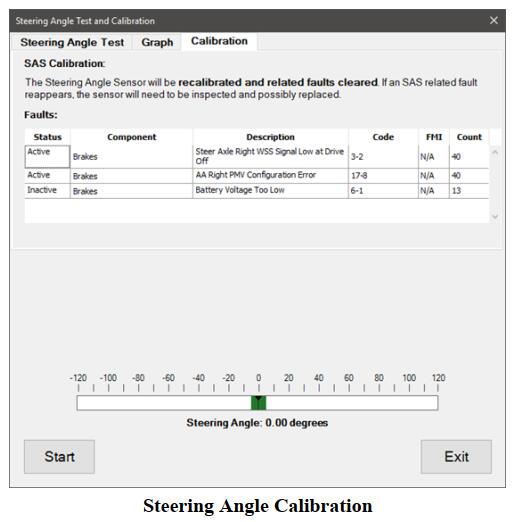
10 To perform Steering Angle Calibration, select the Calibration tab. Click Next to begin the calibration test.
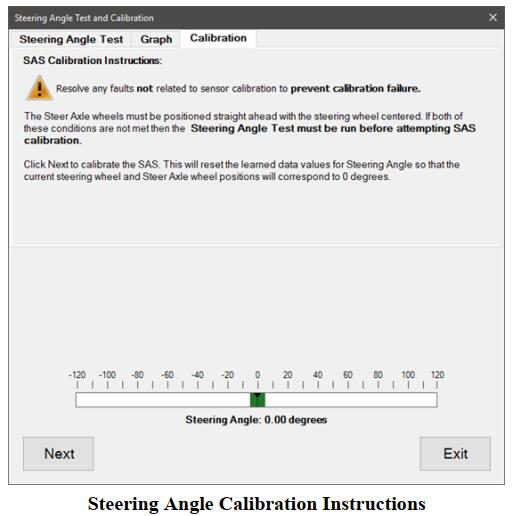
11 Test instructions are displayed which must be followed to ensure successful calibration. Any faults not related to
the steering angle sensor must be resolved before attempting calibration. The steer axle wheels must also be positioned straight ahead with the steering wheel centered. Click Next.
12 The SAS Calibration screen provides a fault grid that will only display braking system related faults. Click the Start button to perform the calibration.
13 When the test is completed a Calibration Successful message will be displayed. Click OK to dismiss this message.
14 When done, press the Exit button to return to the test selection dialog.
More topics about JPRO Diagnostic,please refer to:JPRO Diagnostics Guide