This guide provides step-by-step instructions for removing and installing the inverter on HINO 155, 155h, 195, and 195h series trucks equipped with the J05E engine.
Related Contents:
Nexiq USB-Link 3 Diagnostic Adapter
2025.03 HINO Diagnostic Explorer DX3/DX2 Diagnostic Software Free Download
Hino Diagnostic Explorer 3 (Hino DX3 v1.25.3) 2025.03 Diagnostic Software
Removing the Inverter
1. Remove the PCU
Refer to: HYBRID → HYBRID SYSTEM → PCU → REPLACEMENT → REMOVING THE PCU
2. Remove the Under Cover
Refer to: HYBRID → HYBRID SYSTEM → HV BATTERY → REPLACEMENT → REMOVING THE HV BATTERY ASSEMBLY
3. Disconnect the Bottom of the PCU
Refer to: HYBRID → HYBRID SYSTEM → HV BATTERY → REPLACEMENT → REMOVING THE HV BATTERY ASSEMBLY
4. Remove the Inverter
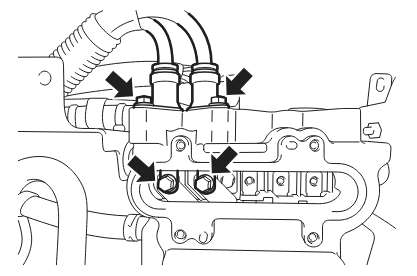
- Remove 4 bolts and detach the main battery cable.
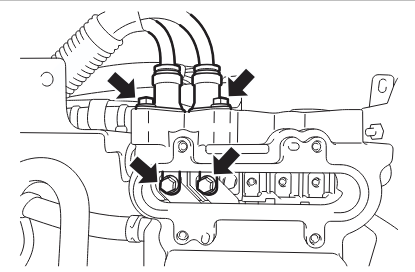
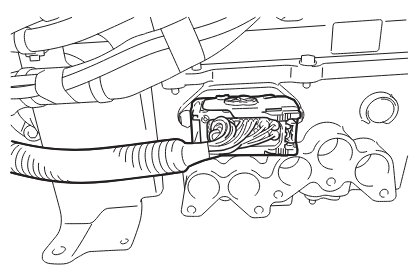
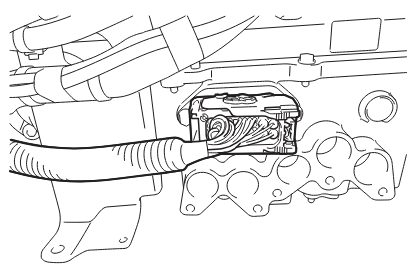
- Disconnect the electrical connector.
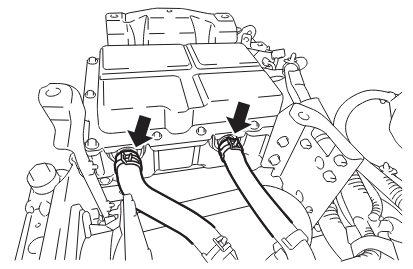
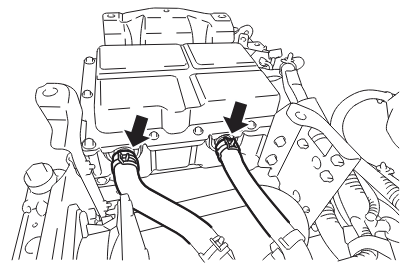
- Remove 2 clips and disconnect 2 coolant hoses.
CAUTION: Use a tray or similar container to catch coolant.
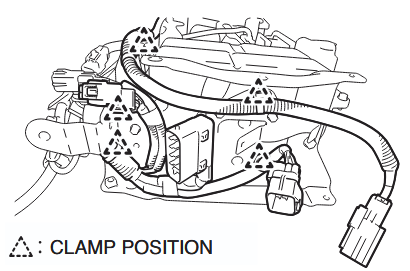
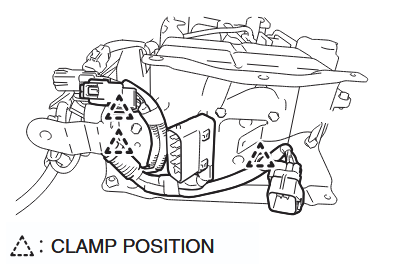
- Cut 5 harness clamps from Inverter Bracket No. 1.
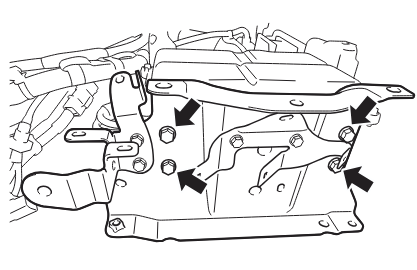
- Remove 4 bolts to detach Inverter Bracket No. 1 from the inverter.
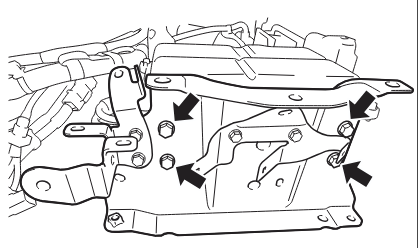
- Remove 4 bolts to detach Inverter Bracket No. 2 and Inverter Bracket No. 3 from the inverter.
Mounting the Inverter
1. Install the Inverter
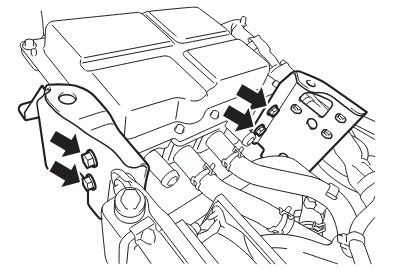
- Install Inverter Bracket No. 2 and No. 3 to the inverter using 4 bolts.
Torque: 19.0 N·m {194 kgf·cm, 14.0 lbf·ft}
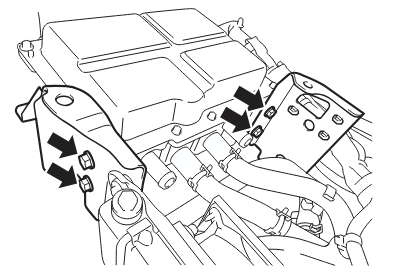
- Install Inverter Bracket No. 1 to the inverter using 4 bolts.
Torque: 19.0 N·m {194 kgf·cm, 14.0 lbf·ft}
- Attach 3 harness clamps to Inverter Bracket No. 1.
- Connect both coolant hoses and secure with 2 clamps.
- Reconnect the electrical connector.
- Connect the main battery cable with 4 bolts:
- Cable Side Torque: 9 N·m {92 kgf·cm, 6.6 lbf·ft}
- Terminal Side Torque: 7.2–10.8 N·m {73–110 kgf·cm, 5.3–8.0 lbf·ft}
CAUTION: Tighten the cable side first.
2. Add Coolant
Refer to: HYBRID → HYBRID SYSTEM → COOLANT → REPLACEMENT → ADD COOLANT
3. Mount the Bottom of the PCU
Refer to: HYBRID → HYBRID SYSTEM → HV BATTERY → REPLACEMENT → MOUNTING THE HV BATTERY ASSEMBLY
4. Mount the Under Cover
Refer to: HYBRID → HYBRID SYSTEM → HV BATTERY → REPLACEMENT → MOUNTING THE HV BATTERY ASSEMBLY
5. Mount the PCU
Refer to: HYBRID → HYBRID SYSTEM → PCU → REPLACEMENT → MOUNTING THE PCU
More case for HINO please refer to:HINO Trouble Repair