This article show a guide on how to configure a VOCOM to WLAN wireless mode using an access point.
Related Contents:
2022 Volvo PTT Premium Tech Tool PTT 2.8.150 & 2.7.116 & 2.6 All Version Free Download
How to Install Volvo Premium Tech Tool PTT Software
Volvo Vocom 88890300 Adapter
Procedures:
Step 1: Connect VOCOM unit/cables to the PC and a Vehicle (key off).
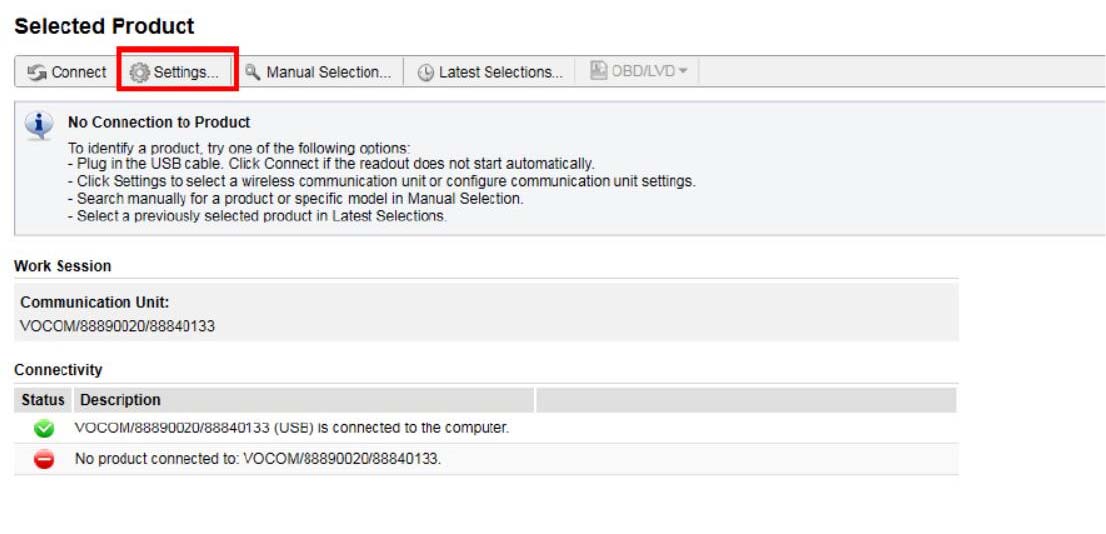
Step 2: Click the “Settings” button.
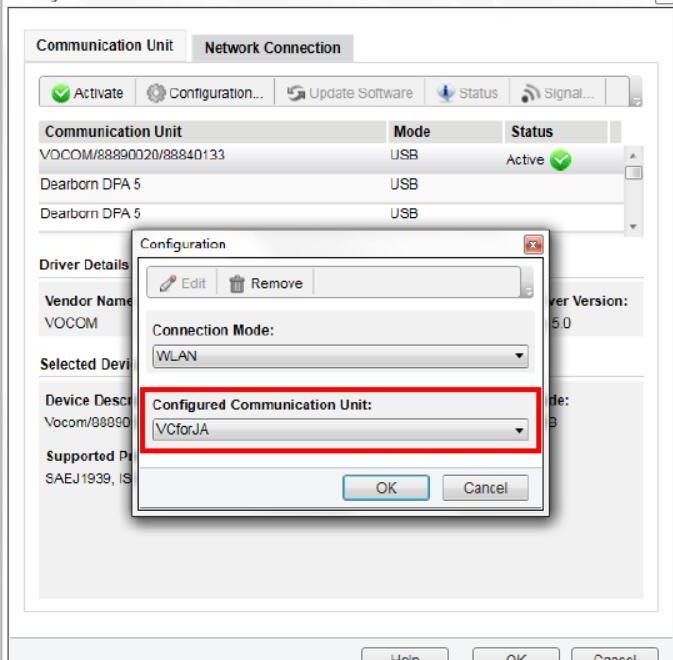
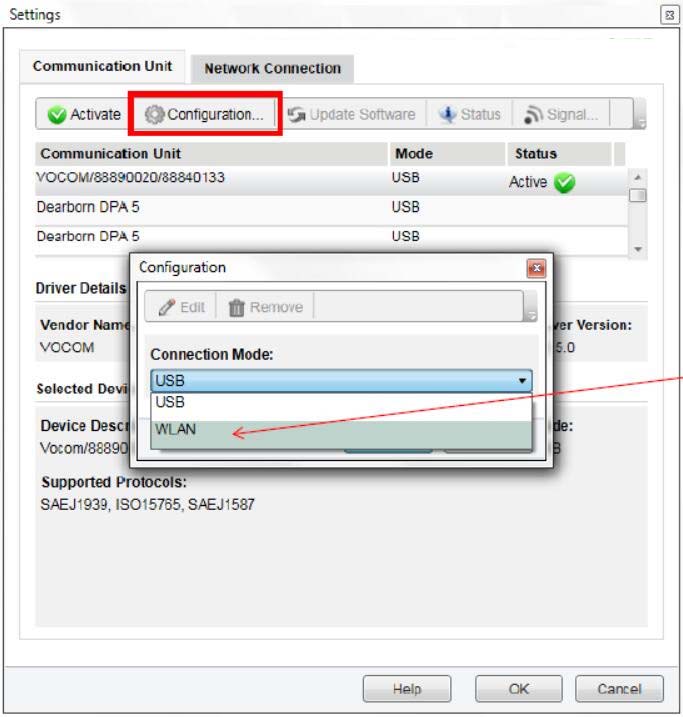
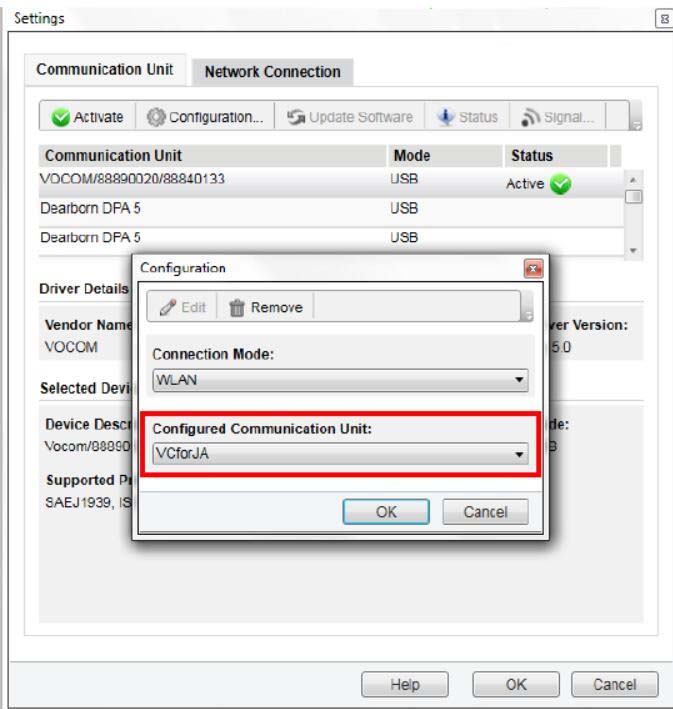
Step 3: In the Settings menu click the “Configuration” button. The Configuration window will open. Select WLAN.
Step 4: To identify the configured communication unit. Enter a name of your choice and select OK. (ex. Garys_Adapter or VCforJA) NOTE: If you have more than one VOCOM, each will require a separate configuration and name
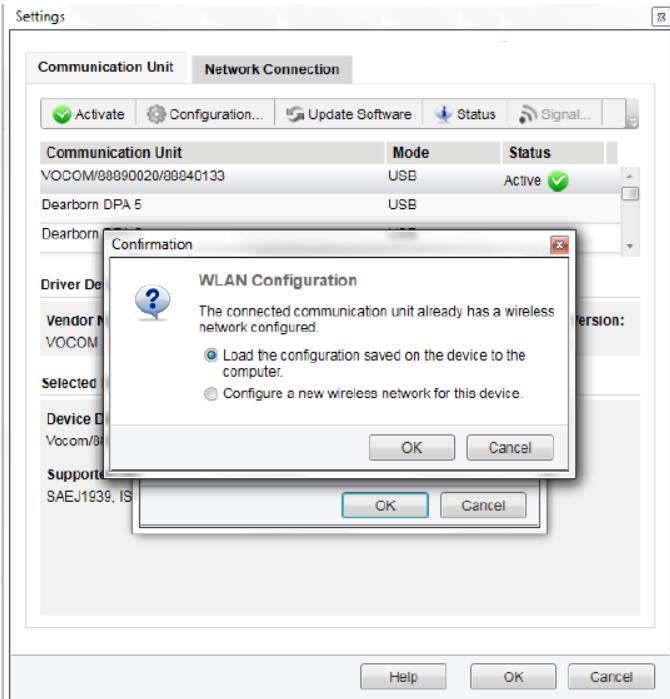
If the connected device was already configured, a confirmation message will pop up asking if you want to load the configuration or set up a new configuration.
Step 5: Make a selection here for your configuration.
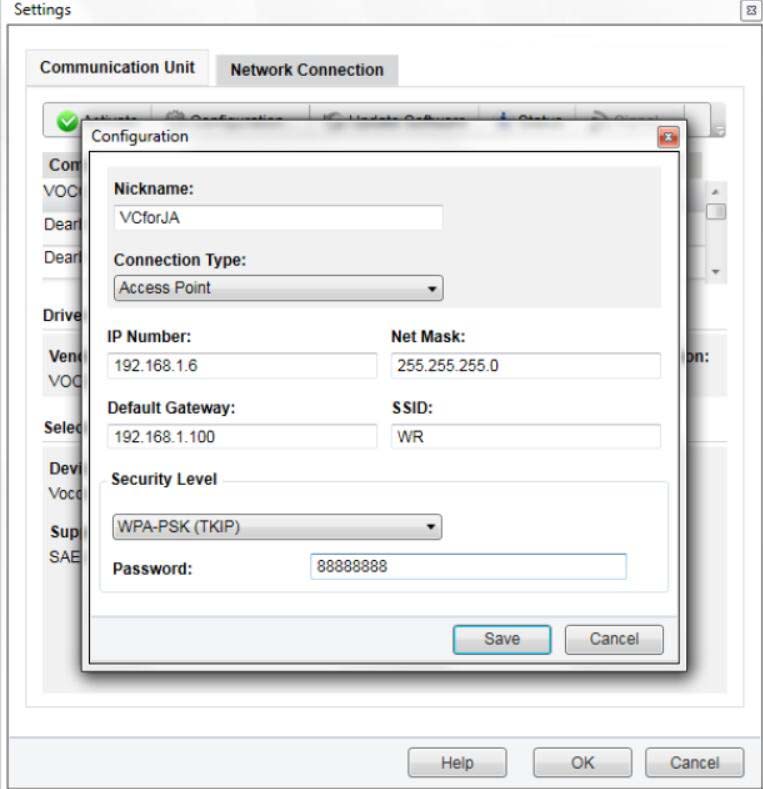
Step 6: Under Connection Type choose “Access Point”. To complete the configuration, the IT person will be required to enter the data. This is the data required for the VOCOM to connect to the Wireless Router.
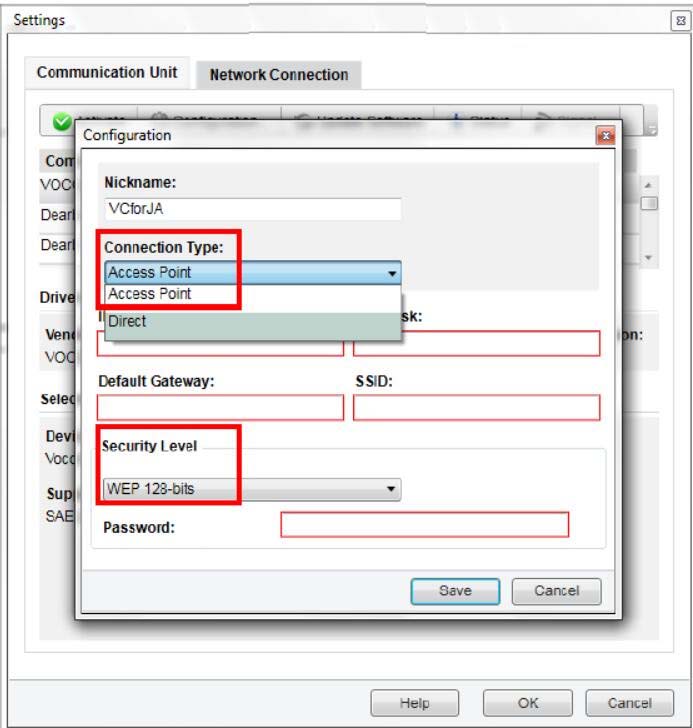
Step 7: Click “Save” to complete configuration setup. NOTE: In the drop down there are 3 different Security Levels to choose from.
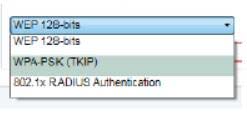
Example: This is an example of a completed configuration for the wireless router that we used. Your configuration will need to be set according to your location’s router. NOTE: The example used a different Security Level. Your configuration will vary depending on your network environment.
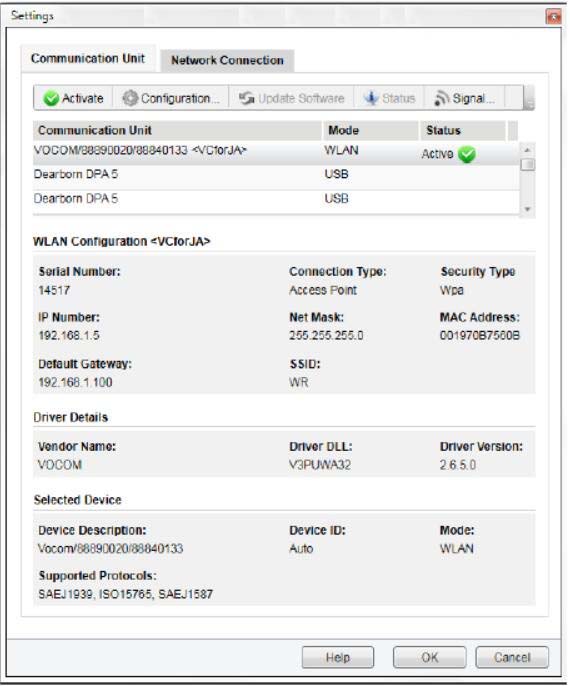
Step 8: Select the newly configured VOCOM WLAN (mode) Communication Unit. Click the “Activate” button and then “OK” to close the “Settings” window.
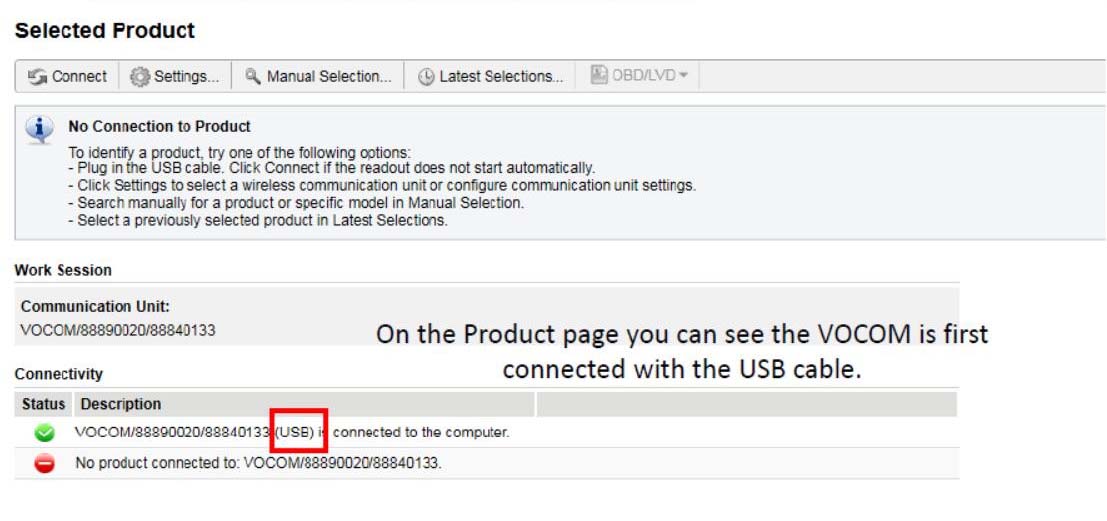
Step 9: Unplug The USB cable and the VOCOM will be in WLAN mode. NOTE: On the Product page you can see the VOCOM is now connected with the (WLAN). When the USB cable is plugged into the PC, the VOCOM will revert to USB mode.
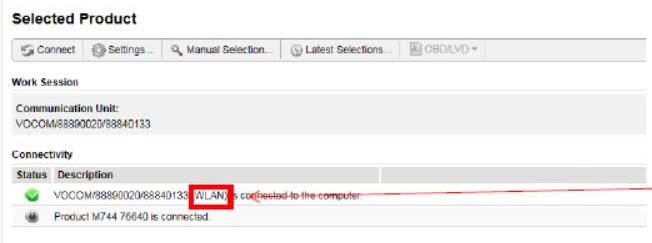
Done!