Please note: You must pair the docking station before the Wi-Fi function will work. Please also ensure that you have a LAN, hard wire connection to your tester when carrying out the pairing.
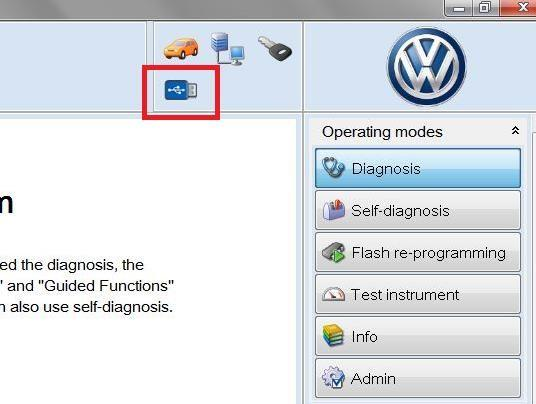
1.Plugin the USB lead for Docking station. The single USB goes into the docking station and both USB
connections at the duo end are plugged into the
diagnostic machine. Insert the VCI head with WLAN adapter attached into the docking station

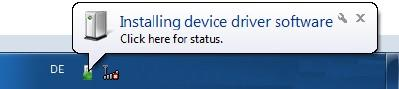
2. The following message will appear
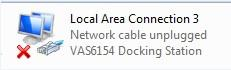
3. The docking station should now be visible in Network Connections
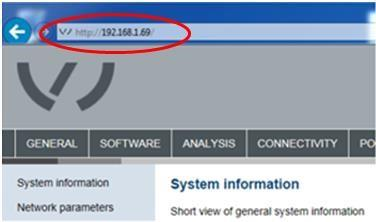
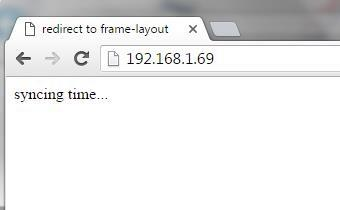
4. Open a new web page and enter the following ip address into the URL
Connection via Docking Station:
http://192.168.1.69
Connection via USB:http://192.168.13.69

5. If you experience the below error message, you are using a proxy server. Please switch off your proxy
server settings (if you do not have a proxy server, skip 5a.-5f.)
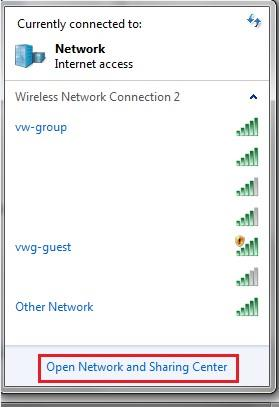
5a. To switch off your proxy server settings, click on your internet connection icon
![]()
5b. Goto Network and Sharing Center
5c. Go to Internet Options
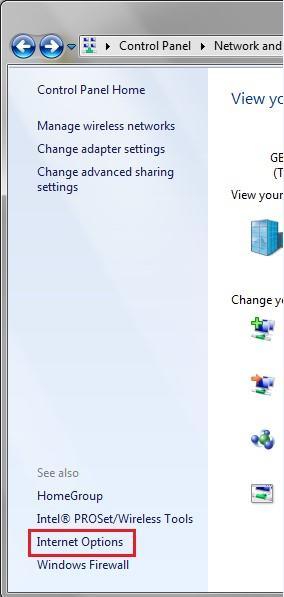
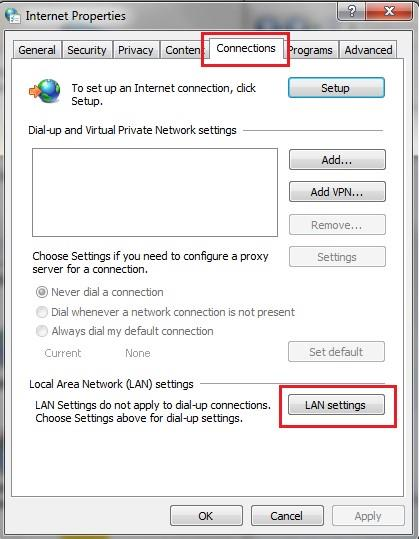
5d. Select ‘Connections’ tab > ‘LAN settings’
5e. Un-tick the box for proxy settings > OK
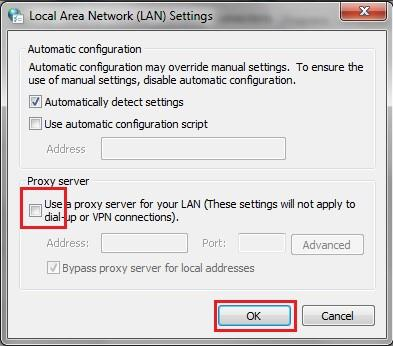
5f. Select ‘OK’
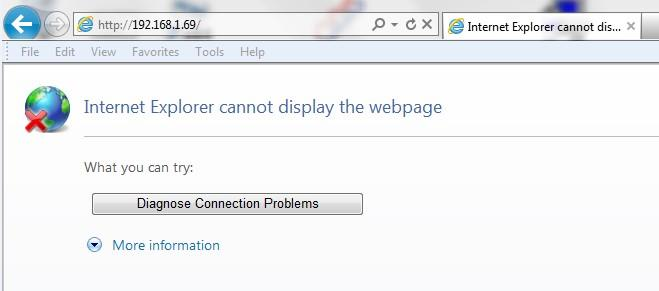
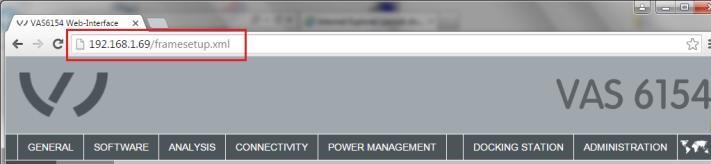
6. If web browser ‘cannot display the page’, type the ip address into an alternative web browser for example, Google Chrome

7. Once the web page has loaded, copy the URL from your alternative browser, into your main browser and hit ‘Enter’
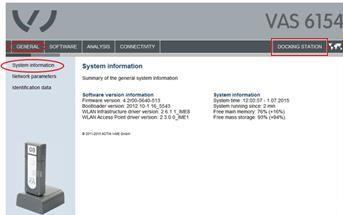
8. If prompted, please select your required
language. System information can be found in the menu under General/System Information > Select the Docking Station tab
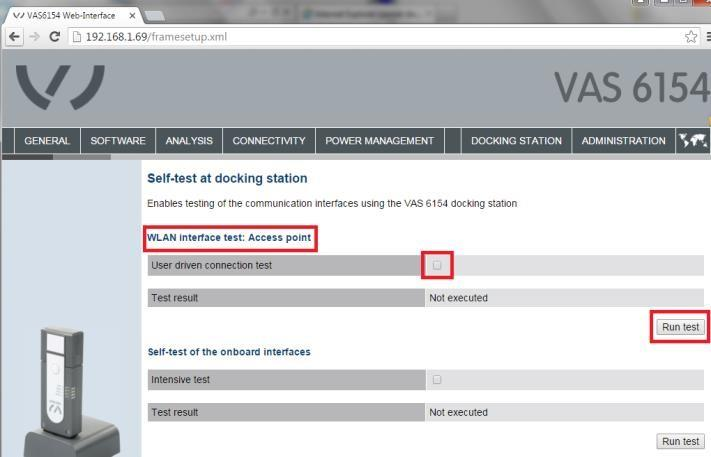
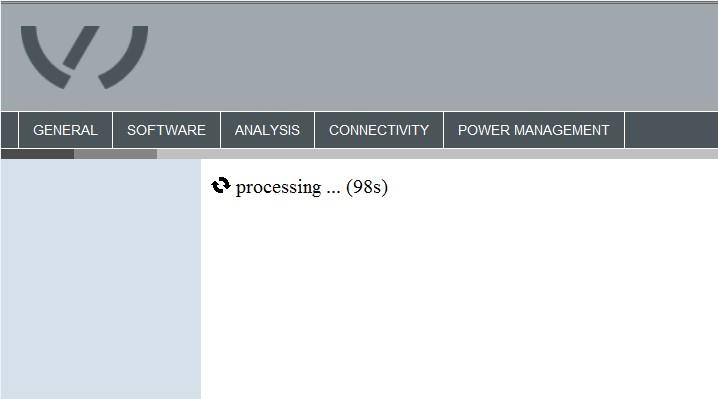
9. Carryout a WLAN interface test by ticking the box and selecting ‘Run test’
10. A timer will appear and start to countdown. Before this finishes, complete point 11.
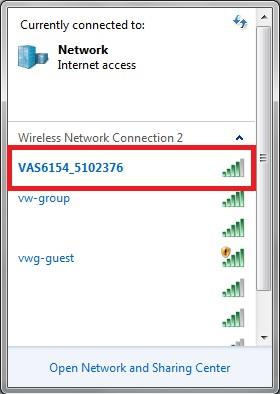
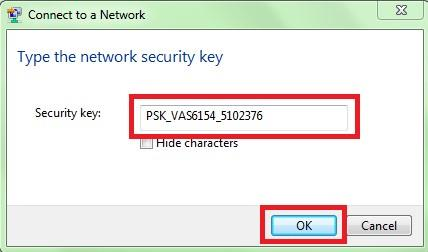
11. Select your VAS 6154 connection and enter
‘PSK_VAS6154_’ and then your SN code, found on the back of your VCI head > OK
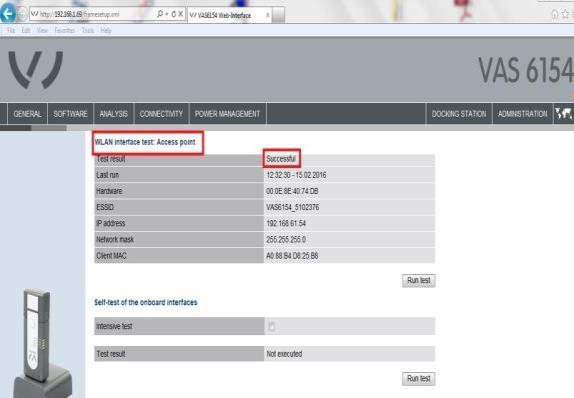
12. The screen should show the test as ‘Successful’ . If you see ‘Failed’ within the field, remove your VCI head and separate from the Wifi attachment, then reattach and place back into the Docking station
and retry
13. Carryout Self-test of the onboard interfaces by ticking the box and selecting ‘Run test’
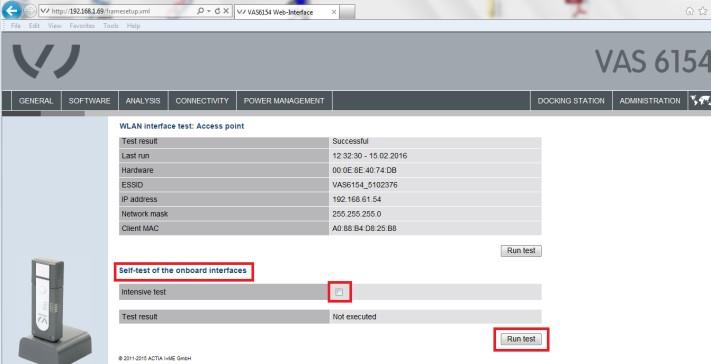
14. The screen should show the test as ‘Successful’ . If you see ‘Failed’ within the field, remove your VCI head and separate from the Wifi attachment, then reattach and place back into the Docking station
and retry
15. You are now ready to pair the new VCI head with your ODIS tester.
**Depending on the function (Wi-Fi or USB), please ensure the
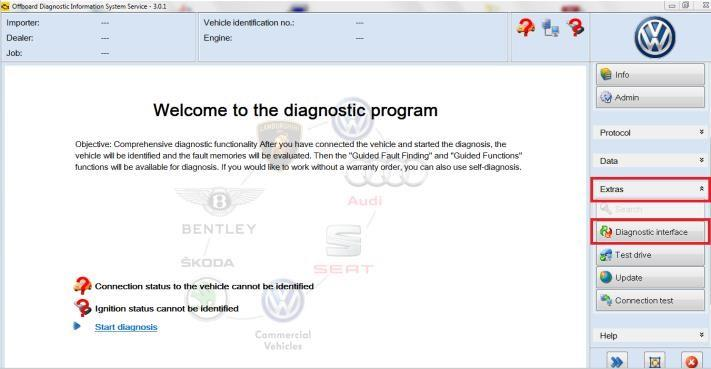
required adapter is connected to your VCI head** Open ODIS and goto Diagnostic interface
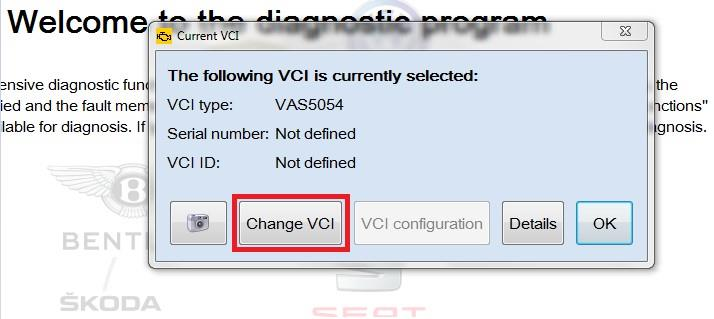
16. Select Change VCI
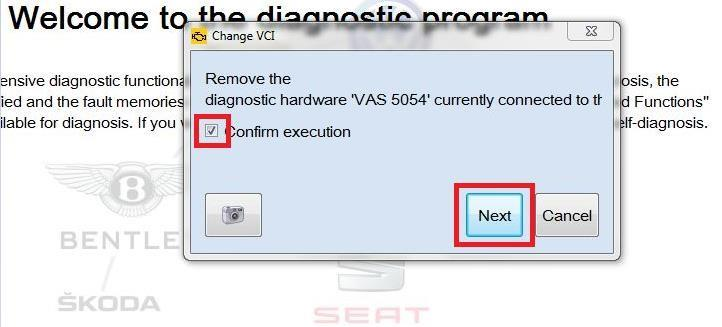
17. Confirm execution by ticking the box > Next
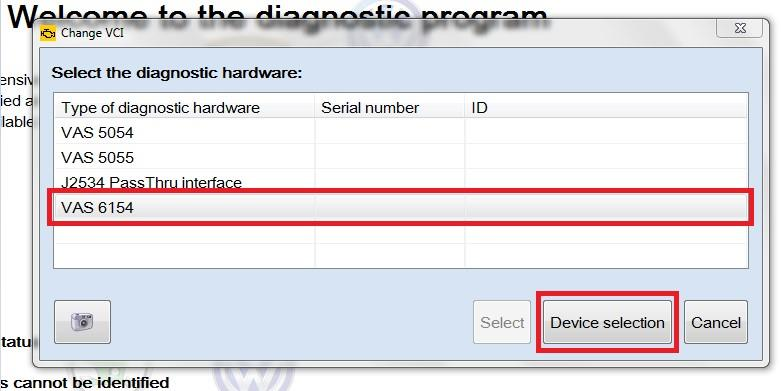
18. Highlight the required VCI (VAS 6154) by clicking on it > Deviceselection

19. Confirm execution by ticking the box > Next
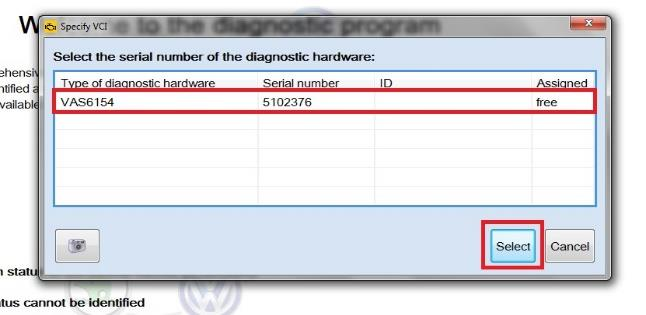
20. Check the serial number against the SN number found on the back of the VAS 6154 VCI head >
highlight the required VCI by clicking on it > Select

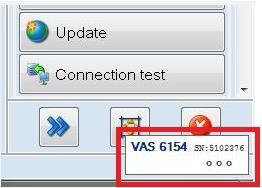
21. Wait for loading window to close
22. Confirm the VCI head connection by selecting OK
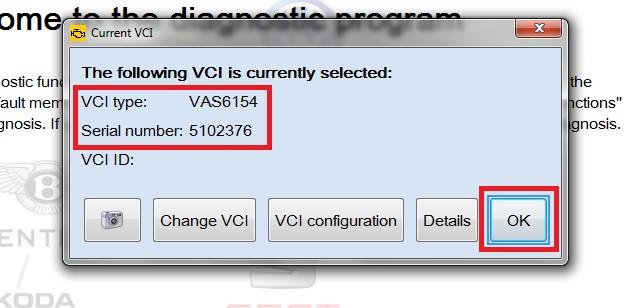
24. You are now ready to connect your VCI head to the vehicle
The Wi-Fi function is now available from software
version 3.0.3 onwards.