This article show a guide on how to configure VCDS diagnostic cable for you laptop
Procedures:
Connect the USB end of your USB Interface or the Serial end of your Serial Interface to the correct port on your PC. If your PC is further from the vehicle’s diagnostic port than 6 feet,
connect an approved Extension Cable between the PC and the Interface.
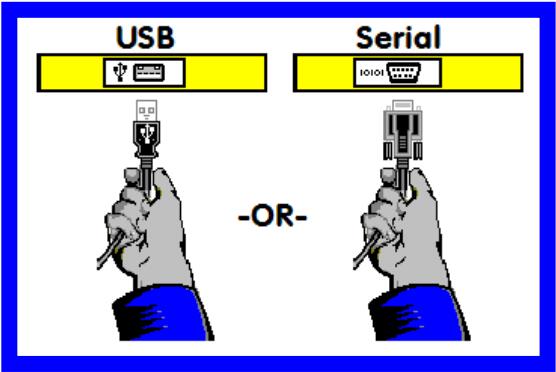
If you are using a Serial Interface then you can proceed to step #4. If you are using a USB
Interface, a message like this should pop up:

The drivers many install automatically in Windows 7 or Vista. If you are using XP or W2000, click on the Found New Hardware message and the Found New Hardware Wizard should start up. If you are prompted with the choice, pick “No, Not This Time” when asked if you want to connect to the Internet to search for drivers. Select “Install the software automatically (Recommended)” then click [Next >]
The process should be automated but you may need to click “Continue Anyway” part way through the process.
If, for some reason, you installed the USB Interface without following the above instructions, and VCDS does not work correctly, go into your PC’s Device Manager while the USB Interface is connected.
You can find the Device Manager by right-clicking on My Computer in XP or on Computer in Vista or 7. Select Manage to bring up Computer Management. On the left side of the screen under System Tools, select Device Manager.
Find the “VCDS Compatible USB Interface” or similar and delete it. It may be under “Other Devices” or under “Universal Serial Bus Controllers”. Next, unplug the USB Interface from your PC, wait 5 seconds and plug it back in.
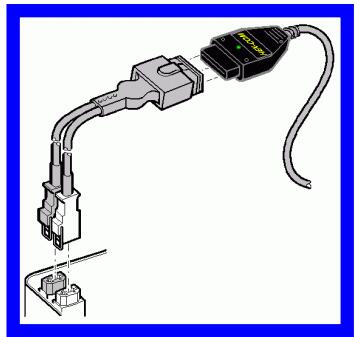
Connect the car end of your Interface to your vehicle’s Diagnostic Port.
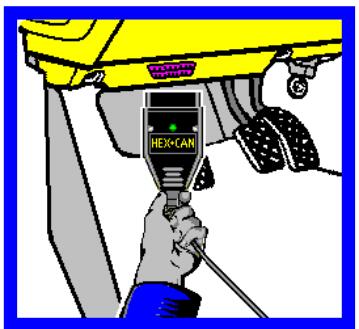
If your vehicle has a 2×2 port (some pre-1996 vehicles), then use the optional 2×2 Adapter between the Interface and the ports in the car. This is included in the Pro-Kit.
Turn the vehicle’s ignition switch to the ON position. Make sure the key is turned far enough that the dash lights are fully illuminated. The engine may either be running or stopped.
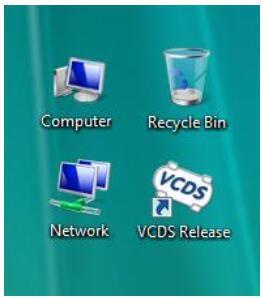
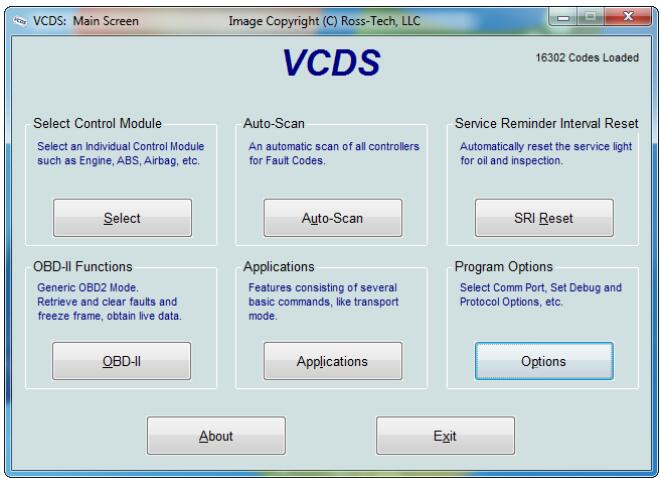
Start the VCDS program on your PC through either the Start Menu or the VCDS icon on your Desktop.
From the Main Screen in VCDS click the [Options] button to go into the Options screen.
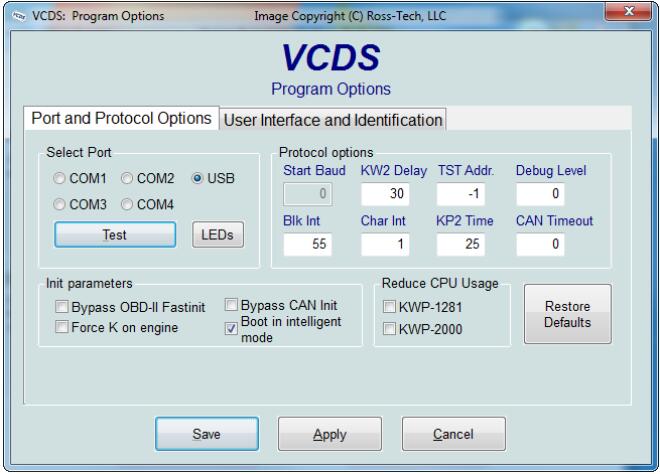
Once you are in the Options Screen,Select the correct port for your PC’s USB Port (USB) or Serial Port (typically COM1 or COM2) and click the [Test] button. Ensure that VCDS finds your interface.
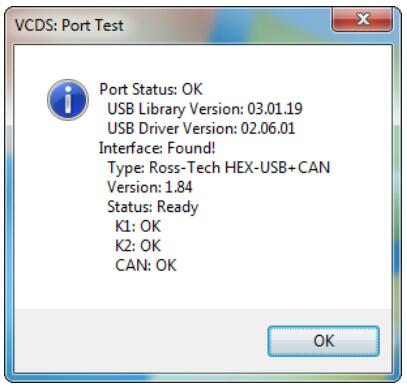
You should see a message like this:
If the Interface Status is “Not Found!”,check the connections at the car and PC.Make sure both are plugged in securely.Serial Interfaces get their power from the vehicle so they will not be recognized at all if not plugged into a car.
Adapter Type should always be “RossTech” followed by the name of the Interface such as “HEX-USB+CAN”.
Version indicates the firmware version of your Interface. It may be updated by new versions of VCDS, if so follow the prompts on the screen.
Once you have tested successfully, click [OK] then click [Save] to apply this configuration,you will be returned to the Main Screen. Click on [Select] to view the Select Control Module Screen. Select one of your car’s Control Modules such as Engine.
Note: Your car will not have all the Control Modules listed in VCDS, only the functional ones that were installed in your vehicle.
After VCDS has connected, click on [Fault Codes] to check for Fault Codes (DTCs).Repeat the process for each of your car’s Control Modules.